I love my decking, I really do, and it’s not just for the reason that I built it myself either (well, that’s not the only reason). A deck is just a nice place to relax at the end of the day, sitting back in a zero-gravity chair or sprawled out on a bean bag, with a well-earned beer and some delicious food cooking on the BBQ.
My decking looks almost as good as the day I finished building it, as I know how to care for and maintain it, but I have recently visited a friend’s house to help him repair and renovate his and thought I’d write this article to teach you how to do the same.
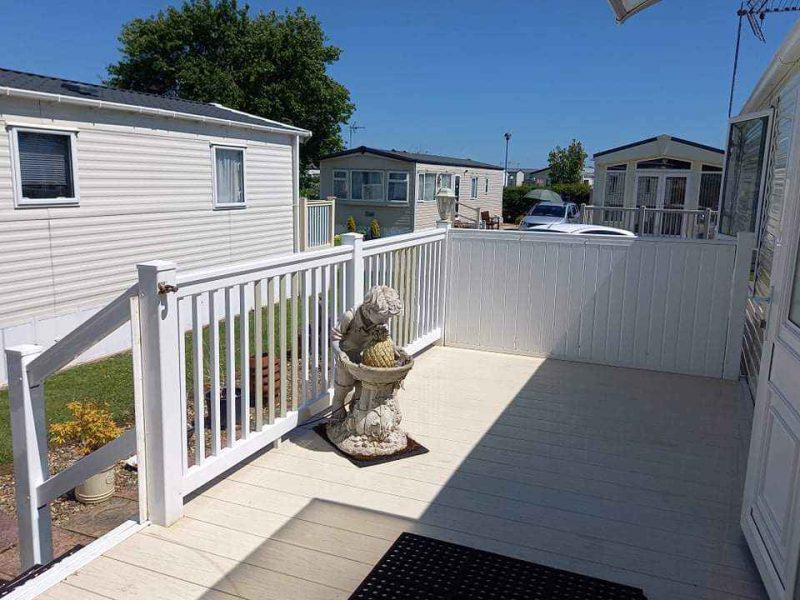
So, today’s article is all about how to clean a decking ready for stain, and also tips on how to check for damage caused by the weather and other factors, and we’ll even finish off with a brief section on the best way to stain your deck at the end. So, follow our istructios, and you’ll soon have your tired looking decking looking like this-
We’ve been on location this week shooting some drone footage in Falmouth for Garden Buildings Cornwall of their recent construction. The log cabin and decking were all done by their skilled team pic.twitter.com/WjiCsux0wo
— Ryan Lean Studio (@ryanleanstudio) June 19, 2021
Let’s get to it, shall we?
Before cleaning your decking, check for damage and make repairs
There’s no point spending your time cleaning and staining a deck that is falling apart, so the first order of business is checking and repairing it, if necessary.
For the checking part, you’re going to need some basic equipment such as a hand screwdriver, torch, and probably a good set of knee pads or kneeler. Depending on what repairs you’ll need to do, you could require a hammer, power drill or driver, nail gun, some kind of saw, etc.
The first thing to check for is rot. If you have boards that are rotted, it shouldn’t be too big a job to replace them, but if your joists or posts have the same problem, it could mean you have quite a repair job on your hands. It’s easy to check rot with a screwdriver or any other hard object with a pointed end like a kebab skewer . Simply poke the tip into the wood and see if it sinks in easily. If it goes in around a centimetre or two with little resistance, you’ve probably got an issue.
Prevention is always better than the cure, so with that in mind, here’s a video that explains some ways to prevent your deck from rotting in the future-
Next, go over every part of the decking, looking for split or chipped wood that could cause splinters. Obviously, this is for your own safety while cleaning and staining the deck, but also for your family and any visitors too. The most common places for splinters are in the hand and foot, so double-check railings and the floorboards and steps, and use a good pair of gloves while you work.
Rusting of metal parts is just a fact of life, and it will inevitably happen to your screws, bolts, nails, etc. It’s a bit time-consuming and not just a little boring to go around checking them all, but that’s really what you need to do, and replace them if necessary. If you are replacing nails, then a powerful nail gun can speed things up significantly, and if replacing old screws and bolts, try to get your hands on some new ones that are coated to protect against rust and corrosion.
it’s always important to check the underside of your decking because, as the old saying goes, out of sight, ou out of mind, but that’s where a lot of the mould and damage can be, as this person found out-
I thought I was going to have my old wooden deck repaired and re-stained. Apparently not. There were too many areas of water and weather damaged decking and also unfortunately previously unseen damage to the wooden platform under the deck. Damn.
— Amy Peterson (@amy_mariska) June 18, 2021
Cleaning your deck ready for staining – best decking cleaner
Once you’ve checked for damage and carried out any necessary repairs, you’re ready to clean it, and the first step of that is to choose the right type of cleaning solution. The type of cleaner you’ll use will depend on what dirt or grime you are trying to get rid of.
For example, cleaners that are sodium percarbonate-based work well on mildew and stains, as does a mix of bleach, washing machine powder, and water. Chlorine-based cleaners on the other hand will do a great job of getting rid of mildew and mould, but aren’t as good at shifting stubborn grime. Take a good look at your decking and then do a bit of research to figure out which best decking cleaner would work best for the job at hand.
You can even make your own decking cleaner if you prefer, as this video shows. I don’t know how effective it would be at shifting stubborn stains and such, but it might be worth a try-
With your decking cleaner selected, you can now go about making your wood look spick and span. To do this properly, you need a good wire brush, a bucket, gloves, and if you can get your hands on a pressure washer, then that will make things so much easier. If you have a lot of leaves collected on your decking, you might need leaf grabbers, a leaf vacuum, or leaf blower, to deal with them, and probably a wheelbarrow too.
Once your cleaning solution is ready, you need to apply it evenly to the decking, and there are a number of ways to do this, from using garden sprayers to simply mopping around the area. Wait a little while for the cleaner to start taking effect, and then you need to get down there with your brush and give everything a good scrubbing.
Finally, use a hose or pressure washer to rinse the cleaner off. If your decking is close to flower beds or something that will be damaged by the washed off cleaning product, you need to find a way to protect it by covering it or somehow making sure that the water doesn’t run off in that direction, and that’s not as easy as it sounds.
Also, if using a pressure washer to clean decking, you should be careful about which nozzle you are using and what power setting you have the machine on, as it is possible to damage the wood with a jet nozzle. Some types of pressure washers, like petrol pressure washers, are very powerful and might even cause damage on low settings, so be careful with them.
If your old stain or paint is looking worse for wear, you should really remove it before adding a new coat, and there are plenty of really good deck strippers out there for you to choose from. After stripping the old coating, it’d be a good idea to grab some sandpaper or a sander and smooth out the wood before moving on.
Staining decking
Applying stain to your deck is pretty straightforward. You can either choose to use a paint roller or paint sprayer to apply your stain, but I personally prefer to use both. I start off by spraying the coating on and then use the roller to add the finishing touches and even things out a bit.
Just like when painting a wall or fence, you have to be careful not to get stain where you don’t want it, and so make sure you have used plastic sheets, tape, etc. to protect the brickwork, plants, and anything else from accidentally getting covered in wood stain.
After finishing, depending on the weather, allow for 24 to 48 hours drying time before trying to use the deck. After that, you can now enjoy your lovely new-looking decking with friends and family, and be as happy as this person-
3 days of work and 20L of stain later, the decking is all done 🤩 pic.twitter.com/u6gMvlNgKd
— Powerpoof Bear 🐻 (@arsenben80) June 6, 2019
That brings this guide on how to clean decking ready for staining to an end. We feel like we have covered the important things to know but with the aim of being easy to read, we have not gone too deep into the details. However, we do have other articles that are more detailed, and we invite you to check them out by using the search bar at the top of the screen.