Written by Terry Smith
Our site is reader supported so when you click a link to Amazon we may earn an affiliate commission.
Best patio grout and jointing compound guide to maintain your patio
This article was last updated on April 23rd, 2022 at 5:41 am
Patio grout plays a huge role in reducing the amount of maintenance and time needed on your garden patio. There’s nothing worse than weeds growing through old grout on a weekly basis, forever spraying weed killer to keep them at bay as well as pouring in ant treatment to keep them from digging up sand too. And let’s not forget the important role of patio sealer thereafter that creates a hard layer with the grout!
Pick a good patio grout and you will be weed free for years to come, pick badly, and you will be at the patio with weed killer all summer long! That’s where my years of expertise come in. I’m going to go through my personal experiences when maintaining a patio and right now is the time to act – well at least, you’ll need a little run of dry weather! So let’s take a look at the best patio grout and jointing compound options that’ll make this project a breeze.
Best patio grout and jointing compound: editor picks:
Best patio grout overall: Sika FastFix All Weather Self-Setting Paving Jointing Compound, Buff, 15 kg – 20 sq.m Superb value for money – Sika is a choice for many professionals.
If Sika unavailable I’d turn to this: Everbuild Geo-Fix All Weather, 14kg, Grey
For ant and insect problems: Sika Pave Fix Plus Buff 15KG – currently unavailable but I’m apprehensive to remove it as you may find it somewhere else
Another quality alternative to Sika: Jointing Compound Stone Grey Easy Joint 12.5 Kilo Patio Mortar
There’s no budget pick – given the importance of this job, saving a few quid is worthless.
With the best picks out the way, before we go any further – here’s a rundown of how to actually use this product properly – almost all the reviews you see online that are negative stem sadly from poor preparation so here’s your pro tip:
Pro tip: make sure you dig out and clean out your old grout fully. If you check the step: Dig out the old grout, you’ll see I mention 20mm at least. The reason is simple, you almost guarantee you remove any seeds deposited and give yourself the best possible chance to get a lasting finish.
Here’s the guide that’ll ensure you get the job done properly.
A guide to patio grout brushed in properly for a lasting job
- What you’ll need
- Safety equipment
- Dig out the old grout
- Pressure washer the joint out
- Bed in a little sand
- Wet your slab
- Brush in patio grout now
- Self setting patio grout
- Clean and seal your patio after
So now you know how to use jointing compound as well, let’s take a look at the best grouts and patio compounds:
1. Sika FastFix All Weather Self-Setting Paving Jointing Compound, Buff, 15 kg - 20 sq.m
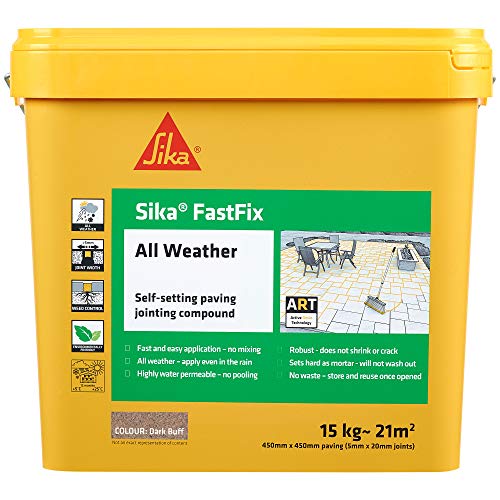


Sika FastFix is a quality self setting patio grout and my number one choice for the best patio grout and when I initially reviewed this a couple of years ago, I still don’t think anything has changed to make me want to move – and when I look at the number of reviews this product has shedding a positive light I feel my selection is validated.
This grout mix comes into its own when you have a joint more than a quarter of an inch or about 5mm if we are talking metric. From personal experience using this self setting compound I really like the fact that it doesn’t shrink or crack. This is absolutely essential if you don’t want to keep pulling weeds out of your joints every single summer!
They recommend the jointing compound is 20mm deep for your patio, but honestly, I always go over an inch, sometimes as much as an inch and a quarter (25-30mm for the metric guys and girls). I can’t stress enough just how important it is that you do not have any shrinkage or cracking. It literally defeats the whole point of this exercise if you can’t keep a complete seal. Of course, the deeper the jointing compound, the more unlikely it’ll be that weed seeds that germinate will be able to break to the surface. It also allows water to pass through as it is permeable. This is a big deal. You don’t want water sitting on your patio. This is how you end up with algae and mould growing which increases maintenance. Incidentally, it doesn’t hurt to have a quality algae remover for your patio on hand anyway. You will eventually need it.
Sika FastFix is extremely versatile and can be used on many different stones, Flagstones, Cobbles, Indian Sandstone, and Patio slabs to name a few. It’s extremely easy to apply to. Following the clear instructions are a doddle. You only need a brush and a jointing trowel. This patio compound brushes in and is like sand in a joint. So if you’re grouting again or laying a new patio, this is a great choice that won’t let you down. A brush in version is particularly handy if you have uneven stone levels. It’ll help you get it pretty close with a brush before pressing in firmly.
In terms of skills required, it is virtually zero. There is no mixing or prep of the grout mix, it’s just pour and brush in, bed down hard, and top up. You then leave it to self set. However, there are some cool tips in the patio grout guide below that’ll really make the difference for the years to come. If you do things in the right order and at the right time you’ll have absolutely no problem getting a professional looking finish. In fact, I guarantee you the hardest part will be digging out the remainder of the old gnarly grout that made you embark on this project in the first place.
You’ll probably want one tub if you have a patio around 15m2. I know they say you can get 20m2 but if you have wider and deeper joints then it’ll not go as far. My patio area is about 6 metres by 4 metres and I used two tubs to give you an idea of my experience.
One thing you need to be careful of is timing. Don’t open the packet till the last minute literally. This is why I highly recommend following my guide on patio grout so you get this right with no fuss. The Sika FastFix will start to set in about 45 minutes or so, and this is no good if it’s not deeply in the joints. Apart from that, it’s hard to go wrong with this product. You can even use it in rain so that won’t be a stumbling block either.
Sika FastFix is miles better than sand cement, looks nicer, more natural, and will last longer in my opinion because it is far less likely to crack.
Pros
- Super easy to use
- Instructions are crystal clear and easy to follow
- You only need a soft brush and a small trowel like a tuck trowel
- Can be used in the rain
- Leaves a professional finish easily
- Doesn’t crack or shrink
Cons
- Little pricey but that’s because we always want it cheaper 🙂 Faultless basically.
2. Everbuild Geo-Fix All Weather, 14kg, Grey
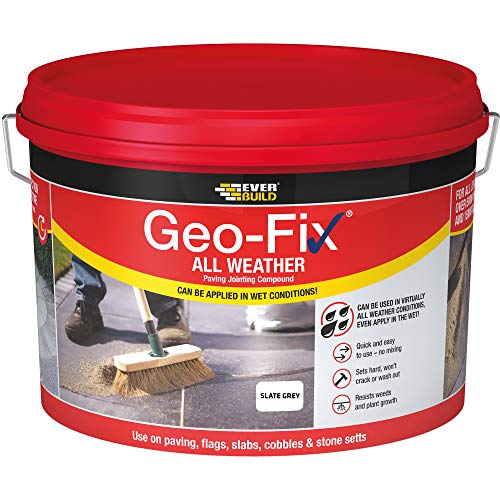
Everbuild Geo-Fix is another quality offering. You simply lay in sand to about 1 inch off the surface depth. Then brush in the grout level to the surface. This is another brush in patio grout that’ll make a huge difference in reducing your maintenance going forward. I chose this over the standard Geo-Fix patio grout because it can be worked in the rain which is kind of a big deal in the UK. I can’t even begin to count how many projects I’ve started in the garden to then get caught by a random shower…
It works in exactly the same way as the Sika FastFix but I feel is beaten simply on price. You get about 15% better value for money on the Sika range and given Sika is a faultless product, I can’t justify the extra spend. Especially when a tub will give about 7m2 of coverage with big joints, so it can soon add up if you have a decent sized patio.
That’s not to say Everbuild hasn’t got decent reviews, if my top pick was out of stock I would buy this right now, without question, it’s an equal. One thing is for sure, the success of this product is completely down to how you choose to get the prep work done. If you don’t dig out deep enough and lay in at least an inch, there is a reasonable chance that weeds will push the grout mix up and that is heartbreaking. I have personally experienced this problem and one of the main reasons I keep banging on about the depth of the channel that you cut to lay in your grout mix.
For a strong bond between joints that will ensure no failure, you have to cut reasonably deep, at least an inch evenly all the way along the channels to ensure you get a good bond from stone to stone.
Like with the brush in patio grout range, this will set rapidly once the pack is open, so be sure to only open what you need.
Pros
- Works well
- Easy to follow instructions
- Can be applied in the rain
- Won’t shrink or crack
Cons
- Pricier than Sika FastFix
3. Sika Pave Fix Plus Buff 15KG

Sika Pave is a really great option if you’re looking for a brush in patio grout that is extremely easy to work with. It’s another great water permeable option for your patio.
If you have an ant problem this isn’t a bad shout. Most of the ranges reviewed in this article work but Sika Pave Fix Plus Buff make a point of advertising this specific compound as resistant to ants. It’s super annoying watching an army of ants pushing up sand from your patio and well worth dealing with the problem as soon as possible.
Some have complained this isn’t quite as durable as other sick products but when I look closely at the feedback, it almost always stems from poor planning. This product in my experience practically never fails if you prepare your work area properly which we go into detail later.
An example would be uneven patio grout in between your joints. This is a double whammy of a problem. Firstly, the areas that are shallow will almost certainly pop up where weed seeds germinate and push through. If that doesn’t get you, when the sun beats hard, different thicknesses of the joint compound will move at different temperatures. This means that you’re going to end up with cracks and movement, meaning you’ll be doing the whole job over. Don’t let this put you off, my guide will give you perfect results below.
As with all compounds, make sure you use decent gloves and generally avoid skin contact. You’ll end up with a rash or burn similar to the exposure of cement. Overall it’s a good product but I probably prefer the Sika FastFix to this.
Pros
- Good for ants
- Easy to follow instructions
- Water permeable
Cons
- More expensive than alternatives
4. Joint It Simple Jointing Mortar Dark Grey (1 x 20kg) - Large Size


This is a relatively new product and I’m always apprehensive to bring in new products but this is worth a shout especially since they know exactly what they are up to:
The jointing compound wants a 3mm gap (no problem if much larger like 10mm) and in their example they want to highlight an inch depth, despite being a new install, they will still want you to go an inch down on your old patio – this is pretty much the standard and whilst it never guarantees you hold weeds and insects at bay, you give yourself the best possible chance!
In terms of install – as the video neatly breaks down for you (I’ve started the video at the right place to save you time), you really want to wet those stones and saturate them. From there it’s pretty much follow my guide – they recommend a stiff broom to move the sand about – this is pretty obvious given wet sand won’t budge with a soft one.
Let it set for a bit and don’t worry about the sand that didn’t make it’s way into a gap, damp it down a little bit – don’t flush out the sand that’s already in and firm! With a soft broom remove the excess but be sure to pull that over the joints to top up any shallow points. They say to use a finishing bar to neaten it up – that’s up to you in my opinion – any ridges are almost always the perfect seed trap 😀 I always keep my grout flush where I can.
Overall this looks a sensible product but hard to pick when I’ve used Sika for so long – I’ll keep an eye out on this and if the opportunity comes to give it a shot I’ll let you know how I feel.
Pros:
- Direct from experienced manufacturer that knows what he’s doing
- Everything on the video suggests a quality product
- Starts from 3mm gaps
Cons:
- Relatively unknown in the UK market (Irish manufacturer)
5. Jointing Compound Stone Grey Easy Joint 12.5 Kilo Patio Mortar
The Easy Joint offering is a pretty good shout. From a price point it’s up there with Sika and ticks all the boxes but where this scores is the required gap. You can have a joint as small as ⅛ of an inch. This is about 3mm in metric. It’s one of the only products that will confidently allow such a small gap between slab or stone and guarantee that the product works holding firmly together. I will say this one thing though, a 3mm gap 25mm deep is difficult to dig out and be absolutely certain you have an even depth. That said, it’s obviously cracking for a new patio.
One thing you should watch for when using this compound is the drying time. I have seen anything up to just under a week for it to be fully cured. So if you’ve laid new stone on sand I would give a little time to settle anyway. It won’t be a problem if it rains though, this product holds up just fine.
The other big advantage with this compound is that you can simply brush it in without firmly pushing it in according to the instructions. In reality following this has led to having to top up a few days later but the result was all the same, near perfect and looks beautiful against stone.
One other nice feature is the ability to store this compound. If you keep it submersed in water it won’t cure for a few months. Never mind the few months, but the additional time over the quick self setting grouts means you’re not in a rush or worried about losing a tub.
I’ve used a pressure washer on this compound at 3mm thickness about a year after applying. It held up well, just as it should.
Pros
- 3mm gap is smaller than competitors
- Well priced
- Easy to use
- Huge range of colours
Cons
- Reasonable product – a few note weeds come through
A guide to patio grout brushed in properly for a lasting job
Everything about never seeing a weed on your patio again is ALL to do with how well you prepare. Following this guide will give you the best possible experience through this project. So let’s get started!

What you’ll need
- Sika FastFix All Weather Self-Setting Paving Jointing Compound – factor 7m2 per tub
- Soft Brush
- Tuck trowel
- Hose
- Patio cleaner
- Patio sealer
Safety equipment
Treat this project in the same way you would using cement. You’ll want decent gloves and make sure that all skin and eyes are protected. This isn’t particularly toxic but be careful and use common sense to keep yourself safe. To the letter of the rule HSE.GOV says that we should use waterproof trousers, masks, gloves, and appropriate footwear such as wellington boots.
Dig out the old grout
The first step is to clear out the old grout as much as possible. In fact, there should be no old grout left at all. In an ideal world you get down to a depth of at least 20-30mm. The best tools for this are a small concrete chisel or gardeners knife or crevice tool if it’s soft. Depending on the thickness of your gap, you may need to turn the chisel sideways at some points.
Be careful not to damage your stone or slab by removing the old mortar or grout. Once this is out, dig up as much old sand or mud as you can. I use a small screwdriver initially for this. There are some huge benefits to this later on in the guide.
Pressure washer the joint out
After I cut out the grout, I always use a powerful pressure washer to clear out the joints, blow any mud, sand, or weed seeds out the way. There are a couple of cracking value petrol pressure washers at the moment. I am super into the Wilks Genuine USA TX750i Petrol Pressure Washer at the moment. At this price, it won’t last long in stock and has just the kind of power and brute force that is tailor made for a job like this.
Use the pressure washer to clear your patio entirely, you’ll be using a shovel and at least a couple of buckets. You’ll be amazed how much muck comes out the joints if you follow this method.
Bed in a little sand
Once the joint is completely clear sweep in a little sand with a soft brush. Press the sand in as firmly as you can. The trick is you want a 20-30mm deep channel even all the way round. One way to ensure this is keep a 30mm jig so you can test the depths as you compact the sand down. Sika does not require this step but I have had patio joints last decades taking the extra step and making the effort. It will help with drainage.
Wet your slab
Get a hosepipe and wet down your slab or stone. Don’t flood it to the point you pull the sand but do ensure everything is wet. It won’t be a problem if you don’t shoot directly in the channels. This will give the right environment for the Sika to bond well.
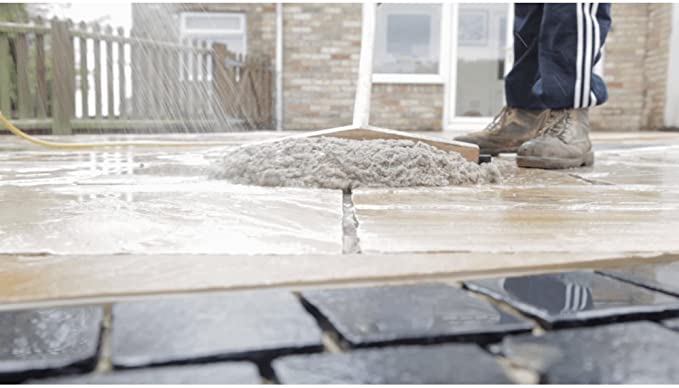
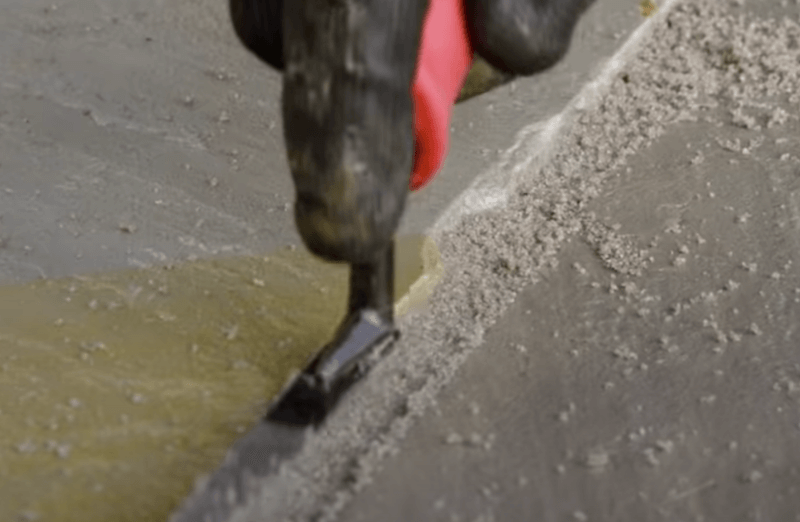
Brush in patio grout now
Open your packaging carefully. I’d recommend using the Sika FastFix All Weather Self-Setting Paving Jointing Compound. Gently brush in the compound to surface level. Then use a trowel to firmly push down and compact the grout mix. Once this has been compacted as much as is possible, top it up and press it in again, then brush over to level. This will give you a perfectly compact and solid joint.
Self setting patio grout
There’s no need to go any further. This is a self setting patio grout so the job is now done. The Sika takes about an hour and a half to start to set on the surface and you really need to leave it a whole day before it’s fully hardened, in my experience using this product. This was a warm sunny day so it would probably take considerably longer if it’s cold.
Clean and seal your patio after
Once it’s all set and done. You would do well to give the thing the final once over so you can forget it for months to come. A pro tip though, that’ll see those months extended considerably, is to use a quality patio sealer. The Sika patio sealer is great but if I had stone, concrete or brick I would probably go for SmartSeals patio sealer at the moment.
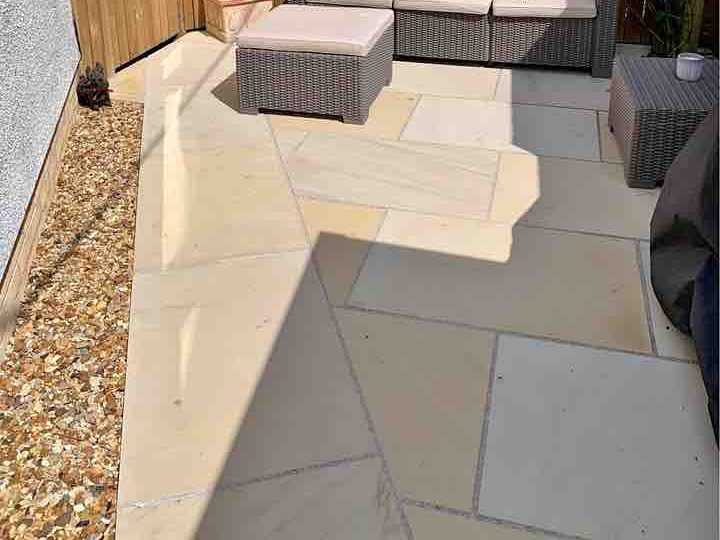
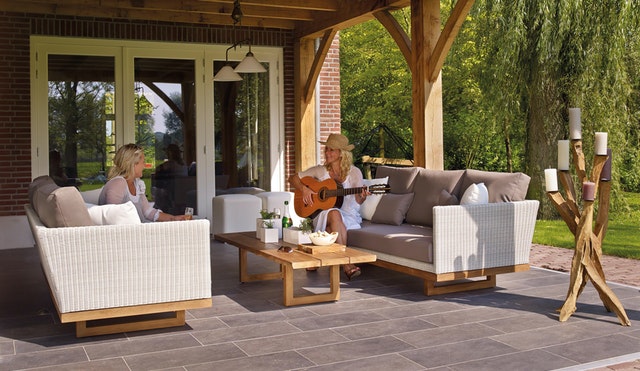
And that’s it. You will be weed free, ant free, and your patio should look pretty amazing and hopefully something like the picture below.
The patio grouts that you recommend are all water permeable. But we need to repoint our patio because it’s at ground level and our cellar is immediately adjacent. The pointing is shot and water goes between the stones and into the cellar. What are your recommendations, please, for a waterproof pointing so that the water runs off the patio and away from the house?