Written by Terry Smith
Our site is reader supported so when you click a link to Amazon we may earn an affiliate commission.
UK’s best shed base grid kits: Plastic gravel grid bases
This article was last updated on April 23rd, 2022 at 5:51 am
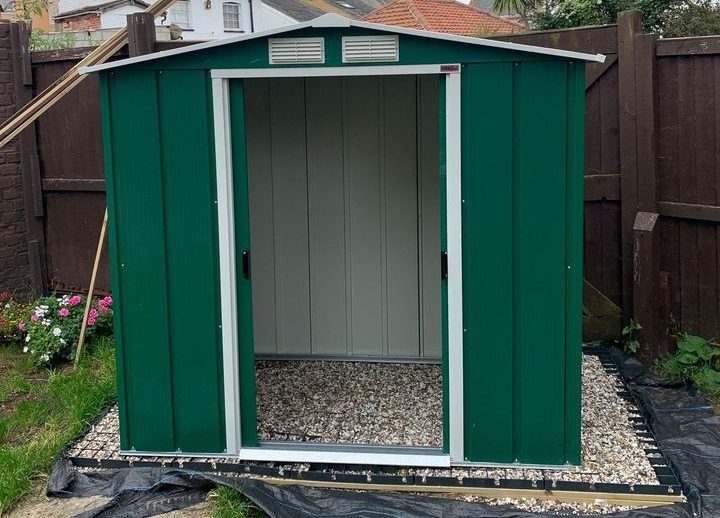
From my years and years of shed ownership and experience, you don’t just buy a shed without planning the base (hence you smart folk being here), even a small shed needs a base – it is a vital part and really enhances the longevity – smaller still, watch how quickly a storage bench dirties on mud too (it’s embarrassing I even showed that picture) 😀 – the same thing will happen to your plastic shed! Luckily they’ve got a new plastic base grid kit system. This best plastic shed base grid simply slots together – you should check my installation link to give yourself a bit of confidence on that and a better understanding. With the boards slotted together you will with gravel and there you have it, a base in a couple of hours and a fraction of the cost when compared to pavers and even more so concrete.
Best shed base kits – editor top picks:
Best shade base overall: 8×6 GARDEN SHED BASE GRID = FULL ECO KIT 2.5m x 1.85m What I like to personally use.
Best alternative: GARDEN SHED BASE GRID 2M X 1.5M SUITS 6X5-6X4 SHEDS & 7X5 FEET SHEDS – this is your pick if you prefer to click together rather than use the clip of my top pick.
Heavy duty pick: Hawklok 6 x 4 ft. Plastic Base Kit for a Garden Shed with Membrane and Clips – doesn’t need pea shingle!
Best pick for large shed: Full Shed Base Eco-Friendly Heavy Duty Log Cabin Building Floor ECO500 Gravel Bases – please check the GARDEN SHED BASE GRID as it’s the same product.
Budget pick: Black Plastic Paving Driveway Grid
British made: 16 x CrazyGadget® GRASS GRID Black Plastic Paving Driveway Grid – let’s not forget 🙂
What you need to know about a gravel shed base
You probably may not realise but shed base gravel systems are extremely easy to use and have multiple applications from car parking and driving to making path and driveways. The reason for their boom in popularity is quite simple – they are much more economical than concrete and paving slabs. If used correctly, as I’ll show you in the installation section for sheds, they are a real asset and save huge amounts of time!
Sizes
Something to really think about is the sizes – if you plan well you may not need so much m2 as per the example below. The grids come in 85 by 61 (FULL ECO KIT ) as well as 600 squared(Hawklok), and 500 squared – the remaining options in this article. Have a close look at the sizes, having a bit of a perimeter is not a problem, but don’t waste material as below.
Installation
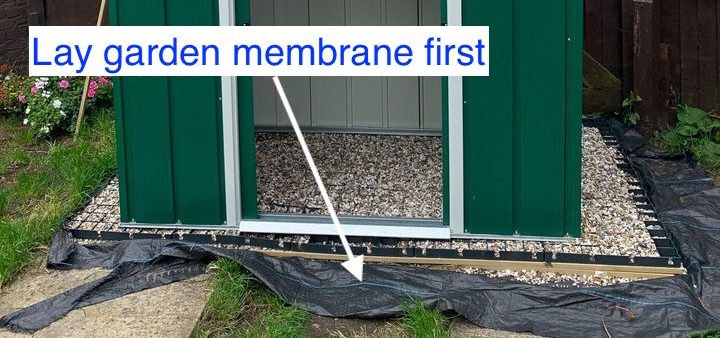
Installation is really simple. You have three main ways in which these boards work. Before we get to that though, you want some very high quality thick garden membrane. The material type or woven plastic both work well but I prefer the material type as it normally holds weeds and grass at bay long enough for everything to die without sunlight.
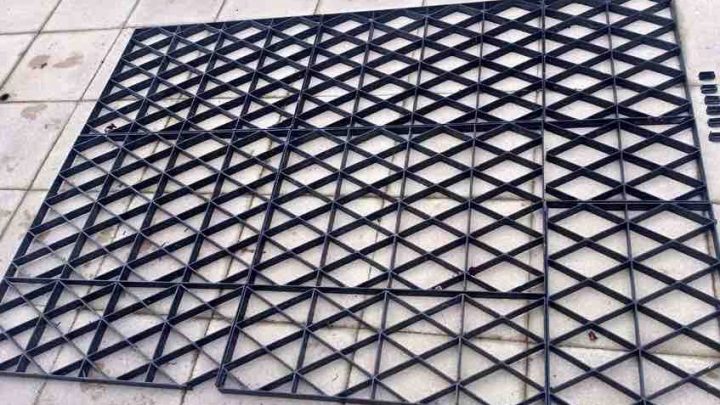
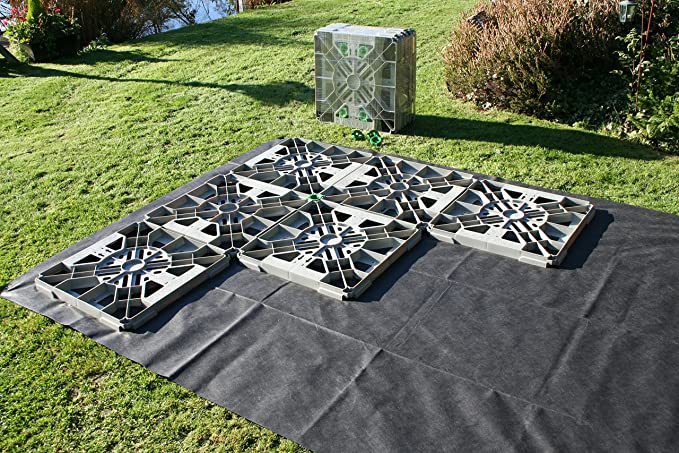
With the membrane down, throw on your grids and tie them together, however, there are a few different types of grid and how they are bound so let’s look at those. The most common simply slot together with a click and lock. These are probably the easiest:
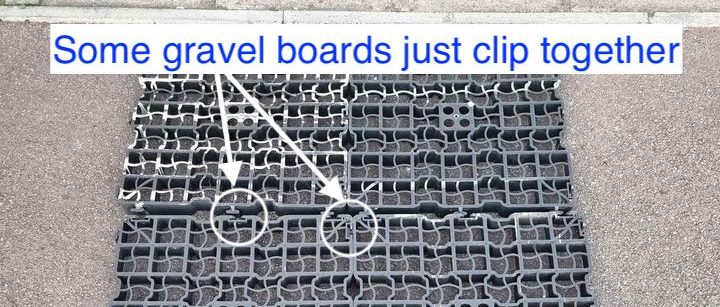
The seconds most common type of gravel board simply lay together and are then clipped – these are just as easy and effective:
I actually really like this system more because I can lay my grids out tightly and see what I think before clipping together – much easier to move about in my mind and its the system I would use every time in fairness – they last really well – here’s one pulled out that’s a good few years old now:
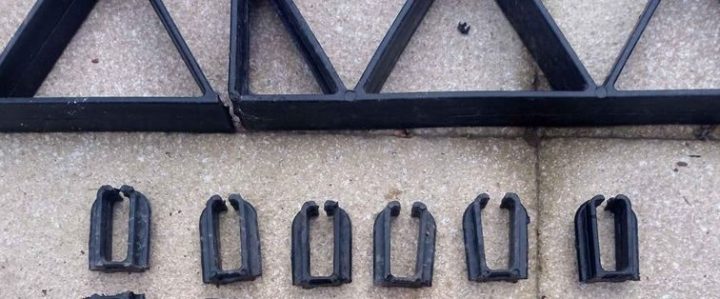
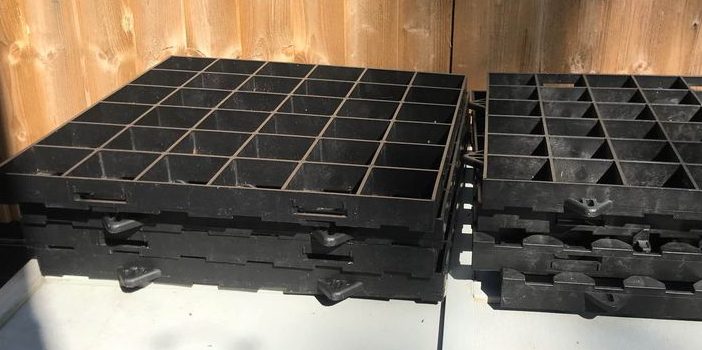
Less common now but very secure is the type of board that slots together then is stacked in the ground or simply tied with a heavy duty zip tie. I have to say, if I was working on uneven ground and the main principal was holding gravel then I still quite like this system:
Depth of gravel board
It’s worth considering how far off the floor you want to be. Most of these gravel boards are about 35mm deep. If you need considerable depth it might not be the solution. The largest depth I’m aware of are the Hawklok which are 45mm or so – remember the deeper you go, the more drainage, but also the more gravel you’ll need.
How much gravel?
On a typical 8 foot by 6 foot shed base like the FULL ECO KIT, I’ll probably use about 10-12 bags of gravel. The deeper bases like the Hawklok that are more heavy duty will want an extra three bags or so, 15 would be overkill and you’ll probably end up with a couple left.
What size gravel or pea shingle should I use?
Given the size of the boards I would almost certainly go with 10mm pea shingle – you can go 20mm and that works fine too, it’s just in my mind, the tighter and more compact it is in there, the better it’ll stay put. The smaller gravel also makes levelling off all that much easier too and far more comfortable to walk on. I imagine you can use all kinds of decorative ships though if you prefer, I haven’t done so because I want comfort under foot – I recently laid some beautiful slate but walking those large chunks in my flip flops was painful – a wise cautionary word from experience that!
What if I don’t use a shed base
Placing your shed straight on top of your garden soil is just a recipe for disaster. When your shed is directly on soil, it means that there is no air circulation possible under the shed and this leads to various mould and moisture problems. Shed bases eliminate these issues by providing a flat surface that can bear the weight of your shed and also provide the air circulation and water drainage needed. This article is solely focused on the plastic type of gravel shed base and below we have reviewed the products that we think are the best value for money here in the UK.
If you’ve got a metal shed the base will rust more quickly – aside from the fact some don’t base a base covering making it an uncomfortable muddy floor! A wooden shed pretty obviously will rot more quickly, and plastic sheds will become dirty and trap moisture – this assumes they have a base which will start to leak as it’s not completely sealed.
So, now we know what a shed base is, it’s time to answer the second question- do you need one?
The answer to this is almost definitely YES, when you compare it to laying directly on soil it is a no brainer, this can become mouldy and not offer much extra protection to your timber almost certainly resulting in rot even if you use a wood preserver and shed stain.
What types of shed base
There are various types of shed bases but the 3 main ones are wooden shed bases, concrete, paving stones, or plastic grids, with plastic being the most popular in modern times due to the low cost, simplicity, and the fact that they are reusable as well as being pretty durable. This is the focus of the review but I wouldn’t say it’s the best – it just solves a problem of paying a fortune for a concrete base or the time consuming process of laying paving slabs properly.
Building or buying a new shed – don’t forget these
Some of the easiest things to forget in the excitement after spending a fortune on your new Keter, and everything that’s going in them is the security factor. Since I’ve been reviewing sheds I’ve become even more conscious as the news sticks out in my ear all the more. The first thing you want is a quality shed lock. From there, consider a security cctv system – I have one for my shed. Then you may even want a shed alarm – this is a bit out there but if you’re carrying valuable goods just be careful, times are getting worse, not better, whatever your told.
Best shed base grids
The best shed base grids cover a variety of common sized sheds, have excellent longevity against rot when placed directly on grass or soil, priced well, durable plastic material, and easy to fit, so with those criteria in mind I have picked my choice of best shed bases:
1. 8x6 GARDEN SHED BASE GRID = FULL ECO KIT 2.5m x 1.85m


This product from Eco Deck is very similar in design to all our other reviews on here today, and there’s a reason for that when I compare the other models online, this type is the best as you can see if you go to my installation section!
The plastic grid sections provide the easiest way to set up a good solid base for your shed, driveway, garden path, and just about anything else you can think of, without all the messing around and hard graft that comes with laying a concrete or wooden shed base.
Installation of this eco kit is very straightforward and there shouldn’t really be much need for using the instructions (except for how to use the provided clips, but you’re welcome to simply check my section as mentioned). However, should you feel the need to use the instructions, the ones that are included by the manufacturers are actually quite good, with clear images and text.
Setting up starts with clearing any turf out of the way and making sure the ground is reasonably flat. I put a bit of builders sand down on top of the soil just to get that extra level of flatness but it wasn’t really necessary. Next I laid down the underlay membrane, which is as easy as laying a bed sheet, then I set out the grid sections. The sections are all uniform and fit together perfectly to give a nice symmetrical shape.
After this, it was time to clip the sections together, and this is where I ran into a little trouble as I just found the clips that were supposed to do the job a bit too fiddly. Anyway, after a quick call to customer service I was told that if I was really struggling with the clips it was because I was trying to use them with the plastic membrane and so they wouldn’t work, and that I could use strong cable ties instead, so that’s what I did and they worked perfectly well.
All that was left to do was fill the grid with pea gravel and this was absolutely no trouble whatsoever due to the design of the grids. It was as simple as emptying a bag full over a section, pushing it into the hole with my foot, then using a rake to even it out a bit more. The whole thing only took 12x25kg bags of pea gravel, and once done it was incredibly sturdy.
I have to say, this product really impressed me. The initial cost, plus the cost of sand and gravel is well worth it, not only because of all the time and effort saved, but because you actually end up with an excellent, reusable shed base. Here’s one pulled out that’s about 4 years old:
2. GARDEN SHED BASE GRID 2M X 1.5M SUITS 6X5-6X4 SHEDS & 7X5 FEET SHEDS


My top alternative pick for best shed base is the GARDEN SHED BASE GRID 2M X 1.5M because the new price updates and comparable quality to the current top pick makes this a real score and worthy of second place. The design it’s lends itself to the most common shed sizes which although not innovative, does mean you are more than likely covered. They also cover the 7 by 5 foot shed which is handy – I used to have one this size from memory!
When I compare the quality of plastic to the the FULL ECO KIT shed base I would say they are on par or so then it just really comes down to the better value for money and whether you prefer to clip before or after.
On testing the grid lock system seemed to bind well. I didn’t have any issues with the locking mechanism and I have to say when compared to a traditional heavy slab arrangement this was an absolute result. This is easily one of the best improvement for shed owners over the last ten years.
One super hack I learned as I was messing around with these gravel bases – If your shed isn’t square or slightly large than the standards, you can simply detach the gris and fill in between the gaps with gravel or your preferred substrate. The only issue I have with pea gravel inside the shed is cleaning. If you’re thinking more use than storage then I would be inclined to go with a slab still as this shed base style has it limits.
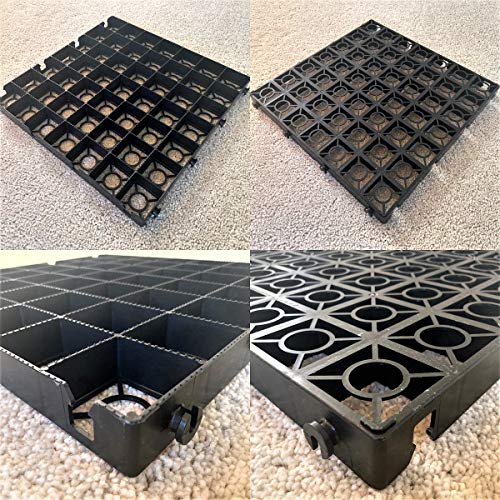
3. Hawklok 6 x 4 ft. Plastic Base Kit for a Garden Shed with Membrane and Clips


Hawklok’s entry into this market is another great plastic shed base that is very hard to fault.
The pack contains 6 sections or ‘tiles’ as hawklok call them, and each tile measures 600mm x 600mm, so they are a good size if you want to get a large area covered quickly.
The main thing I like about this particular shed base, is the fact that there are no connecting brackets on the outer edges of the sections, so you don’t have to plan ahead in order to hide them once the base is finished.
Instead, Hawklok’s sections are connected by their rounded corners coming together to form a circle into which you then insert a round connector to hold the pieces together. It’s an elegant solution which I really thought was nicely innovative and really does keep the base looking more professionally finished.
Strength wise, this is up there with the best of them, with top quality, hard wearing plastic that inspires confidence. I was a little worried about how thro und corner connectors would perform once the grid was filled and a load put on top of it, but I’m happy to say my worries were misplaced.
Included in the box are a membrane sheet for you to put down to help prevent weeds growing through your shed base and floor, and the green circular clips we mentioned for connecting the sections. There are also clear instructions, although they certainly weren’t needed as everything is just straight forward and logical.
With a very fair price tag, excellent quality, a free membrane, and an innovative design feature with the circle connector clips, this is a plastic shed base you should be taking a closer look at.
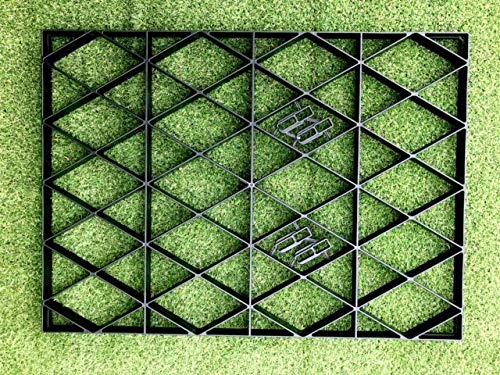
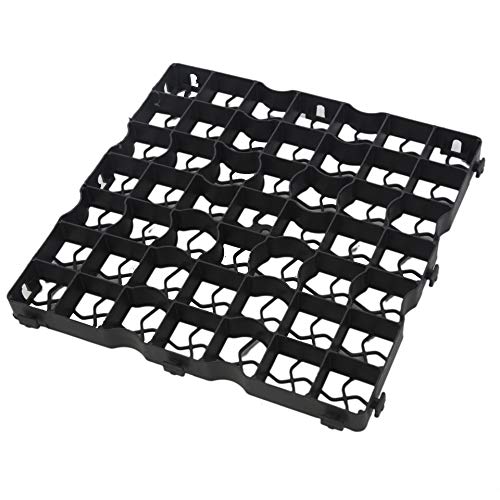
4. 16 x CrazyGadget® GRASS GRID Black Plastic Paving Driveway Grid


These plastic shed base grids are made right here in the UK to exacting standards so you know that you can rely on the quality of them.
The design is quite similar to the eco kit we just reviewed and set up is handled in much the same way- flatten the ground, place the grid, fill it with gravel, and you’re good to go.
This model doesn’t come with a membrane to lay down under the grid when you compare it to the 8×6 GARDEN SHED BASE GRID, but you can pick them up easily at any garden centre and using one is entirely optional, so it isn’t a big flaw by any means.
What these grid sections do have over the eco-kit is that you don’t need to use separate clips or cable ties to fix them together. These sections have their own interlocking connectors on the sides and are extremely easy to fit.
Each grid section measures 500mm (L) x 500mm (W) x 40mm (H), and there are 16 sections in the box, so if you use them all you end up with a decent sized shed base.
The plastic material feels like the high quality product that the makers claim and once laid down and filled with gravel it was on par for sturdiness with the Eco Deck model we just reviewed.
All in all, this is another excellent, time saving product that does what the makers say it will, and on top of that it is reasonably priced too.
5. Black Plastic Paving Driveway Grid Turf Grass Lawn Path Gravel Protector Drainage


Where you can really get value is using a driveway grid but converting the use to a shed grid. This alternate use will save you big bucks. They are essentially the same just priced better.
Srendi Store manufacture these grids out of recycled material that would otherwise end up in landfills, slowly polluting the earth, so you can feel that you’re helping to save the planet by purchasing one.
Srendi Store grids are made in the UK and are of the high quality you would expect and I would have no qualms about using them as a base for any shed, greenhouse, garden path, or decking, and I would have complete confidence in them.
One thing that struck me instantly is that the grid sections of this model are smaller than the others and measure just 500mm x 500mm x 40mm, however there are 20 grids included so you still end up with an 8ft x 6ft shed base and won’t be struggling to find room for your lawnmower, chainsaw, or other garden tools in the shed you place on it.
Like the Crazygadget grids, these ones also come with connectors on three sides and fitting them together is as straight forward too, no need for any clips or ties. However, another thing that Black Plastic Paving Driveway Grid has in common with its competitor is that there is no membrane sheet provided.
One thing I will advise is to make sure that you set up the base of what will be the front of your shed so that there aren’t any of the connecting brackets showing and give your base and she a better final look. This is just a matter of rotating the sections so the flat side is facing out before you connect them together, but it is worth mentioning.
6. Neat Plastics 12 x Gravel/Grass Grid Paver Path Base Mat FOR Greenhouse Deck Turf Lawn Shed Garden


I’ve decided to include the Neat Plastics gravel grids for sheds too as they are almost identical to the Black Plastic Paving Driveway Grid paving system. Incidentally I do think they are the same manufacturer when I look at them closely but I can’t confirm that though the similarity is close to a 100% match. So I guess, seeing as both are proven with sensible feedback, it’s a case of picking which one is cheapest and what is available.
They are not the thickest or most heavy duty grids available, they are also 500mm which might not work for your setup – you’ve got different sizes remember-
It’s very hard to fault these for sheds – remember they are engineered to be driven on for cars – it was a useful bi product that they can fill all sorts of practical purposes such as greenhouse bases, pathways, and even just holding cobble and chips in place in areas of your garden, that result in the need for far less aggregate – remember some is nearly £200 a bag for decent cotswold chips!
So this isn’t a bad option, if you’re looking for budget from a sensible seller then here you go!
All the plastic shed bases we reviewed and compared here today are very worthy products and it was hard to pick the absolute best out of them. I would just simply say that each product will do exactly what it is intended to do, and that it provides stability and support for your new garden shed.
We will update this and other pages on this site from time to time with new products, so please pop back and visit us again. If you are interested in reading more reviews like this for a wide range of products, simply click on the links provided, use our menu, or search bar and don’t forget your shed stain too!
Until next time,
Happy gardening.