Do you have a pathway down the side of your home or in between buildings you would like to section off or protect? We will look at both and go through how to install a garden gate frame step by step. In my case, I wanted access behind my shed (to maintain and clean my shed roof) so it made sense to install a gate rather than fitting a fence. This gave me the flexibility to maintain behind my shed too. For whatever reason you want to install a garden gate frame, I have you covered with the materials required and tools.
- Measure your opening
- Get your materials and tools ready
- Fit the gate frame legs to the wall or building
- Install your frame head (if you want one)
- Treat or paint your frame ready to install your garden gate
1. Measure your opening
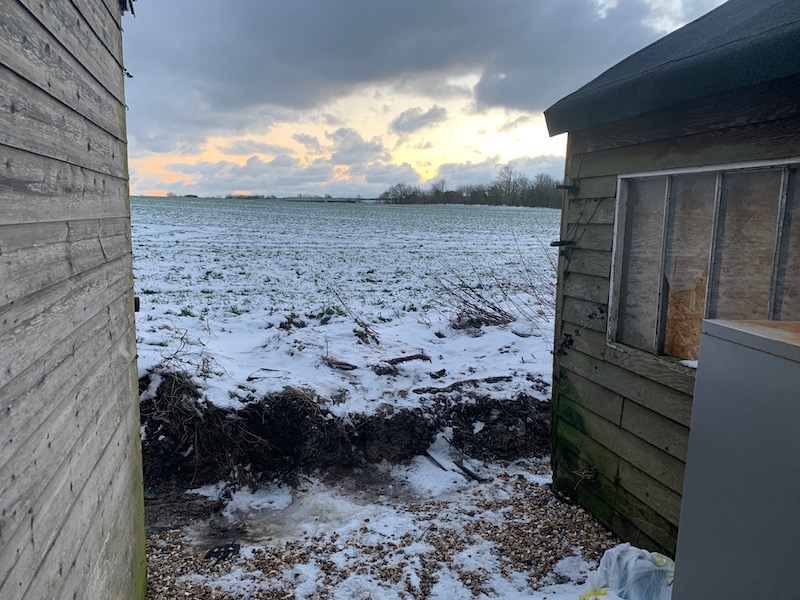
There’s not much to it, believe it or not and the best place to start is a tape measure, pencil, and piece of paper. I know it probably gets a bit mundane to read in my articles, but I can’t stress enough knowing your measurements and material lengths in advance of just diving in will save time and money. Here’s my opening, as I mentioned, I want to block this off for security but still prefer access behind the shed for maintenance, that, and I don’t want to install a fence in front of the rear windows over looking the farmland 🙂
In my case, I know my gate is 1983mm high, and that I want a good couple of inches clearance under the door to avoid moisture absorbing under the gate (up the xylem tubes if you want to be technical). Once a tree dies, it doesn’t stop absorbing water, that’s why you’ll almost always see rot near end grain as opposed to randomly in the middle. So my opening needs to be 2035mm high by 2120mm wide.
2. Get your materials and tools ready
This is great news because most timber is standard 2.4m from your normal hardware stores. Obviously, if you go to a timber yard you could get 4.2m lengths but then you need a vehicle long enough so for me 2.4m from Wickes or similar is fine.
So in my case, my doors are 915 each wide. so this gives me 1830 width total. Now consider I want to allow 12mm for gaps (sides and middle) that means my doors are 1842mm wide total
So 2120 – 1842 = 278mm
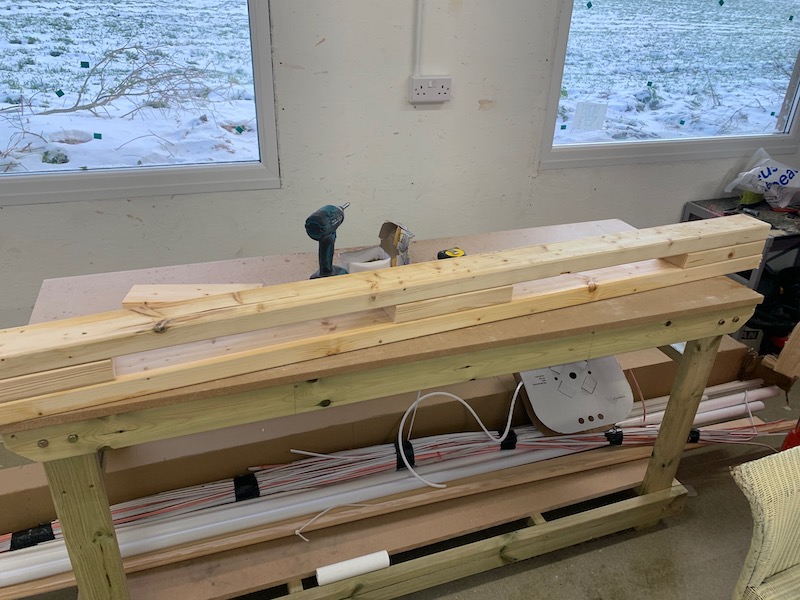
So there’s two options. I could install 100mm sawn timber either side and then build up. Or I can make a little frame out of 4 by 2. This is my preference and I’ll clad it to keep it looking balanced after. So I need to make two 2035mm high by 139mm panels.
So I need:
- 4 no. 4 by 2 sawn for the legs
- 1 no. 4 by 2 sawn for the head
- 3 lengths of half inch by inch and a half for the gate stop
- 80 or 100mm screws (I prefer 100mm when fixing 4 by 2 to a wall or building)
- Wall plugs ( I don’t need these but you might if it’s going into a brick wall or concrete)
- Wood Preserver
- Fence stain
- Cordless drill
- Circular saw
- Garden sprayer or paint brush
- Chop saw or hand saw
- Spirit level
- Step ladder
Here’s a look at me putting the panels together. You might only need a 4 by 2 plate on the wall if you over measured doors and intend to trim down.

Here’s that panel put together ready to fit:
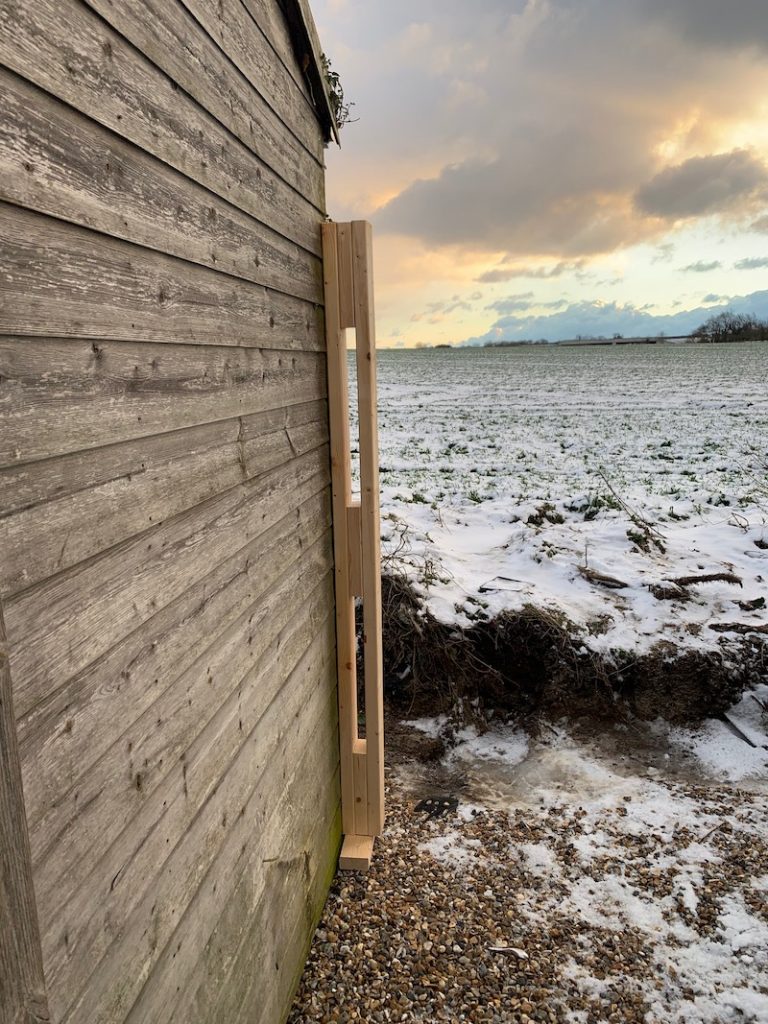
3. Fit the gate frame legs to the wall or building
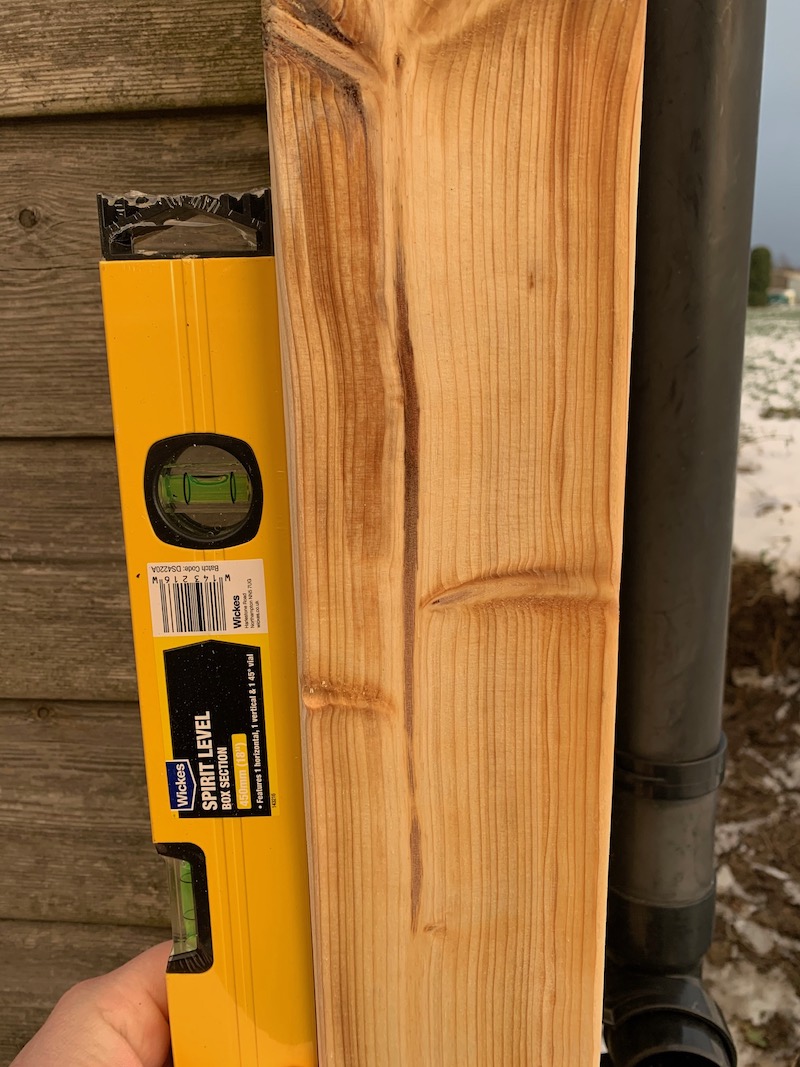
Fit your first leg to the building making sure it’s square. If it’s square, the door will fit far more easily and you’ll make life much easier for your tee hinges. If you need to pack out or move the position slightly that is much better than just installing it wrong and making good by cutting down the door. If you’re screwing into timber then this is easy. You’ll need to pre rill with a masonry bit and use wall plugs if going into brick.

As you can see I take levelling the frame both ways seriously as it’ll make fitting the gate far more easy in the long run. I do exactly the same for the next leg making sure they are in alignment. I just bully the 100mm screws in with my impact driver.
You may need to pilot of your drill isn’t powerful enough but thats fine, it’ll just take a little longer.
4. Install your frame head (if you want one) and the gate stop
Measure and cut your head piece to length. Since you did all the hard work squaring up on the last step, this is just cut and fit.
Get up on your step ladder with the cordless drill and screw it in with 100mm screws.
You can fit the gate stop now if you want too. Some would cheat and leave it until the gates are on so you can adjust the stop near to the gate ensuring a good fit. I am going to pop it on now because I want to finish the job and preserve / stain the whole thing now ready for the gates.
5. Treat and paint your frame ready to install your garden gate
My treatment of choice over the years has and always be Cuprinol 5 Star. You can use your fence paint or fence stain of choice (it’s exactly the same as shed paint too and designed for gates as well) Since I was a kid, I watched my dad apply this and I would watch in amazement as the fungus and bacteria literally dissolved in seconds in front of my eyes. If you ever wanted proof a product works, that is it!
Just apply it by brush or with a garden sprayer. Make sure you wear a mask and don’t have the mist too fine. You really do not want to breathe in these chemicals.
Here’s a look at my frame finished and ready for the gates to be fitted. I might consider making a trellis to go on top but I’m not sure I want to block the view for now.
There you go if you followed this how to install a garden gate frame to the letter you will be ready for your gate.