Ivy is probably one of the most difficult and potentially damaging plants to your property. Whilst it’s not as much as a problem as Japanese Knotweed which really takes some removing. Ivy will bite into brick deeply, and left long enough, run straight up your walls onto the roof, where it’ll begin to lift tiles and cause all manner of damage.
In this guide to remove Ivy from roofs and walls.
1) Cut the Ivy at the base with a pruning saw and then apply a weed killer
2) After killing the Ivy wait 12 months if you can
3) Get a garden rake and carefully pull the Ivy down from the roof
4) Use a pressure washer to finish the job.
5) Spray your roof with a moss killer to finish the maintenance programme
Leaving Ivy to grow unattended and forgotten is a bad idea
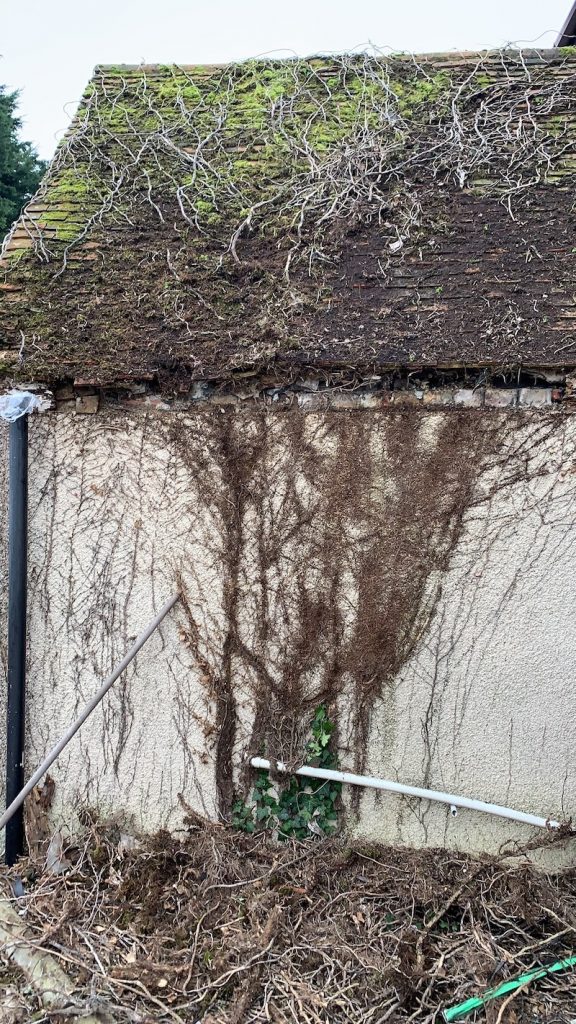
I recently stripped Ivy from the roof of a property I worked on. The damage this ivy had done would shock you. The owner had plans of covering up a pebble dashed wall but left it unattended and forgot about it. This resulted in the Ivy spreading its way up the walls, into tiles on the roof and lifted them. This resulted in the facia board rotting and water ingress into the property. Yes! It can end up that serious as you can see from the pictures I took to document the process.
This job is very much a long game if you want to resolve the problem with minimal damage and effort (obviously favourite if you have the time).
Cut the Ivy at the base with a pruning saw and then apply a weed killer
The first step is to put a saw through the base of the Ivy. I used a pruning saw as this was the easiest way to get at the stem / root. After this, incredibly it kept on growing so I hit it with a weed killer as well. The easiest way was to knock up some Gallup garden weed killer and apply it with a garden pressure sprayer. If you want some tips on using weed killer safely then the linked resource will help.
You can use the old boiling water trick or salt and soap water if you don’t like using chemicals to solve the problem. I will say, weed killers have moved on a long way from where they were before. You can get all manner of pet friendly weed killers that are much safer than they used to be. I would always recommend following the instructions for these chemicals to a tee. If you’re still not convinced then an organic weed killer might be more your thing.
After killing the Ivy wait 12 months if you can
Now that you’ve finally killed the Ivy off, pat yourself on the back and forget it for about 12 months. This will give time for the shoots to begin to rot and loosen from your walls and roof. You can of course go at the Ivy straight after but this presents a huge problem and additional damage if you have a vulnerable roof. Old and fragile tiles on cottage roofs like the ones I’ve highlighted in this article would almost certainly end up needing serious repair work if you go straight at it. From personal experience of doing it both ways I would easily go ahead and say it’s literally ten times easier to let the Ivy rot and perish on your roof first.
Get a garden rake and carefully pull the Ivy down from the roof
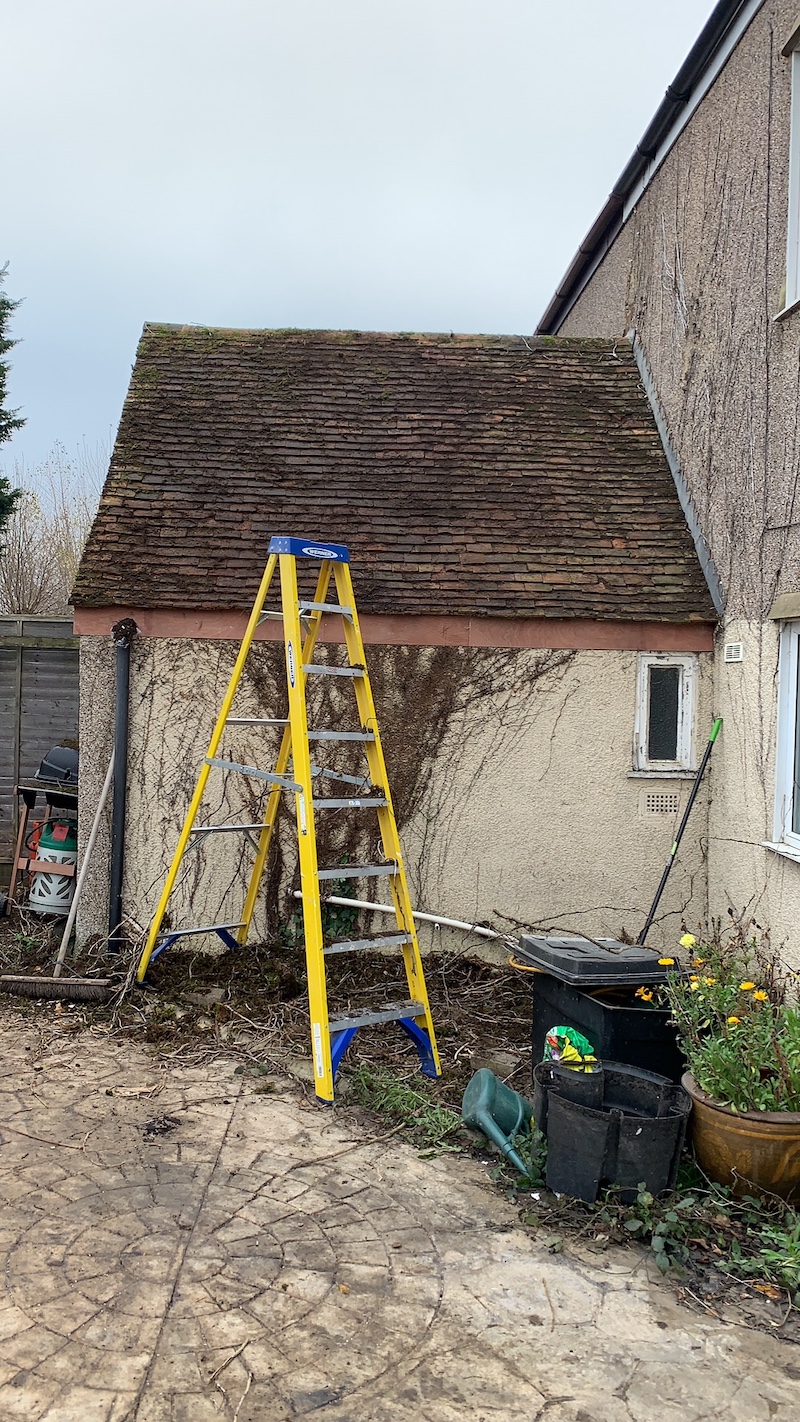
As you can see the facia board had literally disintegrated and tiles falling off the roof. It was a right mess but I put a new board on before continuing with cleaning up the Ivy from the roof. I also secure those lower tiles with an adhesive before continuing thought that isn’t part of this tutorial. If you’re in a pickle you are welcome to email me and I’ll offer some pointers.
As you can see in the picture, the Ivy is rotten and dead. To pull it off I just used a garden rake carefully. Heed my warning. If you have loose tiles you’ll need to re-fit them or get in a roofer if it’s bad enough. So I bagged up the Ivy and then when all the larger shoots were removed, I finished the job with a stiff broom. This was as much about removing the moss as the Ivy at this point.
Use a pressure washer to finish the job.
Depending on the condition of your roof you might want to use a pressure washer. I pulled out my Wilks 750 petrol pressure washer despite the roof being in poor condition because I was fine with the odd broken tile and really wanted to give this thing a serious clean up. I set it to it’s lowest power setting to start and then gradually built up. Sure enough I blew out a few tiles. This pressure washer is an absolute monster after all.
Spray your roof with a moss killer to finish the maintenance programme
Now is the time to spray the roof with a moss killer to be sure you’ve done the job and don’t need to head back onto the roof, hopefully for years. Now it’s time to pull out the before and after pictures of the Ivy rampaging all over your roof and you’ll feel much better as I did once it was sorted!