You know, it only costs thirty quid to buy the best bird table but that is boring. You are at home with a bit of time on your hands, and you want to make something that suits your garden and rightly so. Waste not want not and be resourceful and all that. One of the best things about making your own bird table is the ability to customise it exactly how you want it and maybe workout a method to house your bird box camera to get some stunning video footage 🙂
So in this article I wanted to go through a couple of bird tables I make and show you how there really isn’t much to it other than a few hours of effort.
The hardest part about making a bird table is having the tools and equipment in place to do so and I think it might save a fair bit of time for you if we go through those to ensure its the right project for you:
Tools you need for a bird table
Materials you need for your bird table
- Bit of tongue and groove for the base or featheredge below if you don’t want to buy it separate.
- Some 1 inch square for the bird table uprights and to support the base
- Featheredge for the roof and base
- 50mm square for the base and base support
- Screws
- Glue
- Brads or panel pins
The most important thing when it comes to selecting your timber for this project is that you use a tanalised wood which is designed for external use and won’t rot for many years to come. If you can’t get to the timber yard or the usual builders merchants don’t have them then you could actually use something like a wood preservative to protect your timber if you can’t get tantalised.
Decide on size and design
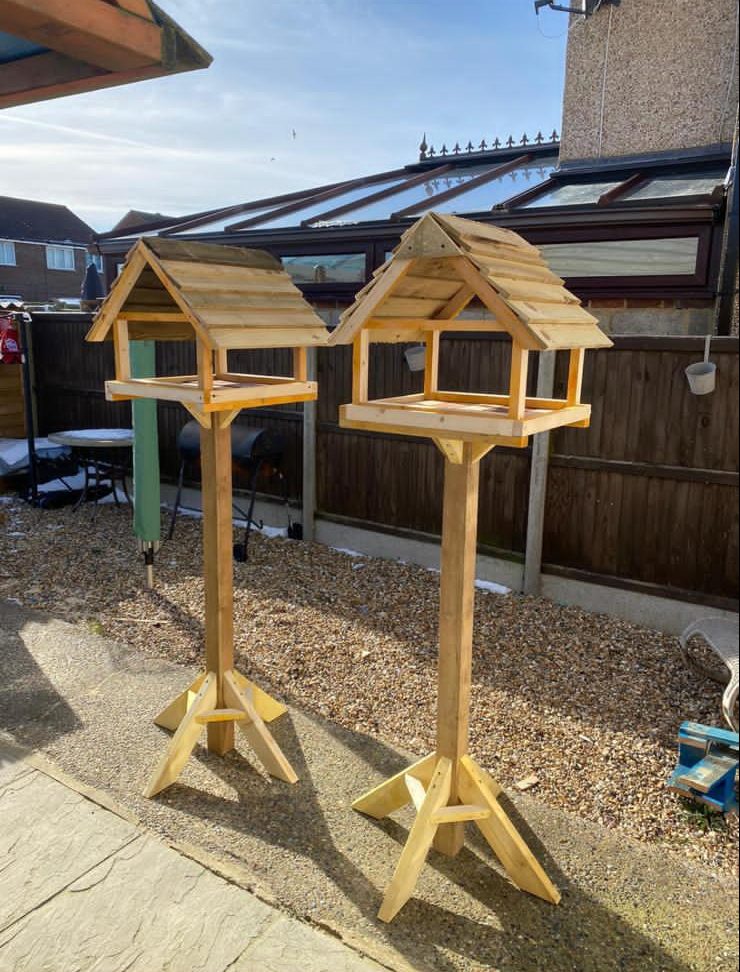
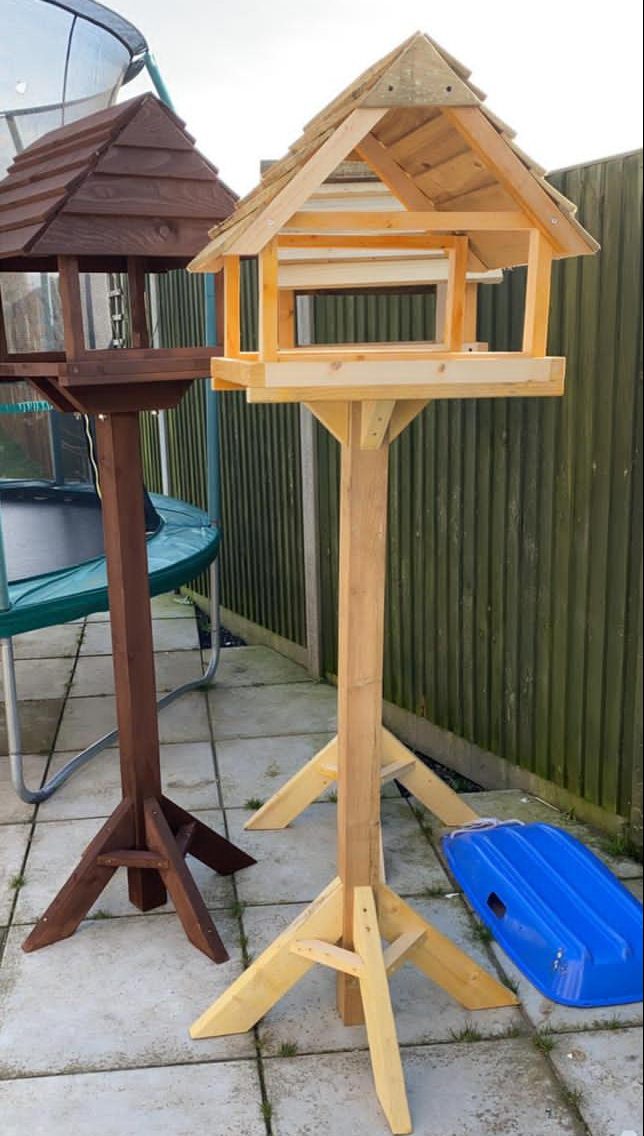
I’ve got two designs for you here I am going to talk you through the unpainted bird table and how to assemble. The painted darker brown one is pretty straightforward too if you’re half on the ball at DIY 🙂
The first thing to consider the job into two parts; the bird table itself and the stand. By breaking the job into smaller parts you’ll be able to handle this little project all the easier. If we tackle the base first
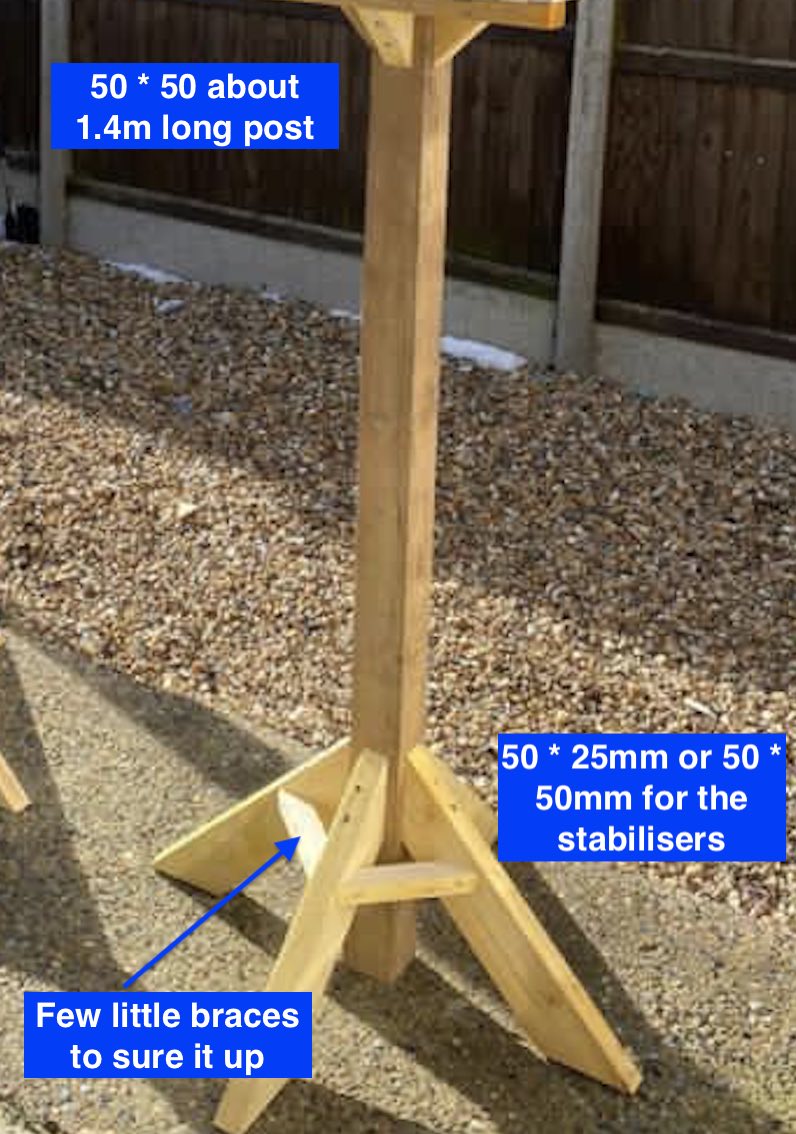
Get your 50mm2 square tantalised timber and decide on the height. Personally I like about 1.4m off the ground. You can choose whatever you like here though. Just remember there’s a balance between height and how easily it’ll topple over. You’ll have to make the support struts larger if you want to go really tall, that or screw some a piece of ply or sheet material to the base to add stability. The problem with this though is the rot so best best is to follow the size I make ours.
You’ll notice that the support struts are 2 by 1. This is fine if you have some laying about but 50mm square is also fine. These are just cut at 45 degrees using a mitre saw and then screwed in. You’ll need to countersink the screws so it doesn’t split. I generally used 40mm screws as they won’t come through but really bind the timber until the glue gets a chance to grab.
The bird table itself is a little more involved but I am going to break it down into easy steps for you here:
First off the bast is cut yourself four 100mm featheredge boards at a length of 400mm. This will give you a near square section. Get your small batons for the underside of the base cut and put the base and featheredge together. Note, the featheredge runs from about 11mm down to 7mm so you want to butt the same size against each other or use the tongue and groove I mentioned earlier (will look neater), the brown bird house uses tongue and groove.
Then continue to build the square shell with your batons. Use a little spirit level and keep the thing square. I use my nail gun and 25mm brands for this with wood glue. You’ll notice that I have screwed this together. If you do the same then use 30mm screws with no more than a 3.5 size head and make sure that you pilot otherwise the timber is guaranteed to split. If you use brads or panel pins there is far less chance of splitting the timber and it’ll be totally strong and secure once the glue sets.
The roof is easy too. I just set my mitre saw to 22.5 degrees and push the timbers together. I then pin and glue those to the frame. Then it’s a simply case of pinning the roof featheredge on. You could do this with panel pins but preferably using annular ring shanks.
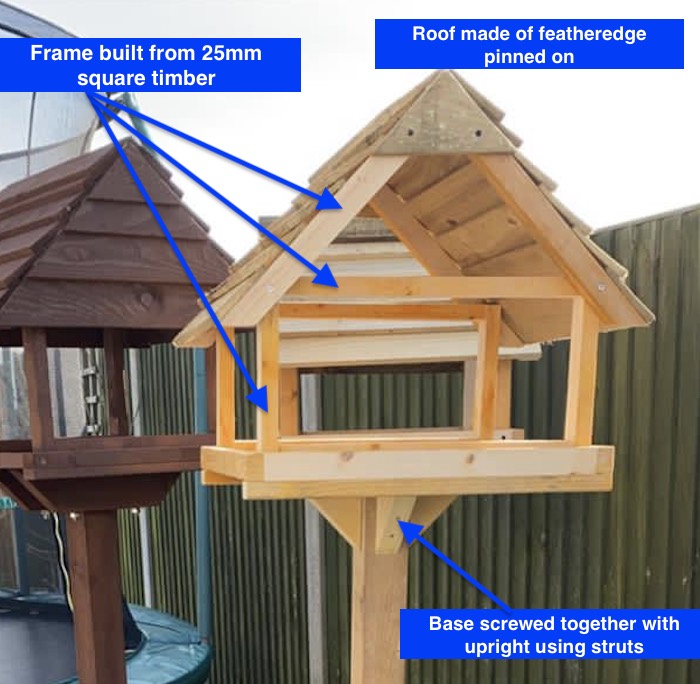
To give it a little more support I cut a bit of thin ply on each gable to just make it that little bit more rigid and fix with a couple of screws. This isn’t necessary but it certainly doesn’t hurt.
Attaching the base to the house is a case of cutting some more 2 by 2 support struts and then simply screwing them together. Typically it’ll take a few hours to make a nice looking bird table. You don’t save any money at all but you have fun and occupy yourself in the garden.
After you’ve built it then simply leave as is or paint. I use that shed paint Cuprinol duck back. Amazing for covering timber and it last so long without another coat.