Fitting a fence post is pretty straight forward. Be it your first post in a run or replacing a broken fence post, the tools needed to fit a wooden fence post is almost always the same. In this example I am adding a fence post to support my 12 foot long closed board panels as I intend to cut it down and then fit a garden gate as well giving me side access. Whilst this is my use, it doesn’t stop you replicating the process for whatever reason you need a fence post installed.
What you’ll need to fit a wooden fence post
The obvious tools are a post hole digger or a small spade, a concrete breaker or good old fashioned club hammer and masonry chisel. Having a wheelbarrow to take away your soil and rubble is handy too. From there I used a cordless drill, trust spirit level, and a hand saw to notch out the fence and timber post. A fence paint or fence stain will then be required to protect the timber. You could use a wood preserver too. I would definitely drop the fence post in a bucket of Cuprinol 5 star wood preserver and allow the treatment to absorb up the grain. That will make your post last SO much longer. I like to use a fence sprayer for all paint and stain, but a brush is fine.
Those are the tools I used, you could literally get by with a hammer, a smaller garden hand spade, a handsaw, some 8 inch nails, and a bit of string to make a plum weight to install the post straight. This doesn’t need to be about having the best and latest tools, they just make life that little bit easier.
1. Mark out for your fence post
You want to workout exactly where you will situate this post. Now if you’re starting a run then it’ll be slightly different, but in the case of shoring up a fence panel you’re going to decide what point the panel is most vulnerable (probably centrally aligned) but in my case I intend to cut out the fence panel and install a garden gate so mine is placed where I will then have a post for the gate. I use a good old fashioned carpenters pencil so I can see the line clearly. I offer the post up with the spirit level now, as this will make digging out all the easier.
2. Dig your fence post hole
So as you can see from the picture below, I had to go through a pretty thick bit of concrete. So you can’t blame me for having a go with a concrete breaker! You can do this with a hammer and masonry chisel. To keep the hole neat and tidy I go nice and steady. Once I was through the concrete I used my post hole digger to keep the hole neat and tidy too. Remember, you don’t want to use much more than a bag of Postcrete so the neater the hole, the less material waste.
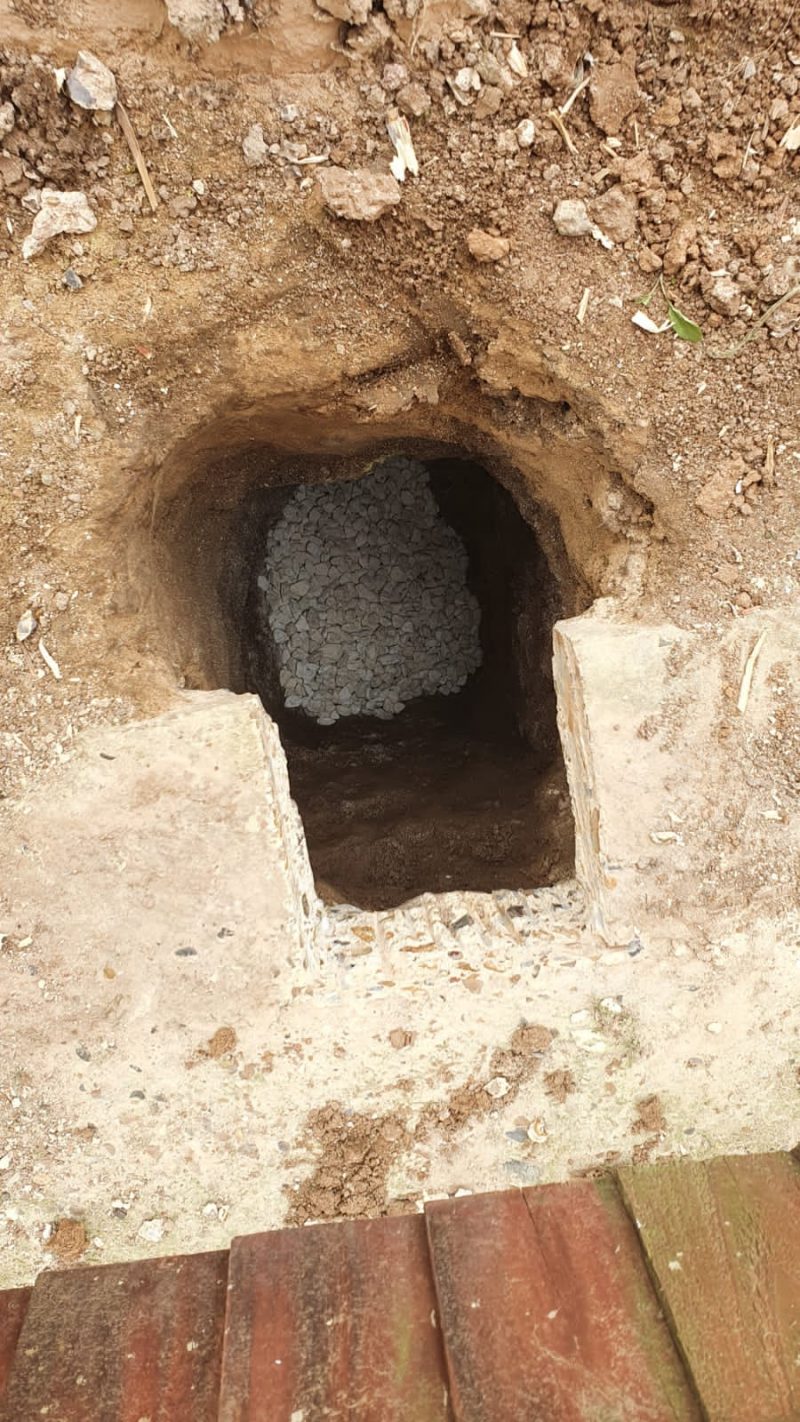
You’ll also note some gravel at the bottom of the hole. This is for drainage and to ensure the moisture runs away from my wooden fence post as much as possible. If you are using a concrete post then this is not necessary but I will say it is a superb hack to adjust the height of your post. If you dig bellow the level required and then backfill, you can then wiggle your post to the required height and you’ll get a superb, professional looking finish as this is how the landscapers will do it day in, day out.
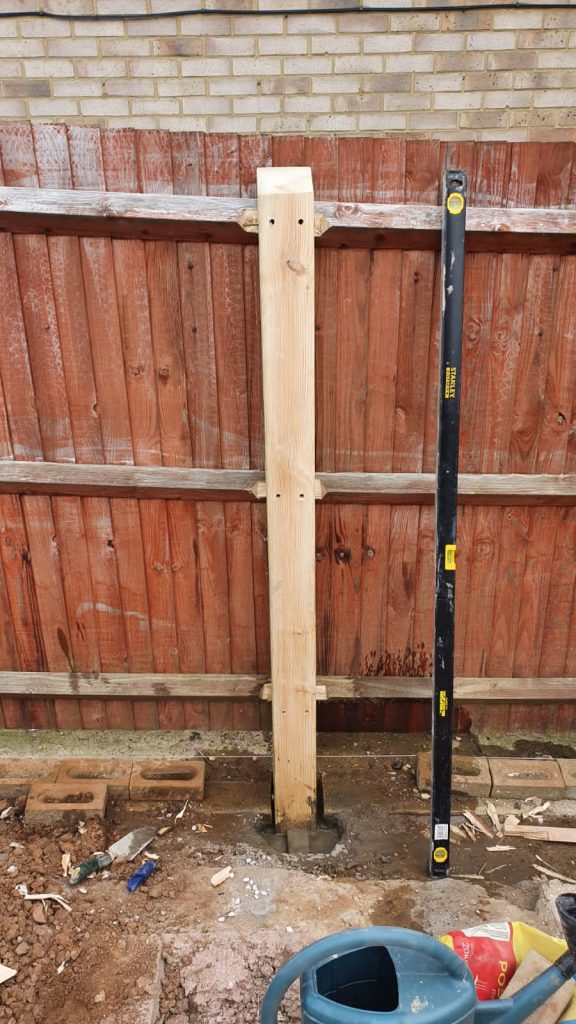
3. Offer your wooden fence post in and notch it out if installing against a close board panel
In my case I am butting up to a large close board panel so I am notching out to make a snug fit. I decided the best thing to do would be notch half from the post and half from the fence panel. In hindsight I think I thought about that too much and it would have made far more sense to just remove all material from the heavier weighted fence post. None the less, the outcome was a tight fitting fence post that shored up exactly as I intended. Here’s a close look at the me starting the process of nothing out.
Once it’s notched out and you’re happy with the position, then you can begin the process of installing and fitting the fence post.
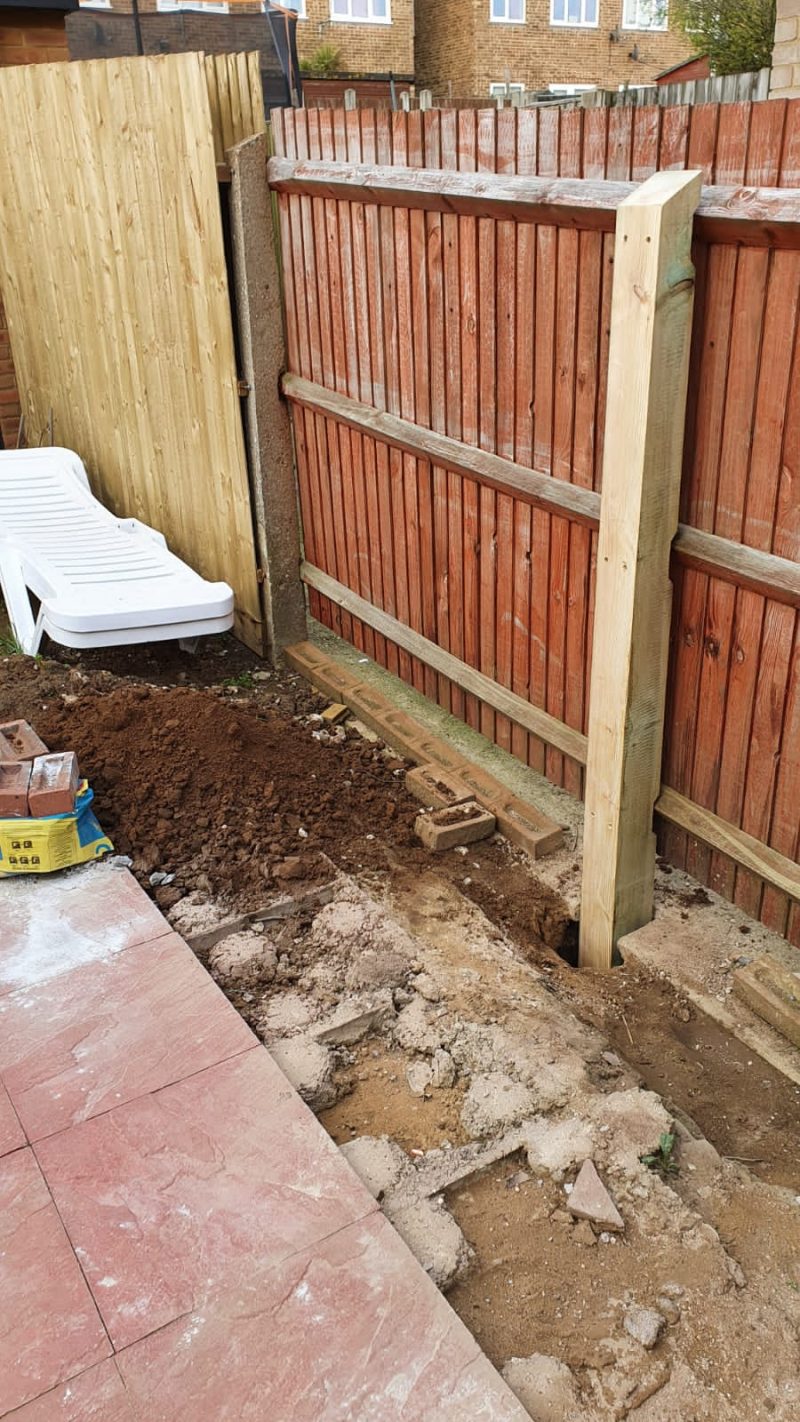
4. Fit the fence post to the panel with large screws or Fishers
If you have no fence panel to install against of the fence panel is bowed out and not square then skip to step five. If you are shoring up or already have a fence panel in place then now is the time to screw in your fence post neatly and square. As you can see from the picture below I decided to pre drill and countersink my screws. This is just to keep the job looking professional and tidy but in truth, using the right impact driver you could just push these screws into the timber by marking with a pencil beforehand.

I like to use an impact driver for this but a standard cordless drill is fine. Especially if you go to the lengths of pre-drilling. If you’ve got an eagle eye you will notice I used a string line from the other previously installed posts to keep it all neat and tidy!
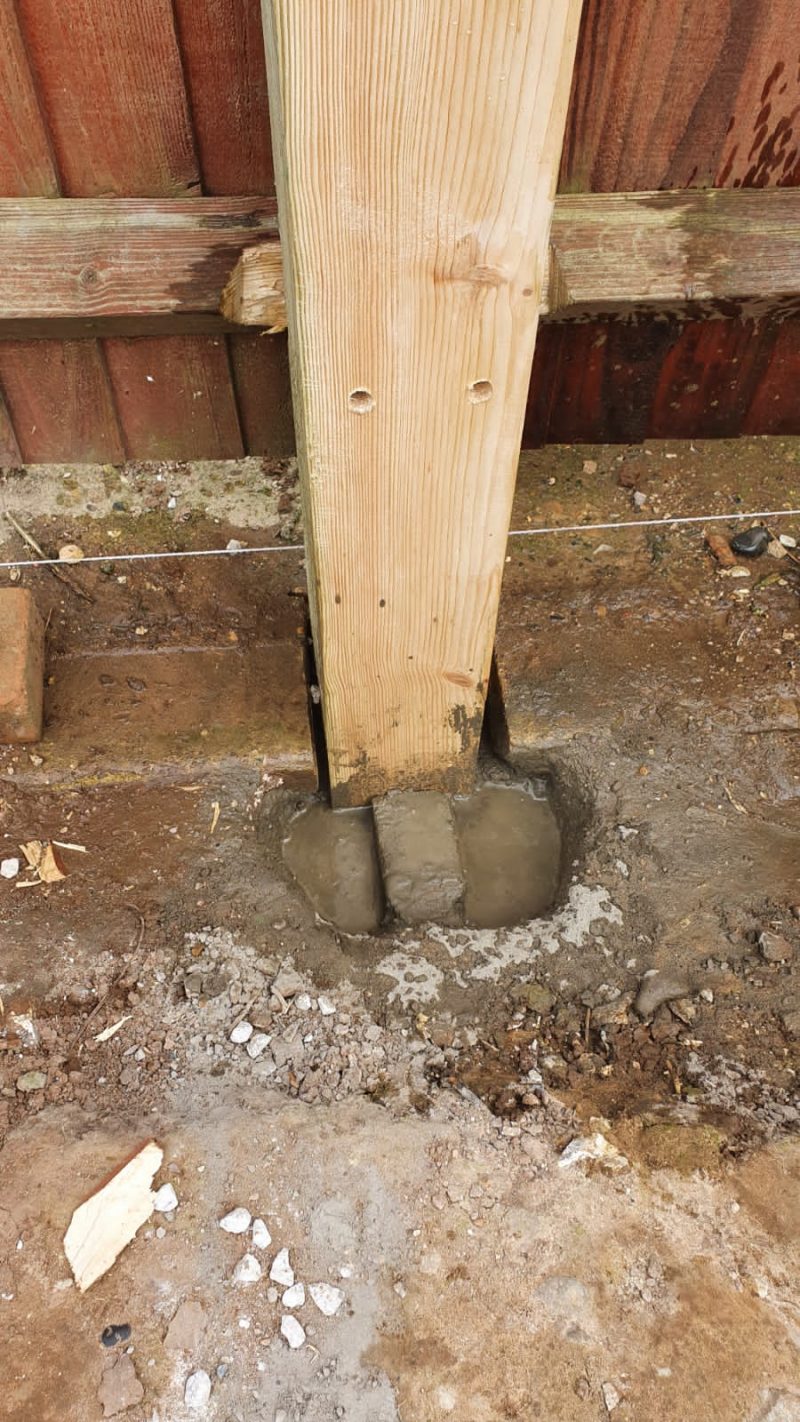
5. Pour in your concrete and square up the fence post
If you are just starting a run of fence posts or don’t have a panel to work against then get your spirit level and square the the fence post as a mate pours in a bag of Postcrete straight after pouring in a half bucket of water or so. If you are doing this alone, put a few rocks in the hole to square up and hold the pence post for you, pour in water, and then the postcrete. Once the mix is in then check again with a spirit level that you are all square.
IF you had the luck of being able to fit to a fence panel first, you then just pour in water and postcrete. If you had a bowed fence panel then you should wait a good few hours, ideally overnight for the postcrete to go hard and ground to harden up then push your fence panel over and attach it to the solid post.
Give yourself a pat on the back. If you followed this guide on how to fit a fence post then you probably didn’t need much more than a few hours and ended up with a lovely looking job. Here’s my wooden fence post fitted:
All that is left for me to do is spray the post. I actually intend to get out the fence sprayer and then I can spray the whole lot the same colour which will give a much nicer looking finish.