There’s loads of ways to add a fence on top of a wall. I decided to build a frame using masonry anchor through bolts. You could go about this with L shaped metal wall brackets, or even post holders and drill and anchor them down. For me, I was happy with building a wooden frame from a base of fixing said anchor bolts to my wall. I spent a great deal of time deciding on how to add a fence on top of a wall and for me this was the right solution – here’s a look at how it came out:
You’ll notice multi colour fence panels in the rear of said picture – I recently conducted all manor of tests to find the best fence paint as well as the best fence sprayer.
List of materials and tools I used to add a fence on top of a wall:
- Mitre saw and mitre saw stand
- Hammer
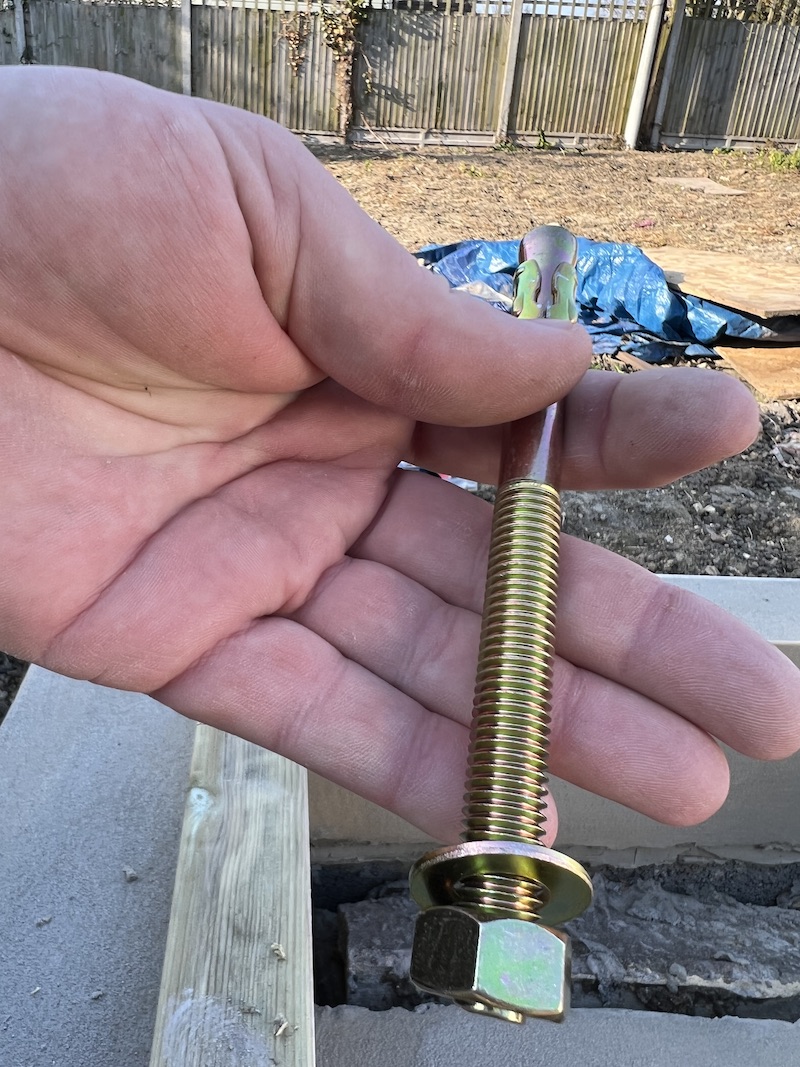
- Anchor through bolts I used M12 size (12mm sds masonry bit required)
- Impact driver – I swear by my Makita impact driver, a total bargain.
- Cordless drill
- Jigsaw
- Circular saw
- Fence paint
- 150mm feather edge
- 3 by 2 for the frame anything around 38 * 63 from Wickes or similar will be fine. Sawn timber.
- 75mm fence post to secure
- Postcrete
- Adjustable spanner
- 90-100mm spax screws
- 40mm screws for featheredge
- I used my nail gun – you don’t need to though.
- String line
- Spirit level
- Fence sprayer
- Petrol auger or post hole digger for the support poles – you could use a spade though.
There’s some other bits as we go through that you might consider but this is a pretty decent start and the bulk of what I used for this. Let’s get going.
Bolt and fix a timber plate to your wall
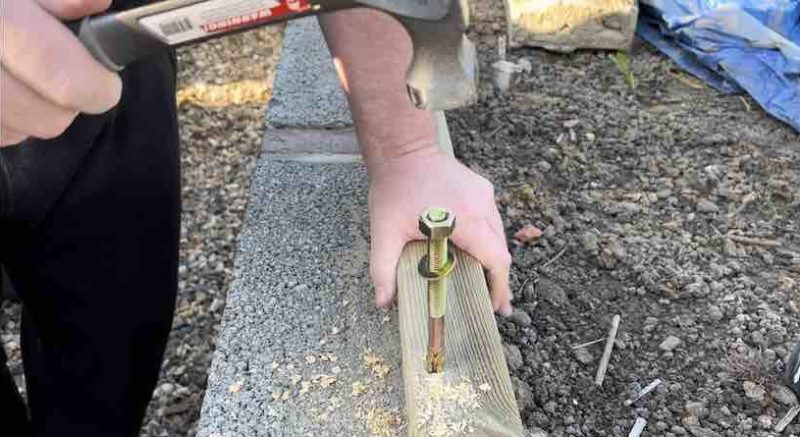
The first place to start is with a length of timber on the wall all the way along. Fix this down and the rest becomes easy as you can decide the frame from there. You essentially then only have to worry about wood screws and nails after this point. Here’s a look at that in picture so you can see what I mean. Firstly you need to drill:
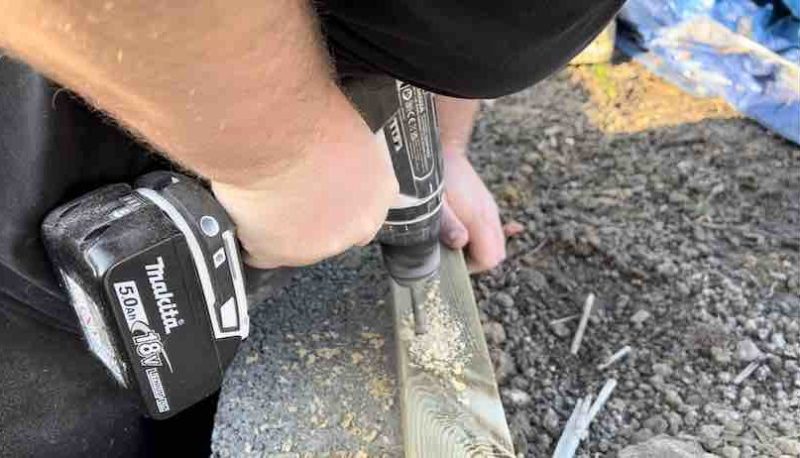
You’re going to want about three fixings in a 3m length. So drill all three at once, keeping the timber still so the holes align. I’m using M12 anchors which basically means a 12mm bolts so you want a 12mm SDS bit as I mentioned above. Then once you’ve got the holes drilled smack in the anchors with a hammer – make sure you send the nut down the thread a bit or as you’re whacking it there’s a chance you can jamb the nut and the thread will just spin in the hole when tightening.
Here’s a look at whacking this through the timber into the concrete block – a little care as to not blow the block out is obviously cautioned – my blocks are medium density so no issues in terms of strength:
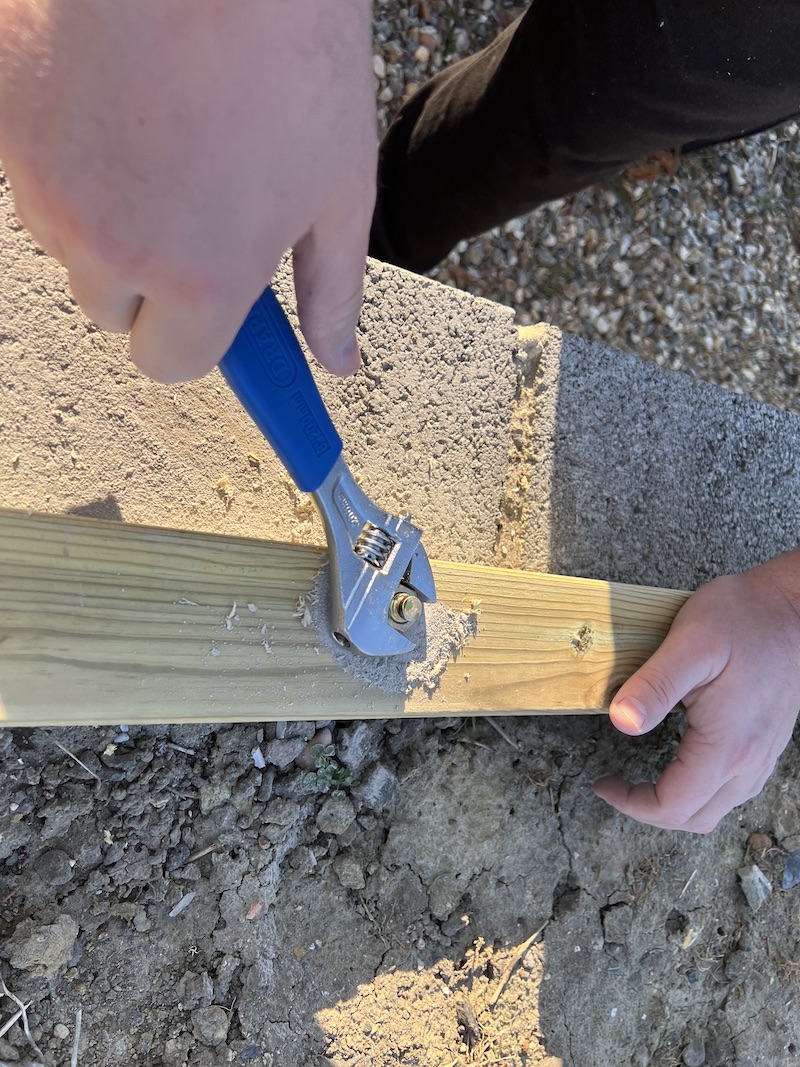
Once you’ve knocked in all you anchors simply tighten them up with an adjustable spanner. Any adjustable will do fine – I personally use a Draper because it is the cheapest of the range that won’t break from even the strongest – you can find this on Amazon if you follow the link I’ve provided. Here’s a look at the plate being bolted / attached to the wall with the adjustable spanner:
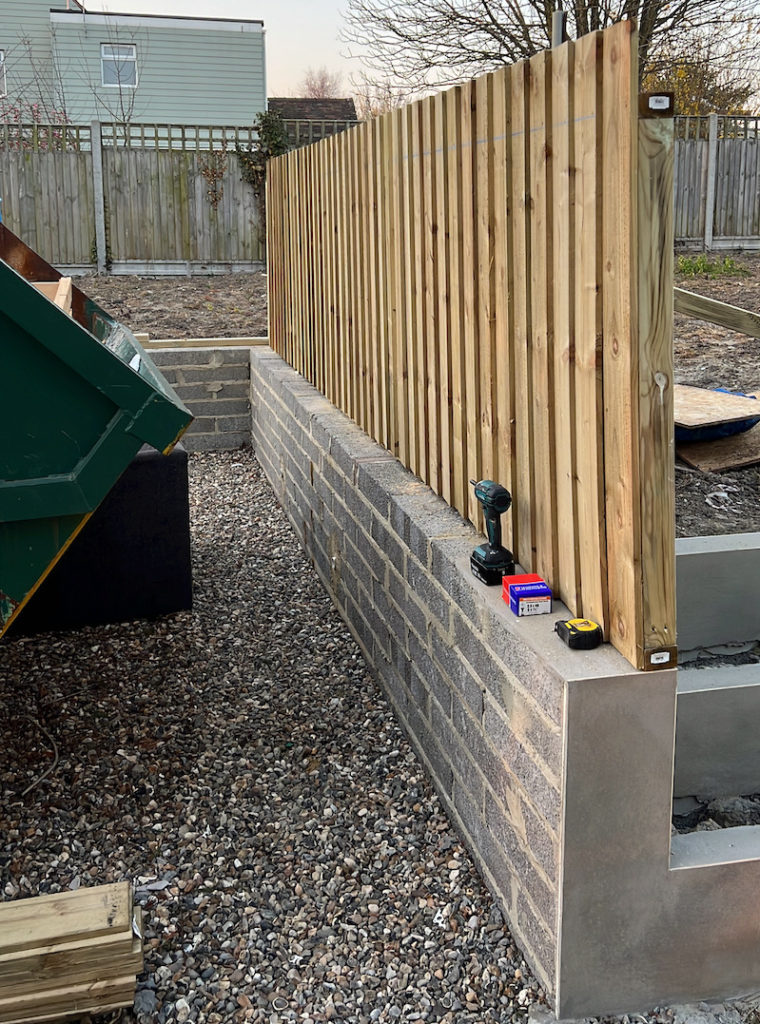
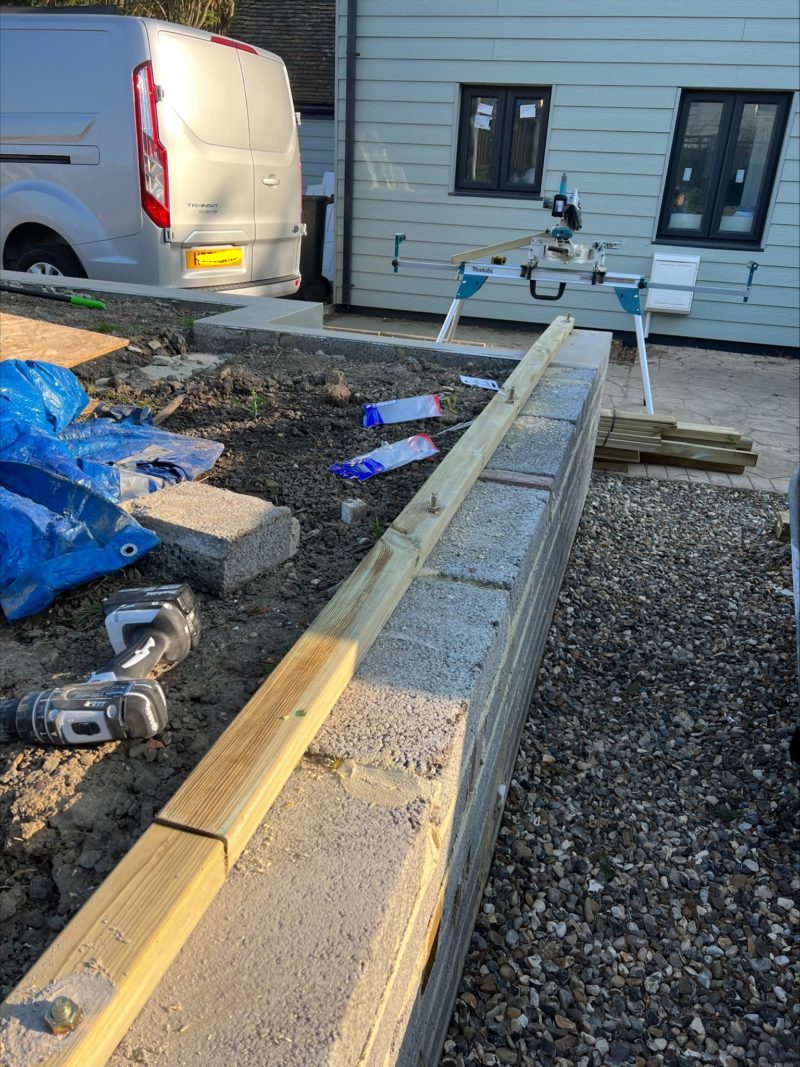
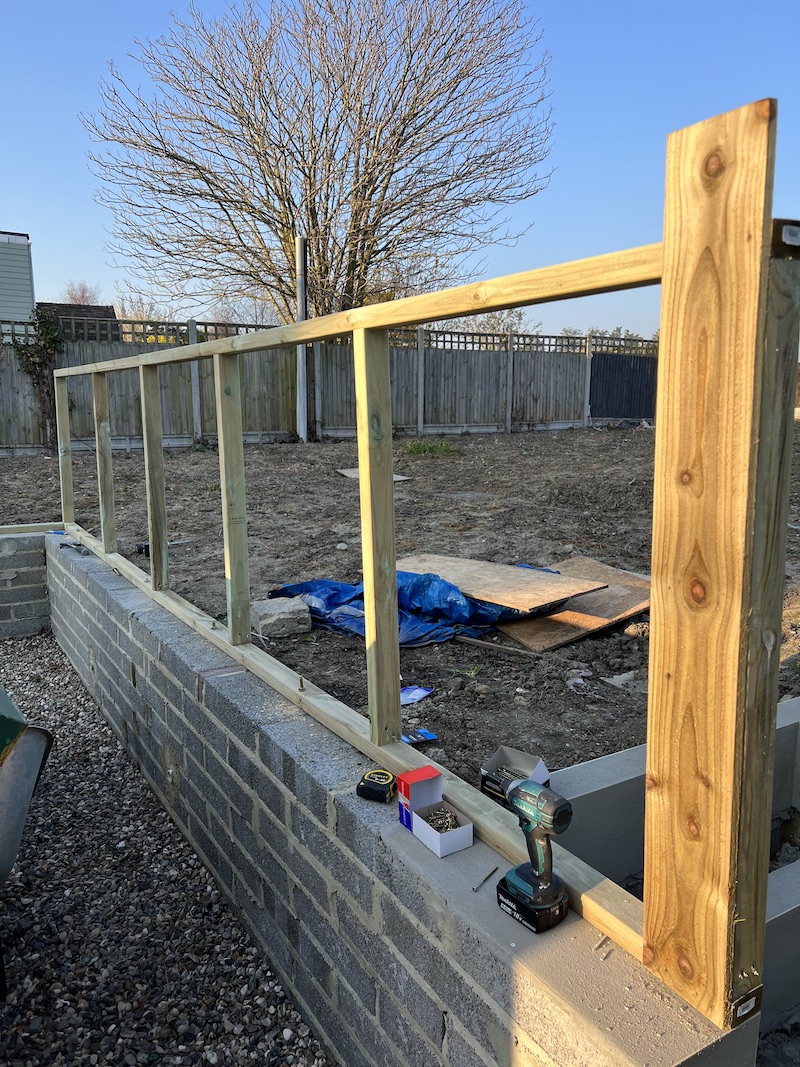
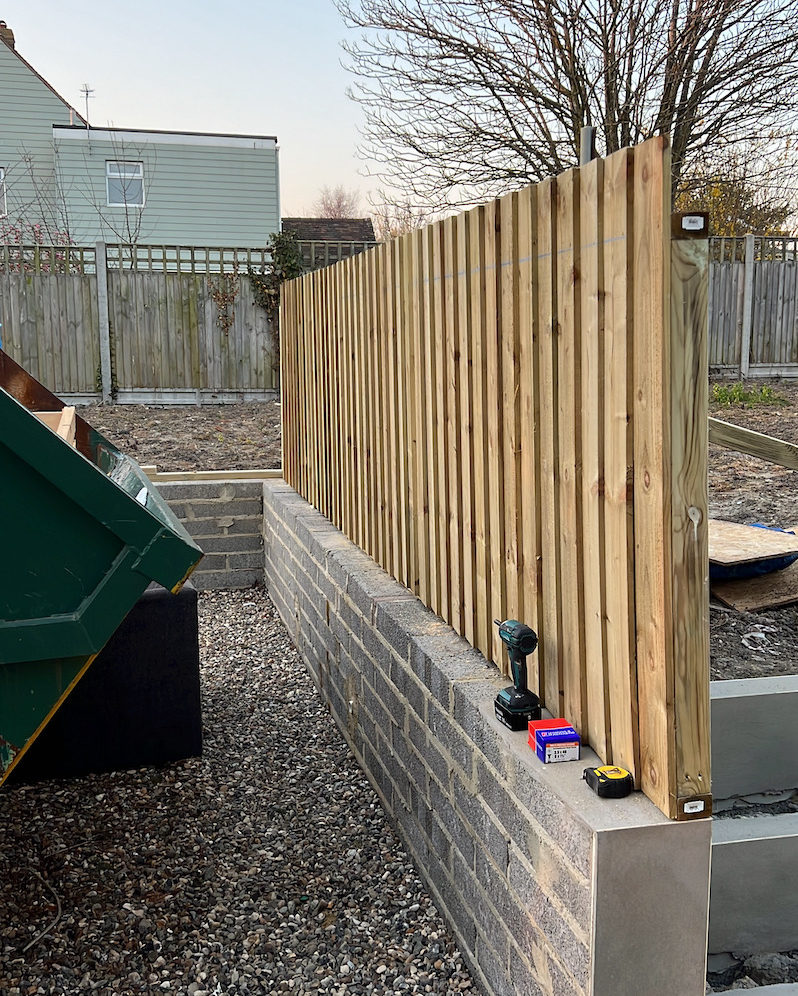
So with the bolts attached just work your way down the wall – I actually did about 20 metres of wall but one 6m run here is plenty enough to demonstrate how to add a fence on top of a wall – you’ll notice my new mitre saw stand in the background. Makita really are miles ahead with their cordless tooling at the moment. Here’s the wall plate fixed running all the way along:
So now things get easy and it’s time to build your frame off the plate.
Building the stud work
I’m not going to go into great detail on this section, you can pick your centres yourself, and your heights – what I will say is I went for 1m centres over a 6m run and it was a bit wobbly on a 1.2m tall extension. That is fine, I always knew I was going to be installing support and both ends and throwing a post into the ground half way to sure it all up. On top of that I was using 150mm featheredge that I screwed. It ended up absolutely fine – a kid could charge at it in the most vulnerable position and still not budge, once secured!
So using my mitre saw (cordless one from Makita) I just cut and screwed putting together the framework. It really was a doddle. I am not going to go into too much detail about how I did this other than say I used 90mm Spax screws a couple at each joint. on 38mm thick timber – absolutely no trouble at all. I threw this frame up in about an hour, might have been less – the other thing I would mention is part of my wall was rendered so the plate wasn’t sitting flush. This manifested itself and the timbers being all over the show. Again, not a concern as I planned to square it all up with posts. I screwed the uprights all in first:
After that I just ran along screwing and pulling the frame roughly where I wanted it with the top section. Nothing fancy or clever here as you can see – just the 90mm spax screws with 1m centres as I previously mentioned. Here’s a look at the frame complete:
Installing the featheredge onto my stud work
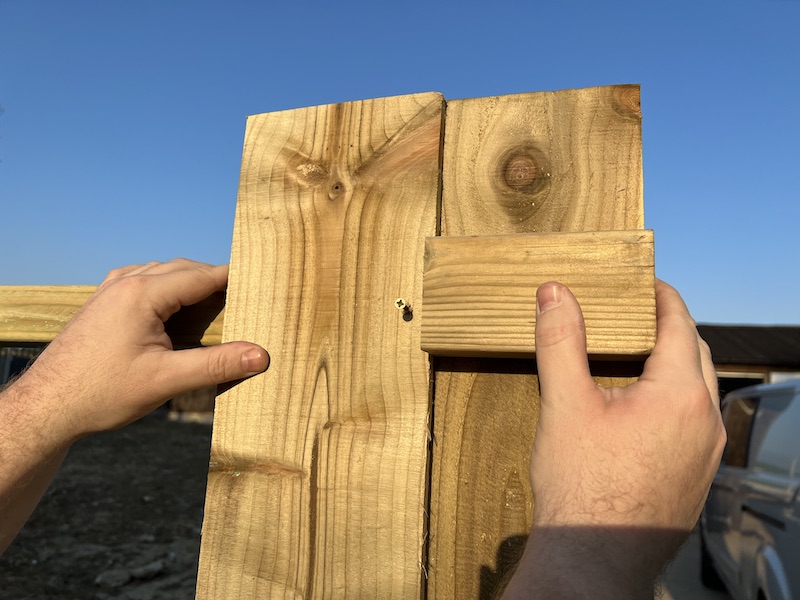
For the first time I got the level out. If you look at the image above you’ll notice one board installed. This is completely squared up – if you get the first one square you can then make yourself a jig and install about 5 featheredge boards close enough before bothering with the level again. This saves a shed load of time and to be honest I cheated and got a hand to keep things level and get them screwed up quickly. Here’s a look at the jig – the boards are 150mm so a sensible overlap is 25mm – I made the jig 125mm to save measuring each time:
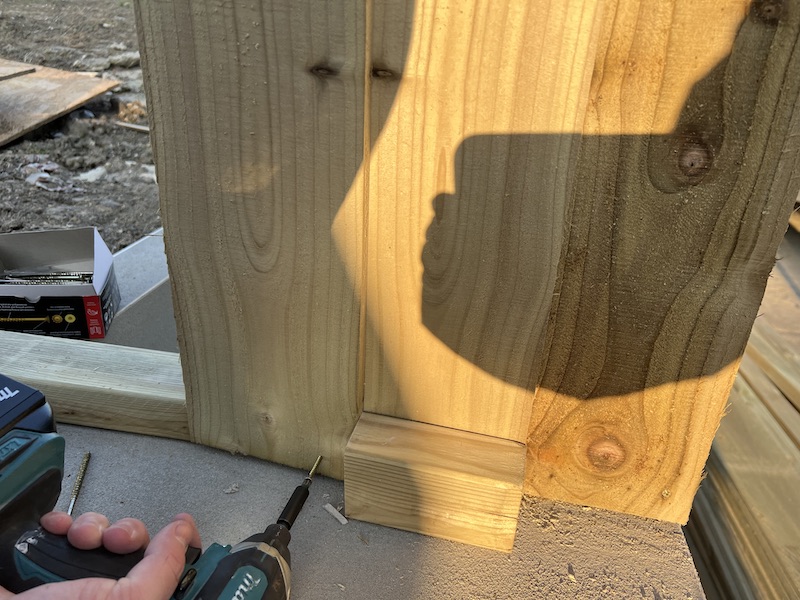
As you can see first I would get the height right and the width at the top sorted. Then that essentially leaves the board dangling and you can just place the block and hold whist screwing the lower section. There is an alternative here. If you don’t want to see the screws then use cladding nails. Screwing is far stronger and more reliable though. I use standard posi-drive turbo 40mm screws:
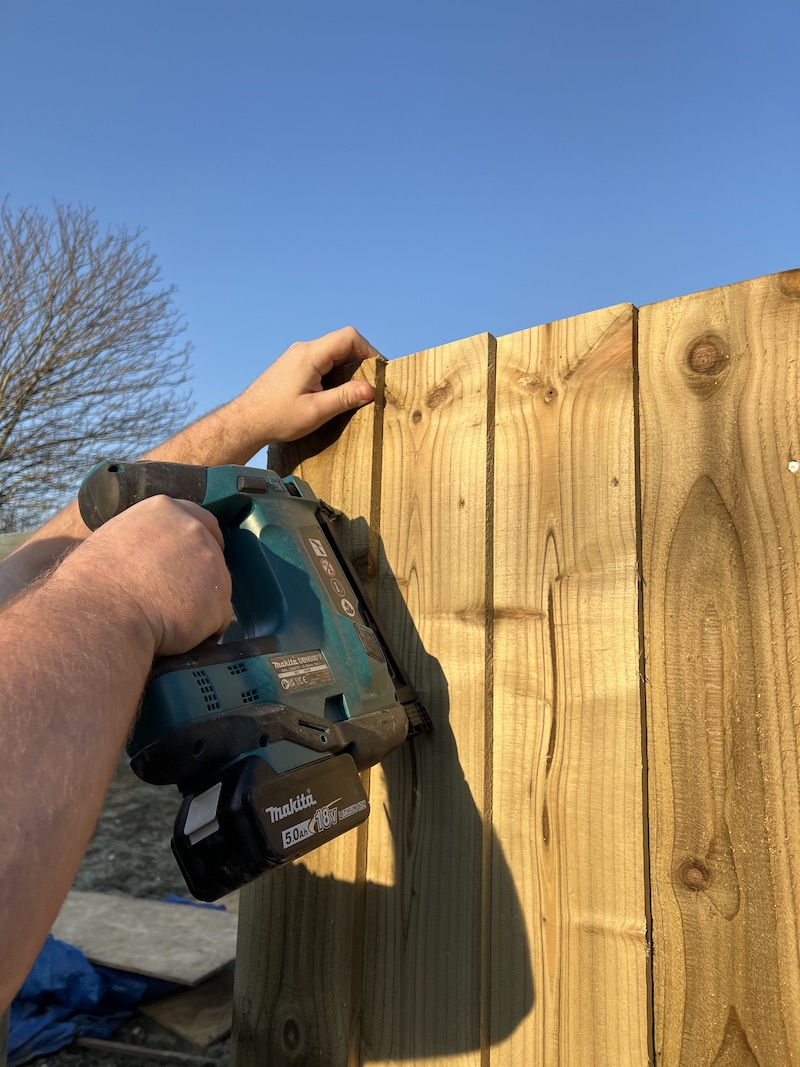
However, this is all great if you’re working with someone. On your own it can be far more fiddly. I don’t have a 1st fix nail gun but I do have a 2nd fix nail gun that fires brads. This is absolutely fine to temporarily hold the board whilst waiting for me to screw it to the frame. I have to say, if you rely on headless brads, you will be chasing featheredge up the road in a storm – be warned. Screw it down or use cladding or annular nails. Here’s a look at using my nail gun:
There was another massive advantage to this. It mean’t that I could run a string chalk line so that my screws were in a uniform position. I know it’s a little OCD but that’s gine I like things reasonably neat and tidy, no point in doing half a job. Here’s a look at that:
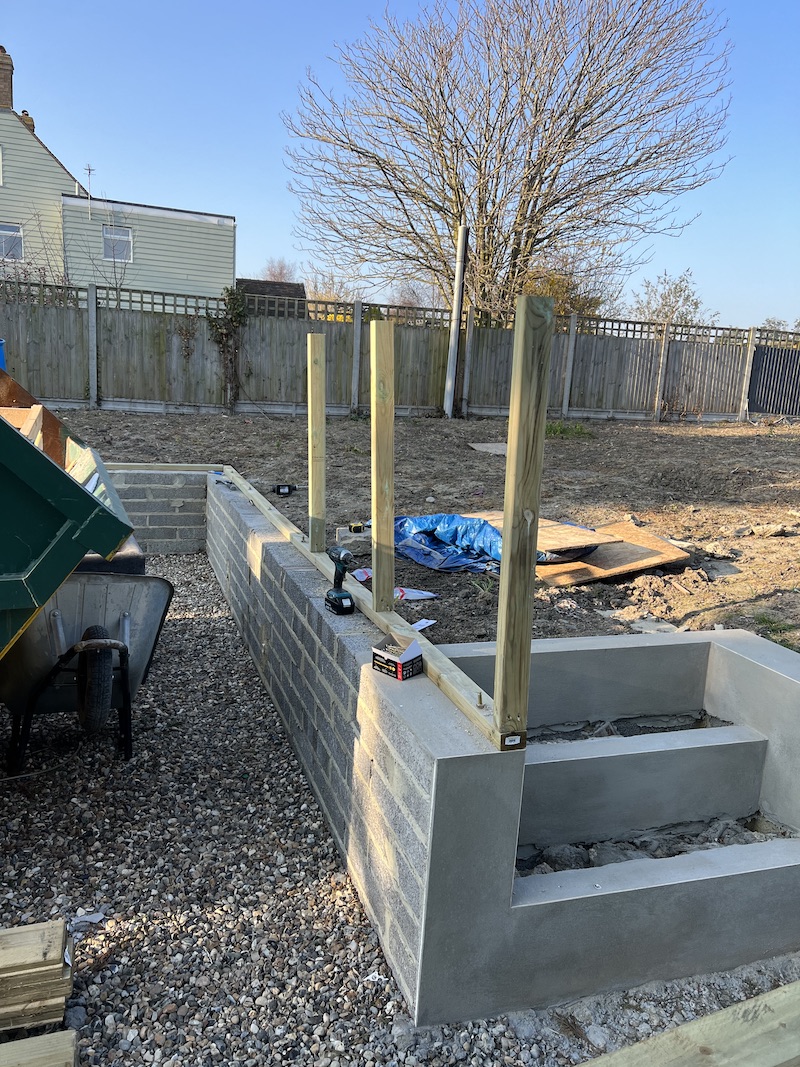
Securing the wall with posts
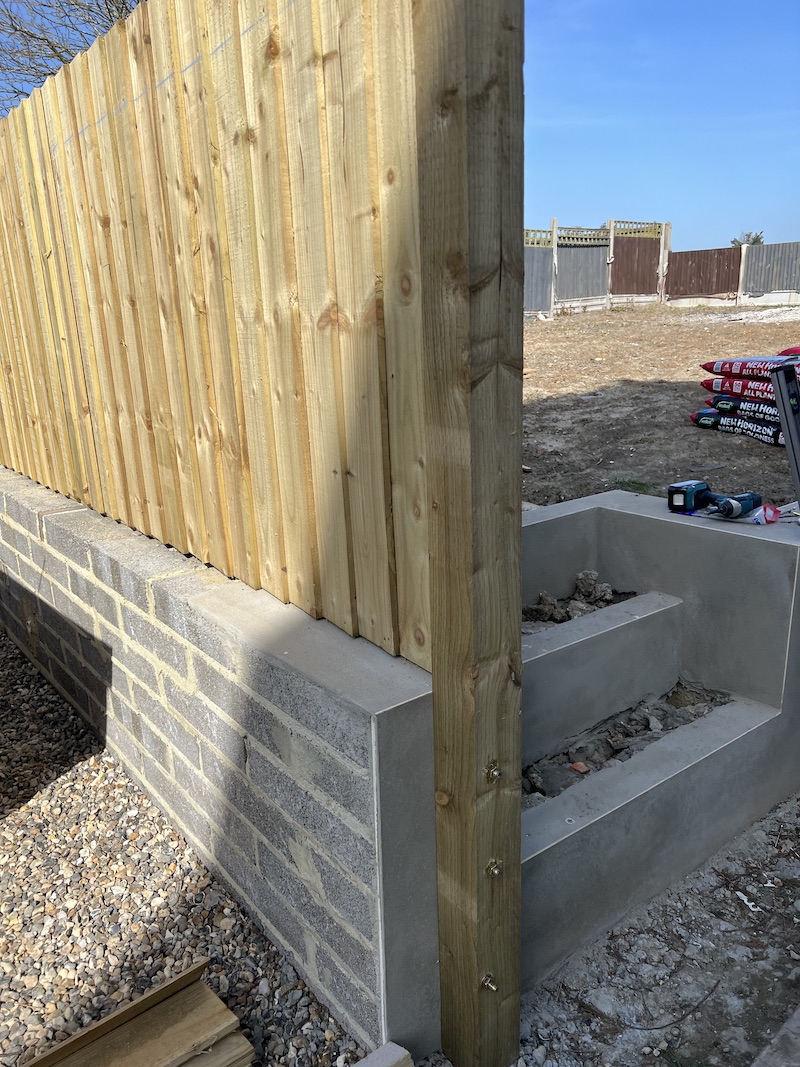
Another point of interest is the wall leaning over. If you look at the corner part of it is rendered and the other not (have different plans for that). So the wall is leaning over. Don’t panic, it’s all loose and now is the time to square that up. Firstly I installed my main post that will continue the wall at a much greater level. This was drilled and anchored in exactly the same way as the ground plate:
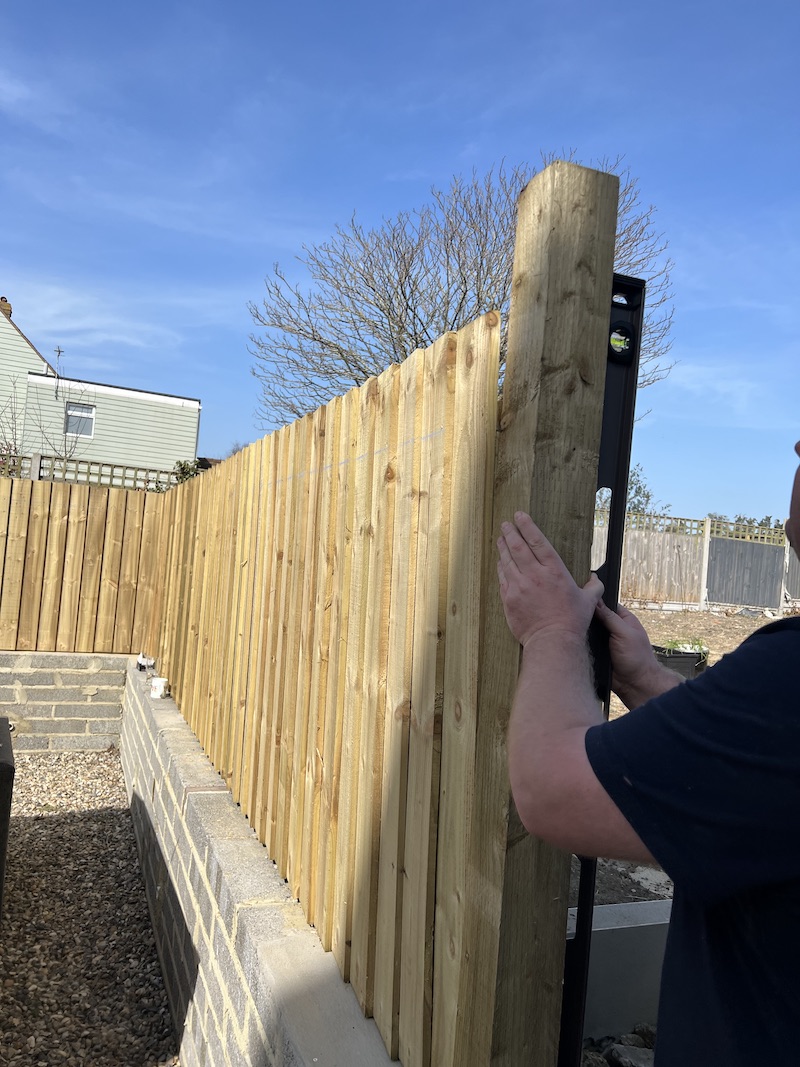
If you look I square up the post first and fix it. Then you can see just how far out the fence is and I simply drag that into position and fix it all up square. To give me a hand I use some braces so that I can concentrate on screwing alone:
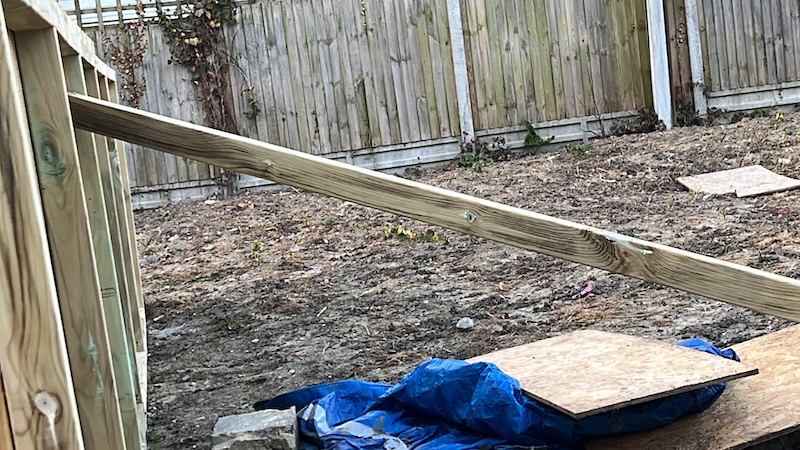
You could have just pulled it and fixed but in my case it needed to move over about 3 inches so I wanted an easy life. Then I simply install my other posts in the ground.
Install fence posts to sure up your fence
Dig yourself a nice deep hole. The deeper the better really but a minimum of 2 foot. If you have a post hole digger great, a petrol auger, even better, I used my spade and got cracking. Then I offered the post in, squared it up, poured in Postcrete, squared it up again. And that is pretty much it.
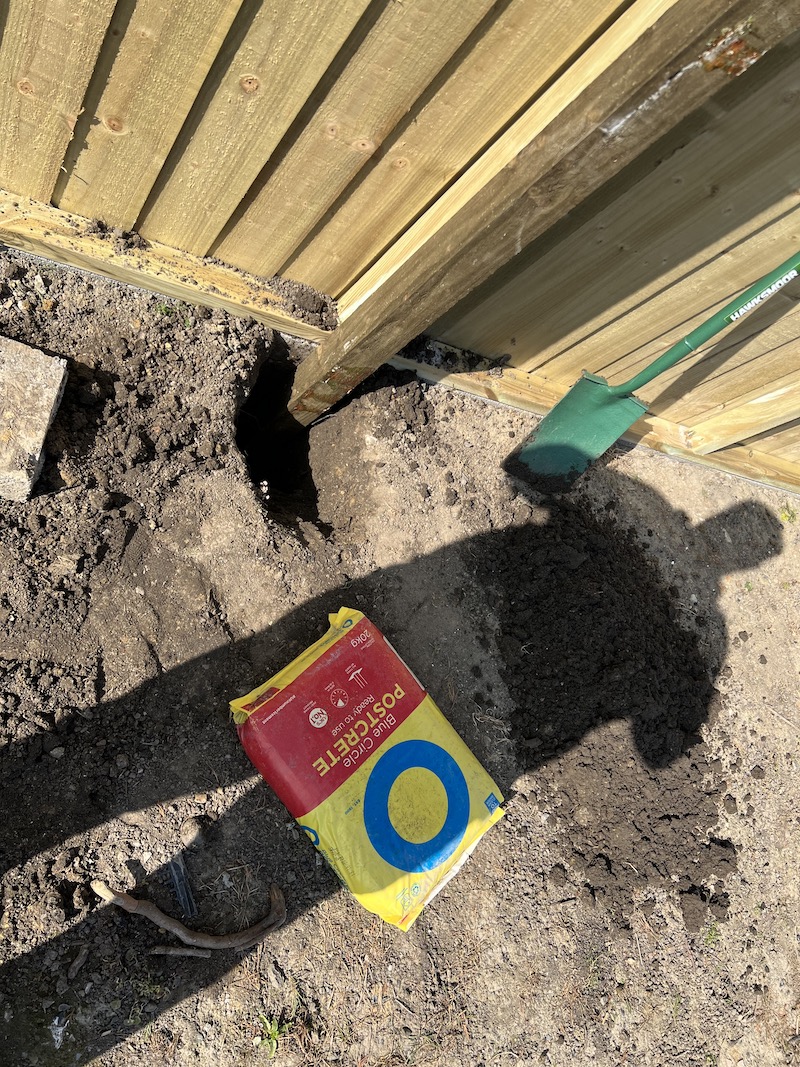
Because I was going to be using the post to pull the frame square I gave it a couple of hours to set then fixed the screws. Postcrete is rock hard in 15-20 minutes so it was total overkill but I wanted to be sure – plus my bags were pretty old as I do this kind of thing all the time so had a few kicking about from an old job I wouldn’t use on a customers house.
And that’s it – give yourself a pat on the back as it’s time to get out the fence paint and fence sprayer – my articles on these will have you completely covered. Here’s a look again at how that all came together: