Using raised planters, also known as elevated planter boxes, to grow plants, flowers, and crops in, can really make a difference when it comes to the amount of effort required to maintain them when compared with planting in traditional beds on the ground.
There are many benefits to using raised planters, and we have highlighted some in our ‘Pros and Cons’ section below, so it’s no wonder that they have become so popular in recent times.
A basic elevated planter box is not a hard thing to make, nor is it very expensive when it comes to materials. They don’t take a lot of time to build, and you don’t need to be a wizard with a set of tools to be able to construct your very own. Sound good?
Well, we hope so, because we’ve put this page together for those of you who are looking for someone to show them how to make raised planters.
We’ll highlight the pros and cons of gardening like this, and then we’ll take you step by step through the preparation and building process.
Let’s begin.
Pros and cons of raised planters
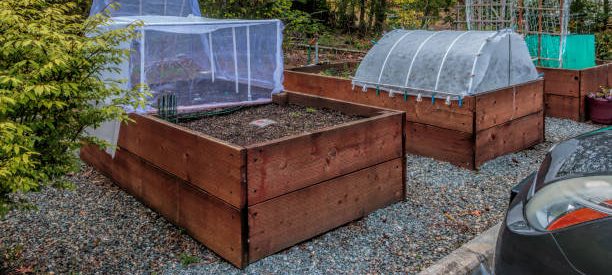
Two of the main advantages of using raised planters are also 2 of their biggest downsides. I’m talking about the better drainage that you get from a raised planter, and also the fact that the soil gets, and stays warmer when in a planter. In colder conditions, both of these are great for the gardener and allow us to start planting earlier in the year, but in summer you’re going to have to really keep an eye on moisture levels to prevent drought conditions.
It’s quite common for your ordinary garden beds to receive damage from wildlife, pets, small children, and weeds. Growing in raised planters reduces the risk of this happening as the soil and plants are elevated off the ground and so are harder to get to.
Garden Planting
As for weeds, it is much easier to install some kind of barrier to keep weeds away in an isolated area like a raised planter than it is on the ground, and we show you how to do this in our ‘how to make a raised planter’ section on this page.
Of course, one of the biggest, if not the biggest advantage, is the fact that you can work standing up with a raised planter, thus saving you possible back pain and general fatigue. While a good kneeler really improves your comfort levels for working low lying beds, an elevated planter box is still much easier to reach and work with.
Another thing to be aware of when using raised planters or beds, is that you shouldn’t cram too many plants into a smaller area as this will affect the air circulation, which in turn can lead to increased moisture levels, and make your plants more susceptible to diseases such as various moulds.
What can I make a raised planter out of ?
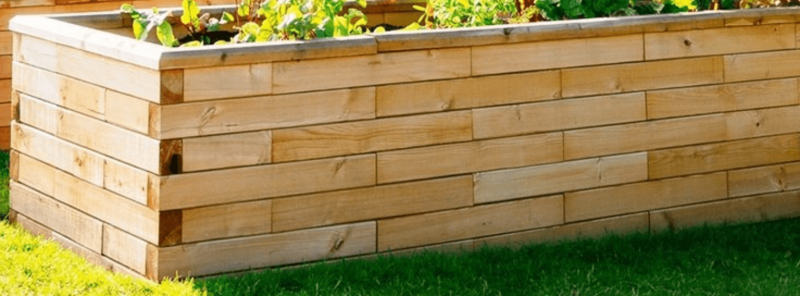
Raised planters can be made out of all sorts of materials, but the most common is definitely timber of various kinds. Wood is cheap, easy to come by, and very easy to work with.
Wood will eventually biodegrade, and you might be tempted to treat your wood before building your planters, or use pre-treated timber, but you shouldn’t as that could leak toxins into the soil. If you are going to treat the wood, use a non-toxic/organic compound only.
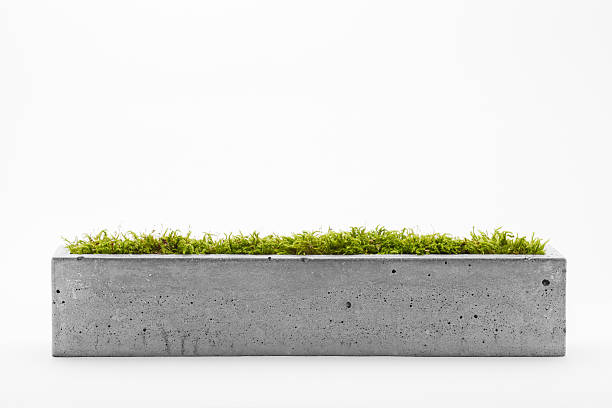
Garden retaining wall blocks can make a great, strong, and long-lasting raised planter. These specially made blocks are designed to fit together easily, and this can really save you a lot of time when compared to using standard or concrete blocks or rocks, if you’re building a taller standing planter.
If you are only planning on making a low planter, some simple cinder blocks placed together in the desired shape can do the trick, and you can even use the cavities inside the individual blocks as mini planting areas.
Corrugated aluminium is yet another viable material for building a raised planter out of. Aluminium is a good choice of metal because it combines the attributes of being lightweight, with a good deal of strength, and is highly resistant to rust. A good mix of a simple wooden frame with aluminium sides, can give you a great looking planter that really stands out.
Honestly, you can make a raised planter out of just about anything: old pieces of wood lying around, like a wooden pallet, corrugated plastic sheets, even old car tyres can be converted. The only limit is your imagination.
How to make a raised planter
For the sake of simplicity, we are going to give you instructions on how to make a basic, waist high, raised planter out of wood, as that is the material most commonly used.
Once fully constructed, this planter will measure 72” long, 12 ¾” wide, and 31” high, and will be built from cedar, so it’ll be strong enough to hold more weight than you will ever need it to.
Trust me, we have gone a bit overboard here, haha, but if you wish to use pieces of timber that aren’t as thick, or expensive, please go ahead, this particular structure can act as a good basic guide.
We have to thank instructables.com for the basis of this step by step building guide, as it’s the one I’ve followed for a while now.
Materials and tools needed
To follow the original plan, we used cedar wood, and while it raises costs, it does give you a raised planter that will last longer than one made out of something like pine, which will probably need replacing in a few years. Here are the pieces of wood to buy:
- 1x8x12 Cedar Board x 2
- 1x8x8 Cedar Board x 3
- 1x4x10 Cedar Board x 1
- 1x4x12 Cedar Board x 1
- 2x4x96 Kiln Dried Pine studs x 6
Fasteners needed are:
- 1-1/4″ All Weather Self Tapping Screws
- 2-1/2″ All Weather Self Tapping Pocket Hole Screws
Tools:
- Safety clothing, such as goggles and gloves.
- Power drill
- Mitre saw
- Table saw
- Set square
- Tape measure
- Wood glue
- Pocket hole jig with clamp
- Pen/pencil for marking
Building the raised planter
You start by constructing the base of your planter by screwing together three 8”x 6ft pine boards. You have to cut all of your cedar boards to this size, or get someone else to do it for you if you’re not confident.
To fix the boards together, you need to set the pocket hole jig to ¾” and make pockets along one edge of the boards, spaced 8 inches apart from each other.
Next, you align two boards together and then insert tapping screws into the pockets that you made. You should use a clamp to hold the pieces together, or failing that have someone help you. Once the two boards are together and you’re pleased that they line up on the left edge properly, you can connect the third 8”x6ft board in the same way, and now you have your base.
Now it’s time to make the sides. For this you’ll need two more 8”x6ft boards, and use the pocket jog to make holes along one side, every eight inches as you did with the base boards.
Align this board to the left edge of the baseboards, clamp it in place, or get a friend to hold it, and then screw it down. Do the same with the other side.
After this, you need to measure the inner width of the planter you are making, and then cut two end pieces to this size and screw them onto the structure to finish your basic box.
6 Best Garden Spades
What comes next, is to make the sides of the box higher, thus giving you more depth in your planter so that you can grow vegetables.
This is done by simply attaching the 1×4 cedar boards onto the top of the box in the same way as before, by using the pocket hole jig and tapping screws.
With the box finished, you’ve now got to build the frame, and this means cutting the 2×4 to size using a mitre or table saw. Cut the 2×4 into 6 pieces measuring 19” long, and another 6 pieces measuring 24 ½” long.
Next, grab both a 9” and 24 ½” piece and use the wood glue and clamp to fix them together, parallel. Following this, you need to counterbore 3 holes in the 19” side and attach the two pieces together with the all-weather screws.
Repeat this process with the other pieces until you have 6 legs constructed, each made up of two pieces of wood: a 9” and a 24 ½’.
On to the last part.
Grab your box from earlier, and flip it upside down, as it’s time to attach the legs, and to add a few more pieces of wood to make a super strong raised planter.
For the ‘final cut’ ( sorry for my puns) you’ll need to get back on the saw and cutter 2×4 you have left to the following sizes:
5 x 19″ pieces to be used as cross bracing.
4 x 28″ pieces to be used for the front and back rails.
2 x 30″ pieces. These will be used for the top.
Finally, attach the legs to each other to make leg pairs, then connect these together with the 30” pieces using a few screws and glue like before.
After this, you need to screw and glue the 28” rails on, making sure they are six inches up from the bottom of the legs.
Now, all that is left to do, is to allow for some drainage. You can either cut equally spaced drainage holes into the box, or if you’re feeling a bit more confident in your DIY skills, use some 2” PVC pipe and create a more complex drainage system.
If you go the PVC route, there are lots of videos on YouTube that can teach you how to set this up, or you can visit the instructables.com website, so I won’t go into detail here, as I think this article is already long enough, and it’s time to bring it to an end.