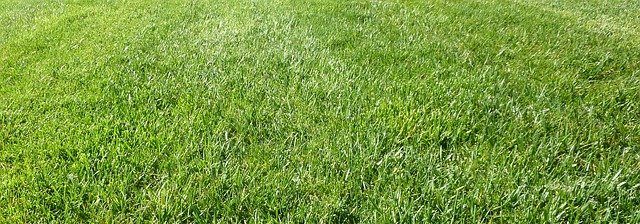
Ask any gardener worth his salt and he’ll tell you that scarifying your lawn is a necessary part of keeping it healthy, especially in the UK. Neglecting to scarify your lawn could see a heavy build up of thatch, moss, and other organic material, that then goes on to cause all sorts of problems and ultimately damage your lawn, leaving it looking far from its best.
The first time people scarify their lawn, it can be quite a shock to them, as it may seem like they have destroyed their favourite patch of grass. This is due to the invasive nature of the scarifying process.
However, there is no need to worry, and as long as you follow the right advice when it comes to post-scarifying lawn care, it will soon look better than ever. It just so happens that we have that advice for you right here on Garden Toolbox.
How often should I scarify my lawn?
The answer to this is a little different depending on your own specific lawn. Some lawns naturally have more thatch and moss buildup than others, and this could be due to a number of factors. Certain types of grass seed, soil, and the fertiliser you use can all affect how much thatch there is on your lawn.
Now, it’s important to note that thatch isn’t the lawn destroying monster that some believe it to be. In fact, a small amount of thatch is actually beneficial to your lawn. However, this is only a small amount of thatch, and anything over half an inch thick will need to be scarified. For most people, scarifying once a year is sufficient.
When is the best time to scarify my lawn?
There are two times of year that are favoured by UK gardeners when it comes to scarifying, and they are late Spring and Late summer/early Autumn (depending on the weather in September that particular year). Avoid going through the process is winter or you could do more harm than good as the cold will cause your grass to recover at a much slower rate than other times of the year.
Ideally, you want to scarify by using scarifiers and rakers when the soil is dry on top but has an average degree of moisture under the surface. You also want some upcoming rainy weather without temperatures dropping too low to help with the lawn recovery after scarifying.
Personally, I always do my scarifying in early October, as I have found it’s the best time for the overseeding process that follows.
How to scarify a lawn?
Before scarifying, I always go through a preparation phase beforehand. This involves weeding the lawn thoroughly a few weeks out from my planned scarifying day and then cutting the grass ever so slightly lower and lower, every two to three days, until I end up with grass that’s about four to six centimeters long.
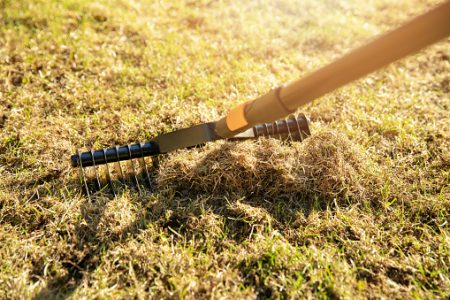
After this I grab my rake and try to remove any moss that has made my lawn its home, and sometimes use a moss killer if necessary.
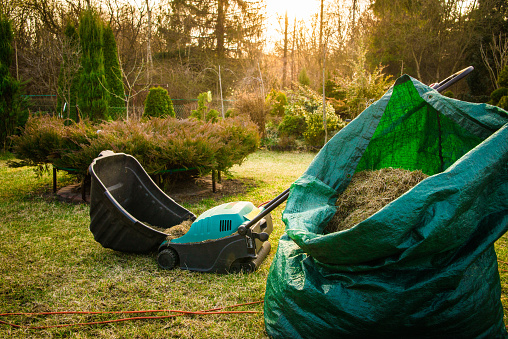
Once this is all done, I then scarify my lawn using my VonHaus electric scarifier. I usually do two or three passes over the lawn, in much the same way as I mow it, until I’m satisfied that the thatch has all gone. Then I switch to the aeration drum and go over it once more.
If you have more energy than I do, and you want to save a few quid, you can always do the same process using a rake or hand powered scarifier.
How to revive a lawn after scarifying
After I’ve finished scarifying my lawn, I then go around and check that all the moss has gone. Often, I’ll find that there is a little moss still remaining and I’ll try to remove it with a rake. On the other hand, if there is a little too much, I’ll reach for a fertiliser that doubles up as a moss killer, weed killer and treat my lawn with it. The moss killer will work exceptionally well after the scarifying process, and this is why many people suggest scarifying as a way to deal with excessive moss problems.
Once the moss is dealt with, it’s time to get on with repairing the lawn, and for this we need to oversee it. Overseeding is just the term we give for planting new grass seed over an existing lawn to promote new growth and cover up any worn patches.
Before seeding, you should water and feed the lawn if you haven’t done so recently, or if there has been a lack of rain. Only use general fertiliser or pre-seeding fertiliser, and avoid fertilisers with weed killer in them, as this will harm the seeds. Also, there is no need to feed the lawn if you have done so in the last few months.
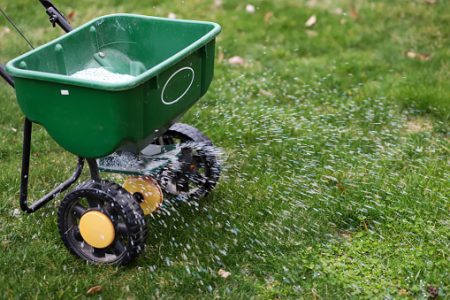
With the ground prepared, spread 20-30mg of seed per square metre and pay particular attention to really bare patches without going overboard with the amount of seed you sow. With the seed down, you now have a few options. You can either lightly rake over the soil and seeds, tread them in by walking over the area, or use a roller to push them in. Which one you choose is up to you, but getting the seeds in contact with the soil properly is essential.
After overseeding, water the area immediately, and continue to do so regularly for about two weeks. If there is a lot of rain at the time, you can hold back a little on the watering, but if it’s dry, you need to do so every day.
Try to keep people from walking on the awn for a few weeks while the seeds get growing, and once the grass is over 7cm tall you can cut a third of the length off. Do this the next couple of times you mow, and then you can start to reduce the length down a setting on the mower each time.