
If you’re looking out onto your almost threadbare lawn and wondering why the garden down the road always has a lush carpet of green grass, we are here to help. You see, the reason that lawn down the road is so healthy, and also the lawns in parks, stately homes, etc. is because the people tending to those lawns know about overseeding.
Overseeding a lawn entails planting new grass seed over an existing lawn, and is used to fix patches where the grass has grown thin, areas where the colour is turning brown, and to help fight off weeds and moss.
This article will guide you through the process of how to overseed a lawn, and you will soon be smiling from ear to ear as you admire your massively improved lawn.
When to overseed a lawn
With the right conditions, grass seed will normally take between one and three weeks to germinate, and it needs temperatures over 13 degrees Celsius. This means you can plant in early spring, around March, if it’s warm enough but probably better to wait until April if you really want to plant in spring.
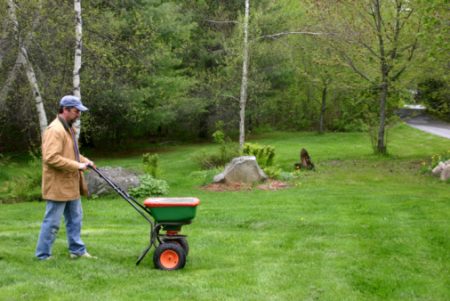
Best Lawn Feed Spreaders Reviewed
The best time to overseed a lawn is in late August to September when the temperatures are still warm but starting cool or somewhat, and there is an increase in the amount of moisture available for the seeds.
Avoid planting in the warmer months of June and July as the reduced rainfall and increased temperatures can harm the seeds.
How to overseed a lawn in the UK
- The first thing you need to do is choose your grass seed. It’s up to you whether you overseed with a similar or same type of grass as the original lawn, or go with something else. Just make sure that if you choose to mix another type in there, it’ll blend well with the existing grass and also matches your soil type. If you get it right, the results can be fantastic, delivering a nice, plush, lawn.
- Next up is to prepare the area for overseeding, and there are multiple steps to this, starting with getting rid of anything that might hinder the germination and growth of your new grass seeds.
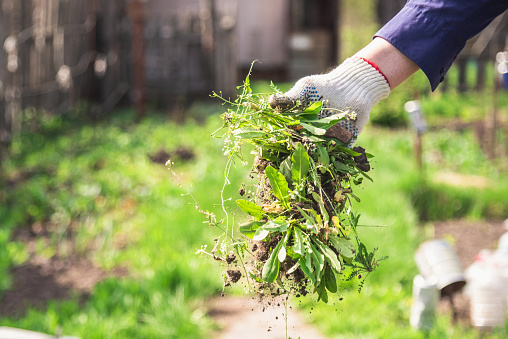 This means removing any weeds and also other things like large stones, rocks, and moss. If you use weed killer, then you should wait at least a week before overseeding the lawn or any remaining residue from the chemicals might kill off your new seed.
 - After getting rid of the weeds, you need to cut that old grass down nice and short. It should be cut to at least 25mm, but the shorter the better. Doing this gives the new seed a better chance of flourishing.

Once the mowing is done, you now need to grab your rake and scarify the area, removing grass clippings and also the layer of thatch. Leaving a thatch layer on the ground will seriously harm your seed’s chances as it will restrict the seed’s access to the soil, and they need to be in contact with it in order to grow. - Topdressing is the name given to a simple procedure of adding a little topsoil to your lawn.
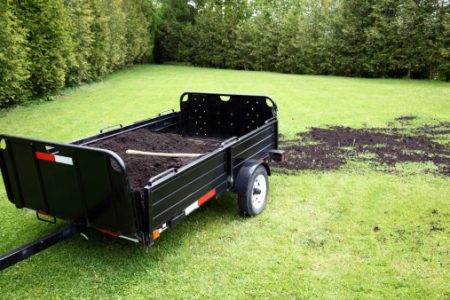
Topdressing grass with soil Topdressing can speed up the germination and establishment of your seed by providing them fresh, new, soil to grow in. Make sure you only apply a very thin layer of soil when topdressing, as too much can be detrimental to the existing grass.
- Garden soil can become dense and compacted over time, especially lawn soil. This is usually due to foot traffic, but there are other factors such as weather. Overly dense soil is not great for grass growth so you’ll need to aerate the soil before overseeding. All this entails is grabbing a garden fork or aerator tool and poking holes, about 15cm deep, in the soil to break it up. Loose soil helps with drainage, and also gets moisture down to the roots of your grass.
- Watering and feeding the lawn before overseeding can work wonders if done correctly.

However, you should only water your lawn before overseeding if there has been a lack of rain. If this is the case, then water the lawn every day for a few days before you seed.
As for feeding, this should only be done with a general fertiliser or pre-seeding fertiliser, not one that also contains weed killer, and only if you haven’t fed the lawn in the past few months. After using the fertiliser, wait around four days before you overseed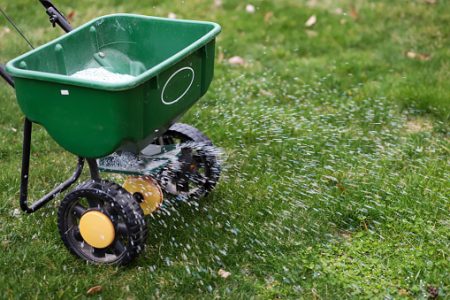
- With your soil prepared, you can now start to overseed your lawn. Spread the seed around evenly, but in particularly bare patches, you should sow more seed. A good rule of thumb is 20-30mg of seed per square metre. You can buy a lawn feed spreaders to help you with this if you like, but it’s not essential. Don’t get into the ‘more is better’ mentality and go overboard with the amount of seed or you’ll get reduced results in the end.
- Now that your seed is down, you need to make sure it is all in contact with the soil or germination is unlikely. The best way to do this is to grab your rake and go over the lawn lightly to ensure the seeds are buried in the soil.
Alternatively, or even as an added measure, you could walk around the lawn to sink the seed into the soil, or even use a lawnmower with a rear roller and push it around while it’s switched off. - Finally, water the area immediately after overseeding, and then do so on a daily basis for about a fortnight. Obviously if there is a lot of rain at that time, you won’t need to water as much or often. Keep people from walking on the lawn for 2-3 weeks after overseeding, and once the grass starts growing, you should wait until it’s about 7cm long then cut for the first time. Make sure you only cut less than a third of the grass blades length. This should be continued for the first few times you mow the new grass. After that, you can start to lower the height settings on your lawnmower each time until you get down to 25mm.
That’s all there is to it. If you’ve followed these steps correctly, you’ll be enjoying your splendid looking new lawn, and what better way to celebrate than by dragging the barbecue out of the garage and inviting a few friends over?
Until next time. Happy gardening.