Rhubarb is an excellent vegetable to grow for new gardeners. This reddish tinged, celery look-a-like is very hardy and extremely frost resistant. In fact, it thrives in cooler weather conditions and is even helped along in its growth by a little spot of frost.
What’s more, insects are rarely a problem when growing rhubarb and only really become one when the weeds are left to grow around the vegetable.
The delicious, yet tart flavour of rhubarb is one that goes incredibly well as part of a crumble or sweetened pie, especially if teamed up with custard or ice cream. Jams containing rhubarb can also be made and stored to be used as a delicious snack later.
Planting and growing rhubarb doesn’t take too much knowledge or thought, and cutting / harvesting it is even less complicated, so we put this article together to tell you how to do all three of these things, but with the most focus on how to cut rhubarb.
Planting and growing rhubarb
The best way to grow rhubarb is by using ‘crowns’. These are young, 1 year old plants that can be bought specifically for planting, and are the easiest to use.
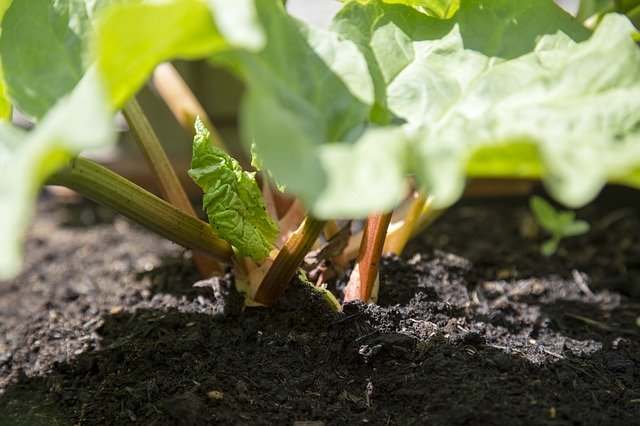
Before planting anything, you need to prep the soil. With rhubarb there is nothing really special that needs to be done, but for a few weeks before you intend to plant, which should be around late Autumn, dig over your soil and add some compost or manure, and remove any stones from the soil that you see the spot you choose for planting should get a good mix of sunlight and shade, and there should be a decent amount of space for the plant to grow into as the leaves can get quite large. Spacing your rhubarb plants about a metre apart should be ok.
Make the holes deep enough so that the top of the crown is just at the level of the surface, but also slightly wider than the plant itself.
After this, all there’s left to do is keep up a regular watering schedule (without over-watering which will damage the plant so you can also use water timer to help ) and wait at least a year before you can reap the rewards of your work.
Adding some more manure at the start of spring, each year, is a good way to keep the plant growing healthily and will give you a heavier crop. Wood chips are never a bad thing to retain moisture either.
How to cut rhubarb
Like we said, it is best waiting until it has been growing at least a year before harvesting rhubarb as it can cause the plant to weaken.
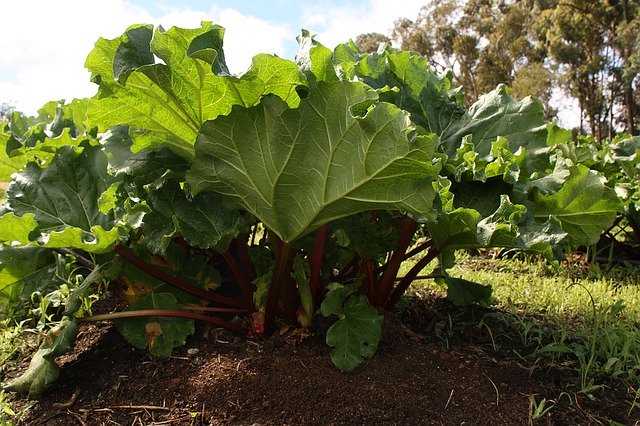
Rhubarb can usually be harvested from the start of spring to the end of summer, and you’ll know that it’s a good time to cut the rhubarb by simply looking at it.
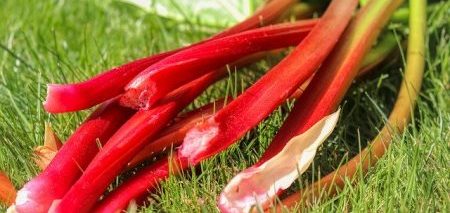
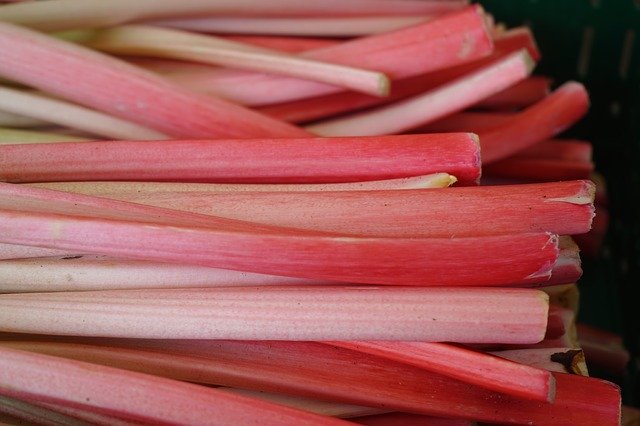
If the stems are over 25cm long, the plant looks healthy, and the stems are a dark pink to dark red colour, it is a good sign that the plant is ready to be harvested. I must note though, that not all varieties will turn red and some will remain green, so look for other signs too.
The Width of the stems is another way to check that they are ready to be cut, and they should be between half and one inch wide.
When you are sure it is the right time, pulling rhubarb from the ground is very easy. All you need to do is hold the stem as close to the base of the plant as possible, and then twist and pull the stem cleanly away from the crown of the plant. Harvesting this way will encourage the roots to grow more in the future.
If you are having a hard time twisting and pulling the stems off, which does sometimes happen, you can clip it off near to the base with some everyday garden shears, being careful not to damage any other part of the plant, especially the main bulb.
Interesting articles:
Growing vegetables with your kids in the garden
How and when to plant strawberries in the UK
Easy to grow vegetables for small gardens
It is important for the health of the plant, and future yields, that you don’t completely strip the plant of its stalks and only remove a third of them, leaving the others on the plant. Once you have removed the stalks, you now need to remove the leaves from them. This is because the leaves of the rhubarb plant are actually toxic to us when eaten, and not something that should go anywhere near our mouths.
They do, however, make a good addition to any compost heap you’ve got going on, so feel free to throw them on there once they’re removed. If you see any flowering or broken stalks, you should remove them immediately, as they both disrupt the growth of healthy stalks in their own way. Broken stalks are the worst because they can invite disease. Wilting leaves are another thing that you can do without, as are ones that have been feasted upon by insects, so remove and dispose of them too.
Finally, if you see that the stems have turned brown at the base and have gotten soft, it’s probably a sign of crown rot, which is a fungal infection and is caused by infertile or badly drained soil, or when there are too many weeds nearby. You can’t really do anything once the rot is set in, so you’ll have to dig up the plant and throw it away I’m afraid.
Once you have your stalks with the leaves removed, and you’ve washed them with water, you just need to cut a slit into them with a knife and peel off the fibres in long strips. After that you cut the rhubarb up as you like and it’s time to start cooking.
That’s all you really need to know how to cut rhubarb as a beginner gardener. Plant according to our directions, making sure the soil is weed free and prepped well with compost or manure, wait until the stalks are long and the right width, and pull or cut them as described. Enjoy.
If you are interested in some slightly more advanced growing techniques for your rhubarb plants, you can look into ‘dividing’ and ‘forcing’, but for starters, sticking with the basics is best and it’ll get you off to a great start.