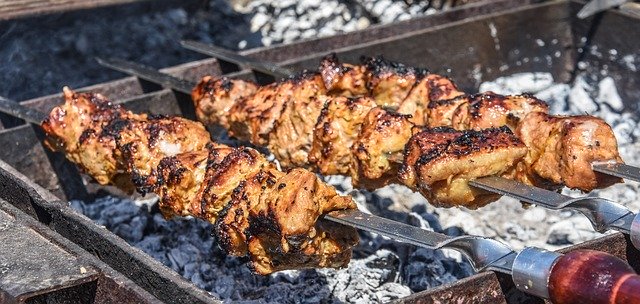
Flame grilled burgers, sausages, and steaks. The words alone are enough to set me salivating like a thirsty Komodo dragon. There’s just something wonderfully primal about cooking on open flames that brings people together, whether that is family, friends, or new acquaintances. Having a good old BBQ cook out while the weather is warm is sure to put a smile on everyone’s faces.
This article has been written to instruct you on how to make a BBQ in your garden; a brick BBQ that is. Now, you might be thinking ‘why should I take the time to build a brick BBQ when I can just buy one from Amazon and get it sent to my front door?’, and that’s a good question. Hopefully this will provide the answer…
Why build a brick BBQ in your garden?
The answers to this question are many, but I’ll just briefly touch on a couple here. First of all, there is the cost factor. A good quality, large, BBQ grill will set you back a few bob, and even if you are thinking it’s worth it for the convenience, you will probably still have to assemble it when it arrives anyway. So, why not just spend that time building your own and save the money?
Another thing with BBQ’s that you buy is that nearly all of them are made from one kind of metal or another, and that inevitably means that it’ll rust at some point. Some more expensive models might last longer, but the combination of high heat and the elements always results in a limited working life.
With a well-built brick BBQ, you’ve got something that will last for pretty much as long as you want it to. There’s no maintenance to worry about, and you don’t have to bring it in out of the rain.
How to make a BBQ in your garden: before you start
Before you start your building project there are a couple of things to do. The first is to gather all the tools and materials that you’re going to need to build your BBQ. These are:
- Barbecue grill set (the type made to fit into brick BBQs)
- Bricks
- Brick chisel
- Building sand
- Cement
- Shovel
- Trowel
- Spirit level
- Metal brick ties
The next thing you need to do is to figure out where in your garden your BBQ is going to go.
You need to keep in mind that this brick BBQ is going to be a permanent structure and once it’s built, you can’t move it, so make sure you get it right the first time.
Best barbecue wire brushes for a sizzling bbq
Think about how close to the house you’d like your BBQ to be. Your guests will likely be seated on the patio or near the back door, and while it is nice to have the food nearby, the heat and smoke might make people feel uncomfortable if the BBQ is too close. You’ll also end up with a smoky smell indoors. That scent is amazing on chicken, but not so much on curtains.
On the other hand, if you build it right at the end of the garden away from everyone, the person cooking is going to feel a little isolated being away from the heart of the party, it will be a longer trip to bring food, cutlery and utensils out from the house, and your lawn might be badly affected by all those people trampling across it, compacting the soil, which can affect drainage.
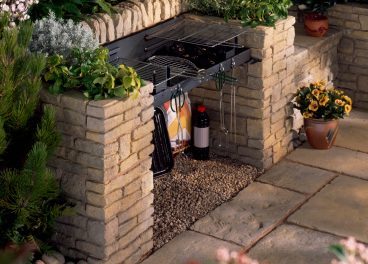
Your BBQ is going to need a solid base to be built on, you can’t just put it straight onto the earth. Often people dedicate a corner of their patio to house their brick BBQ, but some don’t like the idea of that and instead build a solid base from paving stones, concrete slabs, or something similar.
If you’re going to put concrete slabs down on grass or soil, place a big pile of loose bricks on top before building to see if it will take the weight without sinking. You might want to put some sand down on the soil to help support the concrete slabs.
When everything is ok, you can grab your spirit level and make sure the base is flat and ready to build on.
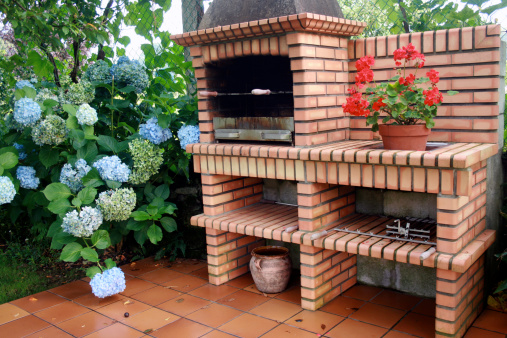
Your base needs to be big enough to house the BBQ you will build and also have space for the person cooking to move around. If you’re building a BBQ with a side table/area, you’ll need to plan for this too.
Of course, the size and shape of your garden, as well as the things you already have in there like your shed, kid’s swings, etc. will dictate where you can put your BBQ to some degree, but keep what we just mentioned in mind if possible.
Best chimney starters to get a bbq going easily
The best BBQ thermometer for a professional experience
How to make a BBQ for your garden
- Get the general layout of your planned BBQ.
Place your cooking grill on the floor of your base and then place a single layer of bricks around it to get an idea of the dimensions and layout of the BBQ you want to build. If you’re going to have a side area, you’ll need to work out how big you want this and lay bricks out in the same way.
You really don’t want to have to cut bricks as it’s a messy job, so try to plan your BBQ with full bricks, or as much as possible. - Once you’re happy with the layout, it’s time to mix up your mortar. Combine five parts cement to one-part sand and then gradually add a little water until the consistency is thick and quite stiff when you try to stir it.
- With your mortar prepared, return to the bricks you laid out on the base. Set your spirit level on the base next to the bricks to make sure everything is level and then remove the bricks, leaving the spirit level in place to act as a ‘ruler’ and help you keep things straight. Spread the mortar onto the base where the bricks were and then place the bricks back on top. Keep using the spirit level to make sure the tops of the bricks are level, and that your alignments are all still straight and the corner right angles are exactly correct.
- Before you add the second layer of bricks, you should add strength to the overall structure by using the metal brick ties to connect the bricks that lie perpendicular to each other. In other words, the inner and outer walls with the back wall. The metal tie will sit on the mortar between the bricks.
- Now you just need to build up your BBQ, just like any other brick wall. Add a layer of mortar on top of the first layer of bricks, then place the next layer on top in a staggered fashion, the same way you see on the side of red brick houses, where the joints of the bricks below are halfway between the bricks above. After you have two or three courses of bricks on top of each other, spend some time clearing up excess mortar, and checking for any gaps. It’s best to start at the corners when starting a new layer, and always be checking both the horizontal and vertical straightness of the structure as you go with the spirit level.
- Carry on building up your walls until you get to the height that you want your charcoal tray to be at, and then turn a couple of bricks in sideways on the centre wall, and do the same on the left wall. These bricks will form a sort of shelf that your grill tray will sit on later. Build up two or three more courses and then do the same process as above to create a shelf for your cooking grill. You’ll want another course or two on top of this one, and then all that is left to do is to check everything is level one final time, clear up excess mortar, and you’re done. If you want to give your barbecue a more polished look, cut off a small piece of garden hose and then run it along all the joints to make them nice and neat.
- Finally, you just have to wait for the mortar to dry and set. Check the weather forecast and keep an eye on the sky, and if it looks like rain, be ready with a plastic cover to protect your creation. The mortar should be dried after a couple of days, but I’d wait a couple more on top of that just to make sure. Once it’s all dried, you can add your charcoal tray, cooking grill, put a surface on the preparation area (if you built one), and invite people around to marvel at your ingenuity and skill.
Then all that’s left to do is to pop open a cold one and enjoy it. You’ve certainly earned it.