Want to impress the family with your DIY skills and at the same time stop the kids from killing each other this summer? Then why not try making your very own badminton court in your back garden?
Best badminton net diy guide.
Badminton is a sport that has its origins in ancient Greece, making it over 2000 years old, yet it is still enjoyed by millions of people all around the world to this very day. The simplistic gameplay and rules make it a sport that is easy to pick up and understand, and the use of a shuttlecock instead of a ball makes it a safe sport that all ages can play.
In this article we will cover a few things, and you can pick and choose which parts you want to take on board as a part of your own project. Will you just build some wireless posts and buy a net separately? Or will you go all out and make the net by hand too?
We have instructions on this page on how to do both. So, grab your toolbox and let’s find out how to make a badminton net.
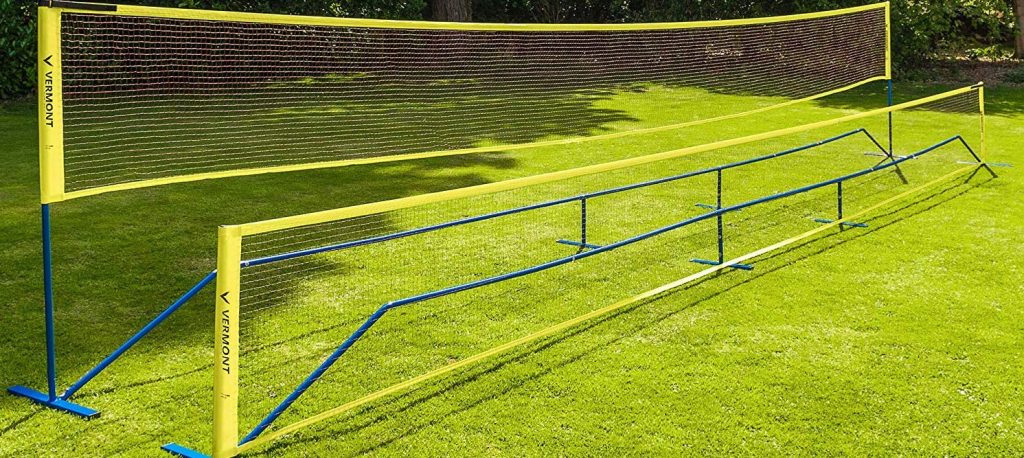
How to make wireless posts for a badminton net
In this section we will take you through the process of making wireless posts on which to hang your badminton net. We chose the wireless design as it’s always the guy lines that get tripped over by kids running around the garden and this can cause injuries.
We decided to go with PVC pipe instead of metal because there’s no chance of it rusting and, well, it’s cheap and readily available, isn’t it.
For this build you should buy a long piece of 1 ¼” PVC pipe about eight feet long, and also two pieces of 1” PVC pipe of the same length.
The lengths of these pieces are to make poles for a standard sized badminton net, but yours may vary depending on how high you want to make it. If you’ve got little kids, you might want to adjust things and make the poles lower.
- The first step is to make some anchors that your badminton net poles will sit in, and there are two ways to go about this.
The first one is to dig two 20-inch-deep holes opposite each other, the same distance apart as the width of the net you will use; then cut two pieces of the 1 ¼” PVC pipe at 20 inches long and put them in the holes. These pieces will be your anchors. A little petrol auger bit would be ideal
You will then have to pack dirt or some other medium in around the anchor pieces to keep them stable. - The other method, which I personally prefer, is to cut the 20 inch pieces of pipe like the method above, and also another piece that is about 30 inches long.
Instead of digging holes, you mark the 30 inch piece of PVC pipe you just cut at 20 inches up from the bottom with a pen line.
Then, using a mallet or sledgehammer, you knock it down a few inches into the ground and stop, pull it out, knock the dirt out of the pipe, and do it again, and again, until the line you drew is level with the ground.
Once you get to this point, remove the pipe and replace it with one of the fresh 20 inch pieces that you cut earlier and it should be a perfect fit.
repeat this process again on the other side where the opposite pole will eventually go. You should now have two PVC anchors sitting solidly in the ground and sitting flush with it. - Now that your anchors are in place, you just need to grab your 1” poles and slip them into the anchors. They should fit nicely and be very stable, but a little play is fine and even helpful when setting up the net.
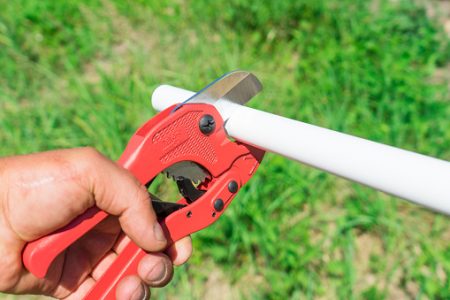
Grab your tape measure and work out how high you want the poles to be (the height of the top of your net) and then remove the poles and cut them to the required size before putting them back in the anchors. - Finally, you just need to work out the size of the net from top to bottom, make some marks on the poles, and then drill a hole in the top, and another further down, on each of the poles.
To finish off the job, you just need to slip something through the holes that you can attach the net to like a nylon cord or similar.
How to make a badminton net
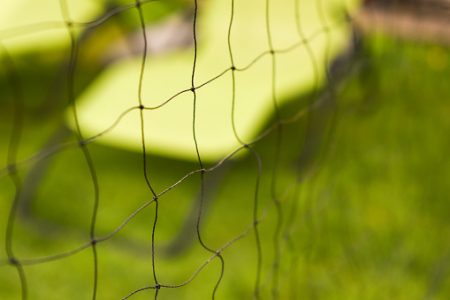
I have to come clean, this net will not resemble a perfect badminton net with a checked pattern, but more of a traditional diamond pattern, like what you see with a football net. Still, it is relatively simple to make and will act as a good replacement for a standard badminton net.
- First figure out how wide you want your net to be, and cut a piece of rope / cord/ string, etc. to slightly longer than that size.
- Attach this piece of string to two poles, hooks or something similar so that it runs horizontally between the two, the width that you want.
- Next cut some other length of rope, twice as long as you want the net to be in size from top to bottom and double it over on itself. With the two loose ends at the bottom, hang the middle of this piece of rope over the original horizontal piece that is hung up so that comes down a few inches, forming a loop. Keep it held in your fingers.
- Then pull the rest of this piece of rope through the loop from the underside of the horizontal rope, creating a lark’s head knot. Pull this knot tighter but not too tight as you might want to adjust this later.
- Repeat step 4 until you have all the vertical threads that you need, spaced out as wide apart as you like. By leaving the lark’s head knots loose it should be easy to slide the threads across to desired spacing. You should now have all your vertical pieces of rope in place, with each one having two separate threads.
- Take one of the threads from the first knot in from the end, and one from the second one in, and wrap them both around your finger before knotting them together. If done correctly they will form an upside triangle shape between the first two vertical pieces of rope.
Repeat this process with all the other threads until you have a zigzag pattern running across the top of the threads. - Now you need to make those upsides down triangles into diamonds. This is done in much the same way as the last step, by taking two threads and wrapping them around your finger, and knotting them. Continue doing this until you have a diamond crisscross pattern all across, and up and down the net. Basically, you’ll have something resembling a football net.
- The last step is to repeat step 2 but at the bottoms of the threads, so they have something to connect to. And there you have it. A rudimentary, but effective badminton net. Now you have the basic skills and understanding of the method, you can make adjustments to the original plan, and make something a bit more advanced if you feel the need.

You can also use this design to make net bags, fishing nets, or even a hammock. If you really want to go the whole nine yards, you could find the measurements of a badminton court on the internet, and then use thin rope or cord that is held down with wire staples to mark out the court in your garden.
That’s all for today, but we hope you found this article informative. Until next time.