If you’re going to be spending a decent amount of time in your garden, you’re going to need an outside tap. It’s not just for watering the lawn that we need these taps, it’s all the other things we forget about: irrigation systems, kids paddling pools, pressure washers, and much more. Installing an outside tap isn’t that big of a job, and only requires some fundamental DIY skills, but if you’re completely new to DIY projects, especially ones involving plumbing, I’d advise that you seek the help of a professional plumber to do the job for you.
On the other hand, if you’re feeling confident that you can handle it, here is how to install an outside tap in your garden, in short easy steps.
How to install an outside tap: step by step
- Your first step is to choose a location for your garden tap. The best possible place would be above a drain gully, on the other side of the wall to your kitchen sink, or very close to it. Having it close to your sink will reduce the amount of necessary plumbing for installing your outdoor tap, as you will be connecting it to the cold water mains supply under your sink. Once you’ve got the general location you need to work out how high up your tap is going to be on the wall. Too low and you won’t be able to fill up any decent sized containers like buckets without it being a struggle. Once you’re happy with your choice of location, mark the wall and then return back inside the house.
- Once back inside, you need to check the route from the cold water pipe to your desired location and figure out how your planned plumbing is going to run around obstacles that already exist along the way. When you’ve got a simple route planned out, make a mark on the inside wall that is on the other side of where you marked the outside earlier.
- Now grab your masonry drill and make a pilot hole through the wall using your marks as a guide. It’ll be easier with someone to help you stay on track. With your pilot hole drilled, it’s time to make it big enough to work with so grab a larger, 22mm drill bit, and do so. You might want to use the hammer drill function for this to make things easier.
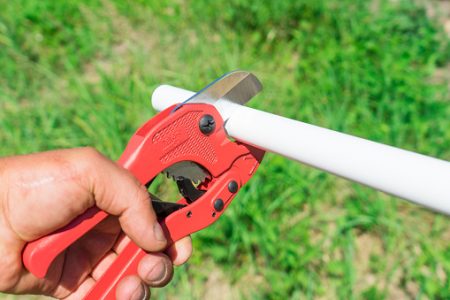
- With the hole drilled, our next step is to cut some 22mm copper pipe that will act as a sleeve to protect the actual water pipe that will feed the outdoor tap. Grab your tape measure and work out how long this sleeve needs to be (the same as the thickness of the wall) and cut the copper pipe to size.
- We are now going to start connecting to the cold water supply, so first we need to go to the main stop valve and turn off the water supply to your home. Once this is done, grab a small tray, an old towel, or just some old rags, and place them under the cold water supply pipe. These will catch any left over water from the pipe when you cut it.
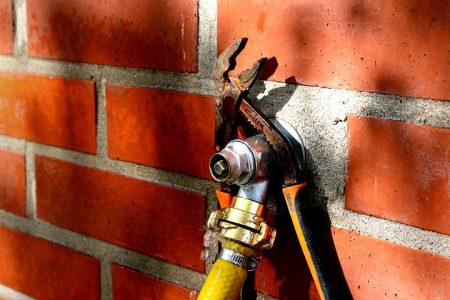
You can use either a hacksaw or a pipe cutter to cut into the cold water pipe, both will work fine, and then use sandpaper to smooth the ends. Grab a T-piece compression fitting and connect it to the cold water mains pipe, making sure everything is nice and tight. - Now cut your new water pipe that will eventually be connected to the cold mains via the T-piece you just fitted. Use a 15mm pipe for this. From the outside, push this pipe through the copper sleeve you made and placed in the hole earlier so that it feeds inside.
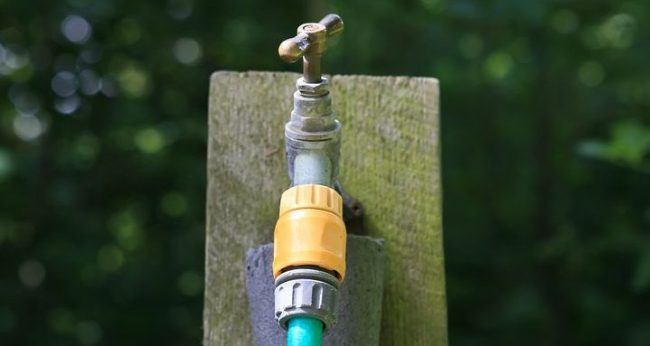
return inside to fit a few things onto this pipe, namely a drain cock, which should be at the lowest point so that you can drain it if needed; a shut off valve, and a double check valve that will stop water flowing back into the mains. Once this is all done, connect it to the T-piece and the cold water pipe. - Connect the pipe to a back-plate elbow, and then fix this to the wall. After this, fit the outdoor tap onto the elbow, making sure to use PTFE tape, and tightening it up properly. If you’re not sure, we have an article on exactly how to do this on this site.
- With everything completed, check all your connections are tightened up and that the inline shut off valve is in the closed position.
Go back outside and turn on the mains supply, then check for leaks around where you connected the T-piece. If all is ok, you can turn on the inline shut off valve and then check for leaks again.
Finally, if everything is as it should be, turn the outside tap and you should be seeing water flowing from your new garden tap.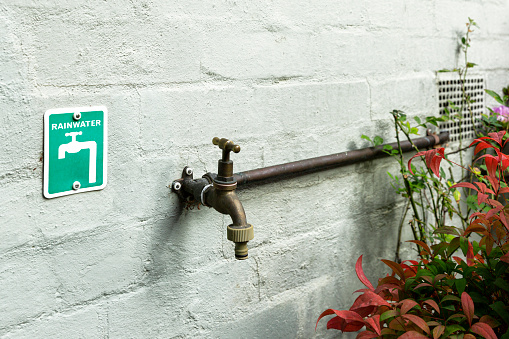
- Now, you just need to add the finishing touches by sealing off the gaps between the sleeve and the wall, and also between the new pipe and the sleeve. The best thing to use for this is good old mastic. It’s cheap and readily available. You’ll want some hoze connectors and then it’s time to look at hose reels:
Also, insulate the pipework or you might have problems with frost when the winter months roll around.
And there you have it; your very own DIY outdoor tap project is complete, now you probably want to look at how to fit a wall mounted hose reel.
Some people like to have both a cold and hot pipe running to a mixer tap outside, but that is a job best left to the professionals. Having hot water can be a godsend in winter for de-icing car windows and garden paths, so it might be worth paying for.
Anyway, that’s all for today. We hope you found this article informative and clear and easy to understand. Until next time.