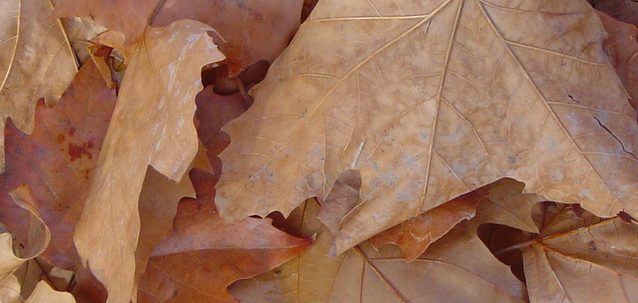
Raking up dead leaves can be a pain in the ‘you know what’ but things can be made easier with a leaf vacuum or blower. And what is the best thing to do with all those leaves once you’ve collected them? Well, make a leaf compost of course!
There are so many benefits to using leaf compost in your garden, and we will cover a few of them in this article today. In addition to that we will walk you through the steps to creating your own leaf compost the slower, easy way, and then let you into a gardening ‘secret’: how to compost leaves quickly.
Why should I compost leaves?
Leaves, even ones that have fallen from the trees into your garden, are full of nutrients. What’s more, these nutrients are the same type your soil needs to be at it’s best, so it should be a no brainer that you want to take advantage of this by using the leaves to make compost. A compost bin also keeps the garden tidy. So why not benefit from a smart looking garden and free high quality feed.
When leaf compost is used as a top dressing, it can protect your plants through the harsh winter months, increase moisture retention, and even fight off weeds.
With all these benefits coming from something that is essentially free of charge, you should be wondering why you’re not making compost out of your leaves rather than why you should.
How long does it take to compost leaves?
If you take the easy but slow route, you just need to pile your leaves up, or throw them in a compost bin, and let nature take its course. The leaves will usually decompose in around 6 months to a year depending on the types of leaves used.
You can speed things up by initially mixing old compost into the new pile, as this will ‘inject’ a load of microorganisms into it, giving it a head start.
You can also specifically layer leaves that are high in carbon and ones that are high in nitrogen alternatively, and then turning the compost pile every 2-4 weeks to increase the amount of air getting into the pile, and thus giving it better microbial action. This is sometimes called the Indore method.
How to compost leaves quickly?
Some of us aren’t blessed with too much patience, and waiting a year for our leaf compost can seem like an eternity to some, so it’s a good thing we are here to help with our tips on how to compost leaves quickly. Here’s how you can have great leaf compost in the space of just a few weeks. Yes, you read that right: a few weeks!
However, doing it this way does take a lot more effort than the slower Indore method, so be ready to do a fair bit of graft. Here’s how you do it:
Shred those leaves
The first thing you need to do after collecting all your carbon rich leaves, is to shred them as finely as possible using pruning shears (the hard way), a shredder, leaf blower mulcher vacuum, or chipper of some sort. You can also throw in other carbon based shredding from paper and other sources like straw to help.
Shredding your leaves will allow more air and moisture to circulate and distribute itself better in the compost heap.
Get the right mix of carbon and nitrogen
You also need to add nitrogen rich materials into the compost and some good sources are vegetable waste like peelings, clippings that you’ve pruned from green plants, and of course, manure. These materials should be shredded too, if possible, but it is not necessary to do so with very soft materials. Here’s a good mix:

The magic ratio for the perfect leaf compost heap is 30:1. This is because the bacteria in the compost use approximately 30 times more carbon than nitrogen, so you should base your compost pile on that scale.
Making your quick acting leaf compost
Now that you’ve got all your shredded materials ready and you’ve figured out your ratios, it’s time to build the compost pile. The pile should be at least 5 feet wide and tall for the best and fastest results.

Now, whether you go with the layer on top of layer method mentioned earlier, or just mix them all in together, is completely up to you as there are proponents of both ways. However, the steps we mention net should be followed as closely as possible.
Once your pile is complete, you should check to see if it is moist enough as an overly dry compost heap is not what we want. If it is lacking moisture, add some and mix up the materials again until you feel satisfied.
What you need to do next, is to cover the top of the pile in order to trap in the heat. This can be done with a plastic sheet, or some other material, as long as it does the job at insulating the pile.
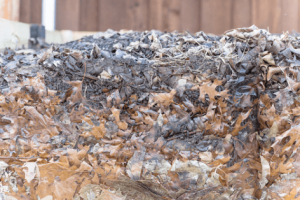
If you have followed the steps correctly, your compost pile should be heating up quite a lot within a day or two. You can test how things are going by pulling out a piece from the centre after a day of the sitting there and seeing if it is both darker in colour and warmer to the touch.
The day after this, you should turn the pile to allow fresh oxygen to get into the compost and feed those microbes. This should be repeated on a very regular basis, I’d say every couple of days, and you should replace the inner layers of the pile with the outer layers each time.
If you continue with this routine for two to three weeks, you should be left with a nutrient rich leaf compost to use as you see fit. Just make sure you check that the temperature of the compost pile has dropped low enough before you go throwing it on your soil and plants.