
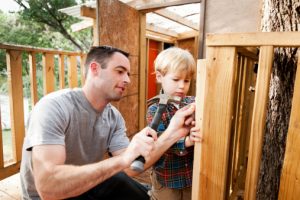
In this day and age, it’s becoming more and more important to give your kids a fun playtime alternative to being glued to their tablet.
The device addiction that has become so common isn’t the kids fault, if I’d have had uncountable cartoons, games, etc. at my fingertips when I was growing up, I’d have probably been the same. But, I have to say that looking back, I’m glad I grew up playing the way I did.
I have great memories of playing outside in the sunshine with my friends, using our imaginations to create games, and building dens.
I remember that there was a girl down my street who had this huge playhouse that her dad had built for her, and she would invite us to play in there. To be honest, we spent most of the time running in and out of the playhouse, but it served as an excellent focal point for our play, and we came up with all sorts of games using the playhouse as a prop.
Roll on a fair few years, and I found myself being asked to build a simple playhouse for a friend of mine’s daughter. I looked around the internet for ideas, before finally settling on the one I’m going to teach you how to make a simplified version of today, which was on an outdoor plans website.
It’s a fairly straightforward construction that shouldn’t be too much hassle for anyone, especially if you’ve ever built, or put together, a garden shed. It should only take you about a day to finish if you have someone to help you.
There’s no fancy or complicated techniques needed for building this playhouse, or any materials that you can’t easily find at your local B&Q, and it won’t cost the Earth either.
Below you will find a comprehensive list of all tools and materials you will need to build a simple playhouse.
Articles of interest:
To build this simple playhouse you will need:

Tools
- Spirit level
- Tape measure
- Framing square
- Hammer
- Sander
- Screwdriver
- Power drill
- Mitre saw
- Safety equipment (gloves, goggles,etc.)
Materials
- Large box of 2 ½” screws (at least 100)
- Extra-large box of 1 ¼” screws (500)
- Wood glue
- Wood filler
Wood (cedar or pine to be cut down further later)
- 9 pieces of 8ft long 2×4 beams
- 4 pieces of 4ftx8ft plywood (3/4”)
- 7 pieces of 8ft long 2×2 lumber
How to build a simple playhouse- the floor
We are going to start with building the base and floor for the playhouse, and for this you first need to grab some of the 2×4 beams and cut yourself some pieces to following sizes: two pieces at 96” long, and nine pieces at 48” long. you could cheat and buy a garden shed base by the way! If you want to go for a serious play house you would do well to put some footings in. Installing some brackets in concrete would be perfect. Just use a petrol auger as if you were installing a fence for the extra support.
Once you cut your timber, lay the 96” pieces on the floor and then use two of the smaller pieces to make a rectangle shape, don’t screw anything down yet.
Next, measure 10 ¾ inches from the inside face of one of the smaller pieces and then place another identical piece in place. Repeat this process until you have 7 cross pieces in place, including the two ends.
The last remaining 48” piece of timber will be placed in the frame in the same way but with slightly less space between it and the others. Measure 9 inches along from the seventh cross piece and place another 48” bit of 2×4 in there.
What you should have now is a rectangular frame measuring 96”x48” that has eight sections inside, 2 of the sections will be 9” wide, while all the others will measure 10 ¾”.
After making sure the corner pieces are at right angles and everything is lined up properly, you should drill some pilot holes and then use some of the 2/12” screws to fix them in place.
Using these end pieces as a guide, and also your tape measure and spirit level, do the same to all the other pieces until everything is connected.
To finish off the floor, it’s time to head back over to the saw and cut a 96”x48” sheet from the plywood. Lay this on top of the frame you just made, line it up to the edges really carefully, then fix it to the floor frame with 1 ¼” screws after drilling pilot holes in the appropriate places.
Grab your orbital sander, and smooth off the edges, and you should have a nice looking base and floor for your playhouse.
For kids
How to build a simple playhouse- the main frame
For the main upper frame, you’ll need to cut some lengths of 2×2. You’ll require two 45” pieces with the ends cut straight, then four pieces at 48” but with one end cut at a 30 degree angle, and four pieces measuring 27 ¾” with both ends cut at a 60 degree angle.
With these pieces we are going to make two identical, pentagon shaped frames. The bottom piece will be the 45” length of 2×2, the 48” pieces will make up the sides and the 27 ¾” will be angled towards each other to create the top.

As before, lay the timber out on the floor, use a tape measure and spirit level to check that everything is as it should be, then drill and screw the pieces together with the 2 ½” screws and reinforce the Joints with the wood glue.
Now cut 5 pieces of 2×2 at 72” long. We are going to use these to connect the two pentagon shaped frames we just constructed.
With the help of a friend or family member, lift one the frames into place on the playhouse base, in the line with the back edge, and then drill and screw the bottom piece to the floor after making sure everything is level, obviously. Then measure 72” from this and fit the second pentagon shaped frame to the base in the same way.
To complete this stage of construction, connect these two main frames together using the five 72” pieces of timber, 2 that will act as the base of the sides, two more at the top of the sides, and the final one at the ridge (top point) of the roof. Use 2 ½ screws again for this water drilling pocket holes to make things easier and to stop the timber splitting.
If you’ve followed these instructions properly, your frame should now be resembling what you expect it to: house shaped with a flat empty area in front.
How to build a simple playhouse- constructing the walls
The four walls of this playhouse will all be made out of plywood, but first you need to make a few measurements. Measure the inner dimensions of the front and back parts of the frame (the pentagon shaped ones). They should measure something like 59 ½” high (at the peak) and 45” wide but there might be a little difference depending on how you put the frame together.
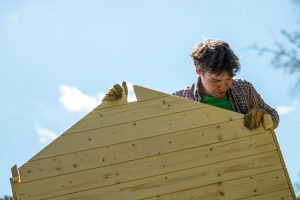
Cut two sheets of plywood at these measurements and in the same shape as the frame, then take the sheet that will be used as the front, and measure out a front door 40 ½” high by 25” wide. If you do this in the centre of the sheet, you will have approximately 10” either side.
Go back to the saw and cut this section out and you’ll now have your front wall finished, complete with an opening for a doorway.
For the back wall, we are going to cut a small window in the wall using a jigsaw. This can be any size you like, just make sure it’s in the centre about ¾ of the way up.
The side walls are going to measure 72”x45 ¾” and again, you can choose to cut a window in one, or both of the sides using a jigsaw if you wish.
Once you have your four walls cut and sanded smooth, it’s time to fix them to the playhouse frame. Start with the front wall, get help to line it up to the frame, drill pocket holes along the edges, and then use 1 ¼” screws to set it in place, again reinforcing the joints with wood glue.
The side walls will go on next and be drilled and screwed on in the same way, followed by the back wall, and when that’s all done, you’ll be ready for the roof and any finishing touches you decide upon.
How to build a simple playhouse- the roof and railings
We are going to begin this final stage by building the supports for the roof overhang that will create a lovely little porchway for your child’s playhouse once it’s all finished. This supporting fame is basically exactly the same as the main pentagon shaped frames you made for the front and back of the playhouse, only minus the bottom 45” long piece, as you won’t be needing it.
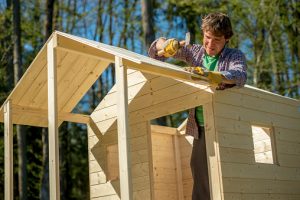
Cut and build the frame as before and then fix it to the very front edge of the base with 2 ½” screw, so that it mirrors the front wall of the playhouse. Next up are the roof panels. Cut them out of plywood so that they measure 96” long, and 32” wide, line them up with the roof frame and overhang supports, then screw them in place, this time with the smaller 1 ¼” screws.
You’re going to have to waterproof this roof, and one of the best ways to do that is to cover it in asphalt shingles that you will stick down with tar paper.
The last step is to fit the railings and complete the playhouse’s porch. For this we’ll use some more 2×2.
Cut four pieces at 10” and four at 19 ½” long. Screw one of the longer pieces into the edge of the base positioned between the overhang supports and the front wall. Repeat this on the other side so they are parallel to each other.
Now measure 16” up from the top of these base pieces and screw in the other two 19 ½” pieces above them to act as top railings.
The 10” pieces will also be bottom and top railings but for the front of the porch, coming away from each of the overhang supports. Line them up and screw them in place.
To complete your railings, and your playhouse, cut 18 pieces of 2×2 at 16 inches and then fix them vertically between the top and bottom railings spaced 2” apart on the sides of the porch, and 1 ¾” apart on the front.
And that’s it. You’ve now got a completed, simple playhouse. All’s left to do is go around with the sander (sandpaper is just fine, especially for the tighter spots) to make sure everything is neat and smooth, use the wood filler to cover the pilot holes you drilled, and if you want to add some finer touches, you can add trims to the windows and other parts of the playhouse, such as the doorway using 1×3 timber.
Paint the playhouse, or use wood stain, and then decorate it with pictures, toys, etc. and some child size furniture, and you’re done!
We are sure your kids will absolutely love this garden playhouse that you built from scratch with your very own hands. Things like this can really help cement the bond between parent and child and create amazing memories.
We hope that the instructions here are clear and precise enough to follow without being overly wordy and complicated, as it is our intention to keep things as simple as possible.
It is also our intention to bring you a site that is packed full of helpful gardening and DIY information, product reviews and much more, and we invite you to spend a little more time browsing here.
From all of us here at Garden Toolbox, we wish you all the best with your gardening projects.