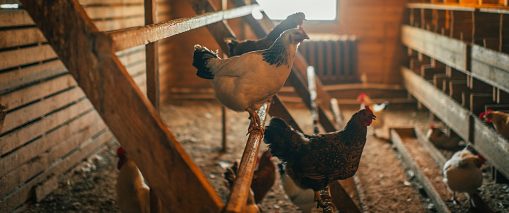
Keeping chickens can provide you and the family with a lot of benefits. Obviously, there are those delicious fresh eggs to collect and have for your breakfast, but apart from that, chickens can offer you a way to teach your children about nature and caring for animals.
Getting your kids involved with caring for the chickens from a young age is an excellent way to teach them compassion, logical skills, and the benefits of a little hard work.
To get the most out of your chickens, you need to make sure that they are comfortable and happy, and to do that they need a nice place to live.
Chickens need an appropriate amount of space to dwell in or they can end up living in disharmony to one another, and this will affect their health and also their productivity, so giving them a great coop to live in should be your number one priority.
While many people prefer to buy a flat pack chicken coop, and there’s nothing wrong with doing so, there is a sense of satisfaction that you get from building your very own chicken coop from scratch.
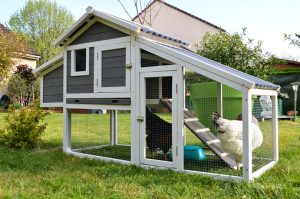
Below you will find step by step instructions on how to build an A-frame chicken coop from scratch, complete with all the measurements and materials you’ll need to do the job.
Things to be aware of
Chicken coops usually comprise of a sleeping area and a separate area to walk around in, known as the ‘run’. The sleeping area needs to be elevated in order for rainwater to run off and into the ground, and also to allow some extra ventilation to come in from below.
Further ventilation will come in from the large front door that will also allow the chickens to move from the sleeping area to the run easily and comfortably.
Most chickens need 2-3 square feet of space per bird inside the coop itself, and around 5 square feet of space to move around, in per bird, in the run. These are the minimum conditions, but more is always better when it comes to space and chickens so feel free to adjust our plans and make your coop larger.
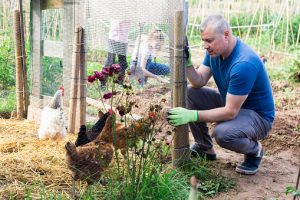
Before you start, make sure you’ve picked out a good spot in your garden and measured the space to get a proper idea of how the coop will look there once it’s fully built. Also try to choose a spot that gets plenty of shade, under a tree for example, if this is not possible, you will have to find some other way of providing shade for the chickens, particularly in the hotter months of the year.
How to build a chicken coop from scratch
We are going to start off by building the base frame of our chicken coop, and for this you will need six pieces of 44x44mm FSC grade timber. 2 of the pieces should be cut to 4 metres long, and the remaining form should measure 160cm long.
Pre-drill screw holes (do this before driving in any screws on all pieces of wood) in the ends of the four smaller pieces, and then do the same with the two longer ones, only make the holes in these pieces align with the ones in the 160mm long pieces if they are put together at a right angle to each other.
Lay the two 4 metre long pieces of wood down on the floor so they are parallel, then connect them with the 160mm pieces running between them creating a rectangular shape with three sections inside. Two of the sections should measure 100x160mm, and the third should be double that length at 200x160mm.
Now we are going to make and fit the triangular, A-frame parts that will act as supports for the top beam.
Pick from the 5 best chicken coops in the UK
Downsides to Keeping Chickens In the Garden
Keeping Chickens In the Garden Guide: Chickens and UK Law
A Guide For Raising Chickens At Home
This is done by using six pieces of 3 by 2 timber, that is 5 metres long, and has had the ends cut off at angles: a 30 degree cut for the bottom, and 60 degree for the top. Take two of these pieces and screw them to one end of the base frame, then line up the tops of these two pieces so that they make a triangle shape and screw these together. Do the same at the other end of the base frame, and a third one in the middle.
You should now have three triangles pointing upward from the original frame, one at each end and one in the middle.
To finish off these triangular supports, all you need to do is to take three pieces of 3 by 2 timber, 2 foot long, and screw them in a couple of foot up from the base to act as cross members for the three A-frames, making sure to check that they are straight with a spirit level.
To finish off this phase of the construction, get another 44x44mm bar 4 metres long and use it to connect the tops of the three A-frames, again checking that the bar sits level before you screw anything into place.
Or this part, you will need 2 bars of 3 by 2 cut to 420cm, and 2 smaller pieces around 95cm long.
Fit the long bars onto the sides of the chicken coop, exactly half way up, and ensure that 10cm sticks out at either end, and that these bars are completely level and horizontal.
The reason for the extra 10cm is so that we can screw the 95cm pieces onto them that will act as horizontal supports.
Now we have the complete frame, the next thing is to build the floor for the coop. For this we need some 12mm plywood approximately 70x200mm, but you should measure the area of the largest of the 3 sections of your frame made up by the long side bars and the cross sections of the A-frames. Once you have it cut to size, screw it.
To build the roof, you need 12 planks of 165x22mm which you will fix together in two sets of six, with the planks overlapping each other slightly so that there is 22cmm of wood showing for each plank except for the top one.
Fit one of these sets of overlapping planks onto each side of the A-frame which has the floor, and screw it into place. If you want to make things easier for you to clean out the coop later, you could fit one of these sides with a lockable latch at the bottom and attach it by a hinge at the top so that you can use it as a door.
With the two side parts of the roof in place, we just have to create the rear side of it. For this we can cut a piece of plywood measuring the same dimensions as the triangle hole on the rear of the henhouse. Again, you can either choose to screw this into place, or just screw the top in place and have a latch at the bottom to use this part as a way of getting at the inside of the coop.
You should now have something that is starting to resemble a chicken coop, but there are a few steps left to go.
Take a plank of wood 125x30ccm and then create ‘steps’ along it by screwing in some thin 30cm long strips of wood and spacing them out evenly up the plank. 6-8 of these little steps should be enough to make it easy for the chickens to walk up and down them.
Chickens need roosts, and also nesting boxes, so you’ll need to make these too. Remember that the backs of these nesting will have to be slanted at the same angle as the roof to fit into the coop properly, and they’ll need to be layered with straw, hay, or even better: chalky grit.
Dimensions of 45cm high, 30cm wide, and 25cm deep should make a good fit for this henhouse, but you’ll have to adjust the measurements to fit whatever size chicken coop you’ve built. Make some small 6x4cm, square roosts and fix them onto a wooden perch raised about 5cm off the henhouse floor.
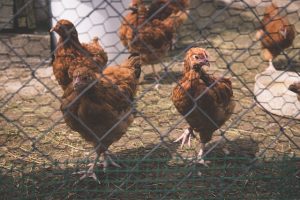
Finally, you just need to fit the wire gauze into place all over the frame. Using a staple gun is the fastest way to this, and once the mesh is secured, you should make sure that any sharp ends are taken care of to avoid any accidents.
And there you go, a beautiful chicken coop all of your own. Give yourself a pat on the back and a well-earned cold drink or cup of tea, and it’s time to get those chickens in there.
We hope you enjoyed this article, and we would like to thank Skil.co.uk who were the inspiration behind it. For more articles, reviews of products, and more, please take the time to browse our site. It is stuffed to the rafters with helpful information on all things gardening related, and we are very proud of it.